�How to Create a Basic Club Calendar Event
| Log into Admin Home on your web site. |  |
| Click on Club Content in the Applications box, then click on Club Calendar of Events. | 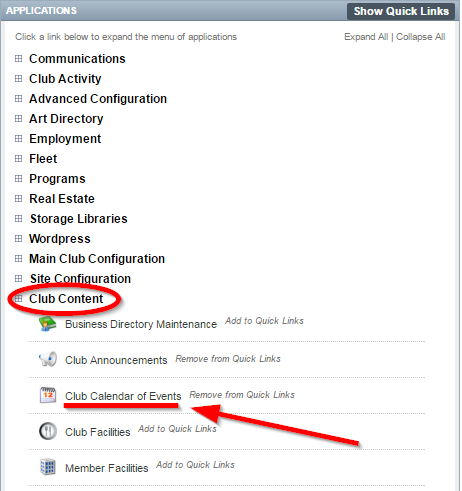 |
| Click New at the top of the page. | 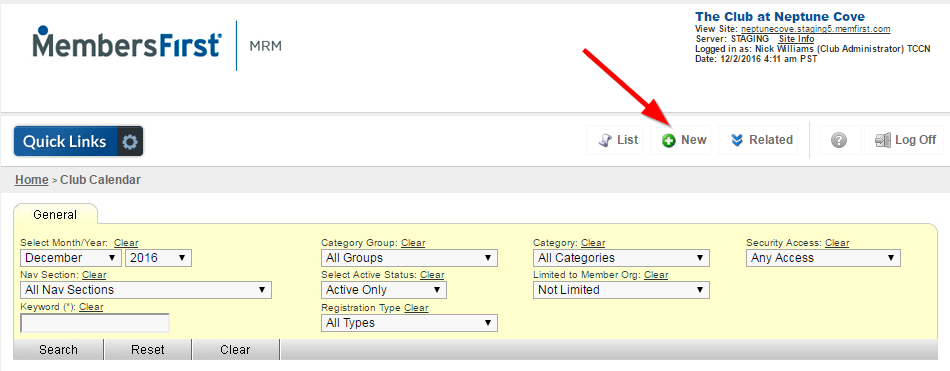 |
| Enter the name of the event into the Event Description field. | 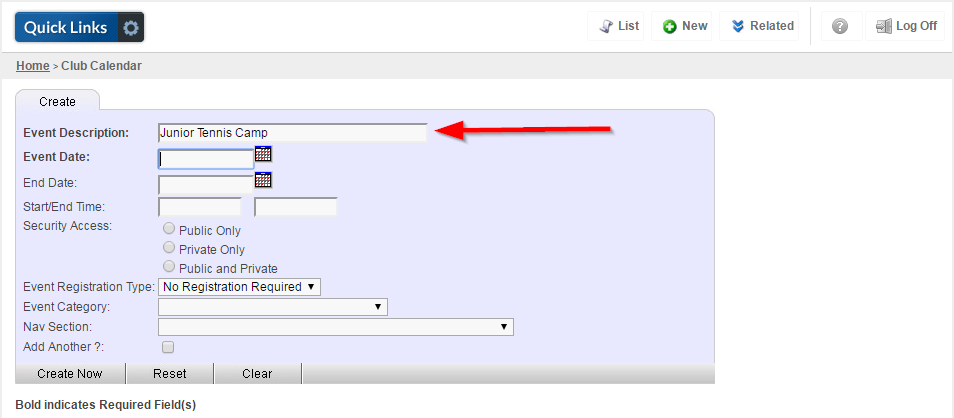 |
| Click the calendar button next to the Event Date field to select the date of the event. If the event is multiple days long, then select an End Date as well. |  |
| Enter a Start/End Time for the event using the format HH:MM:SS am/pm. | 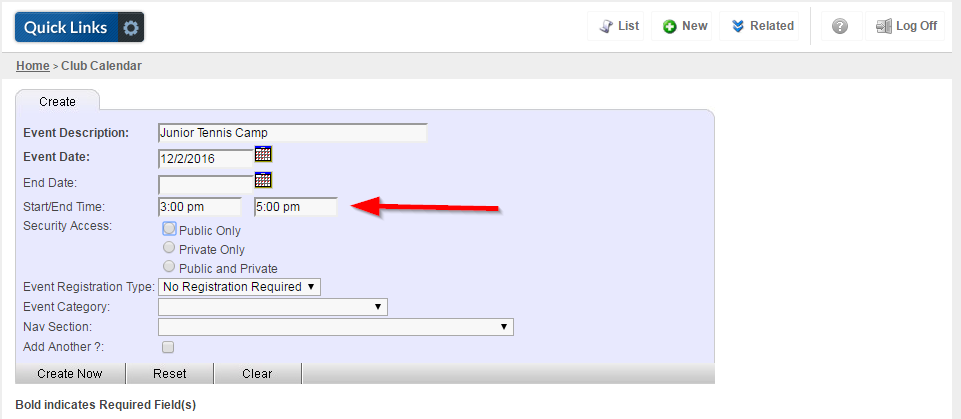 |
| Set Security Access for the event. | 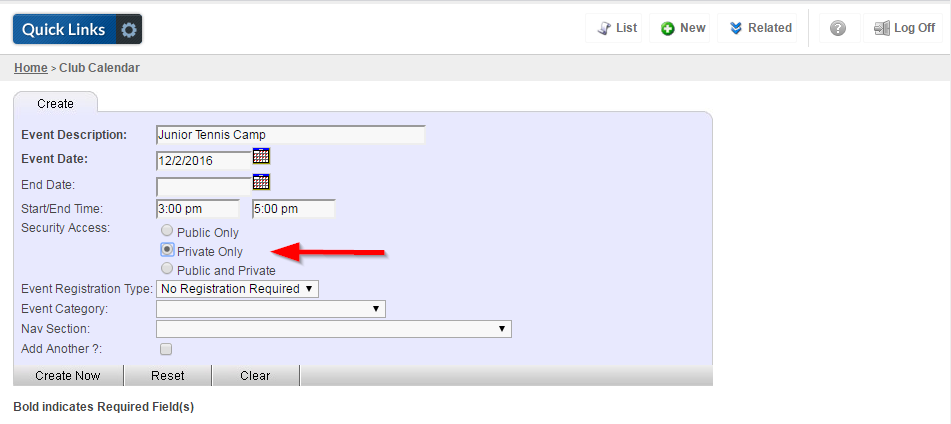 |
| If the event requires a registration, select Registration Required from the Event Registration Type: dropdown. | 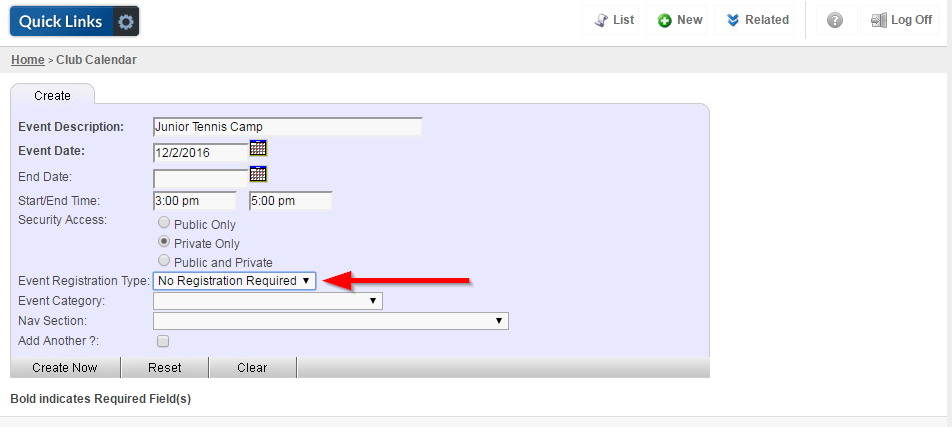 |
| If the event is department-specific, then select an Event Category in order to place the event on the appropriate calendar area of your website. | 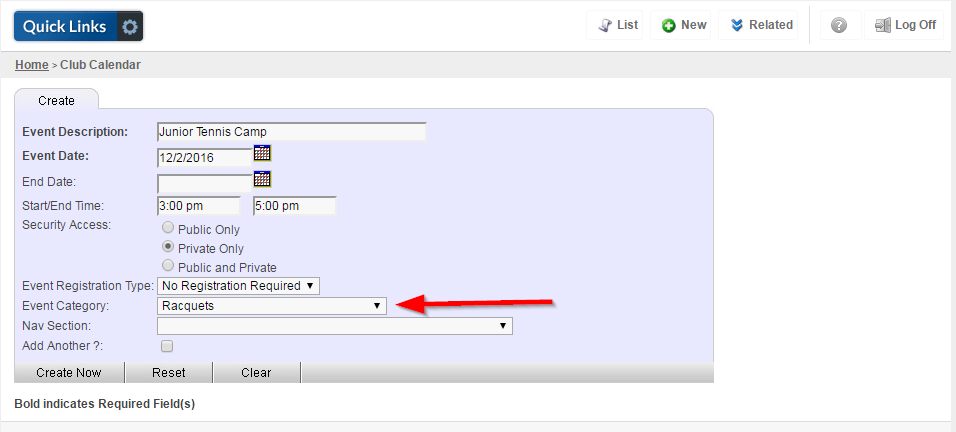 |
| Click Create Now. | |
| You will now be on the Full Page Text tab. You can enter the information you would like to post to your website here. (i.e. event flyer info, schedule of events, etc.) | 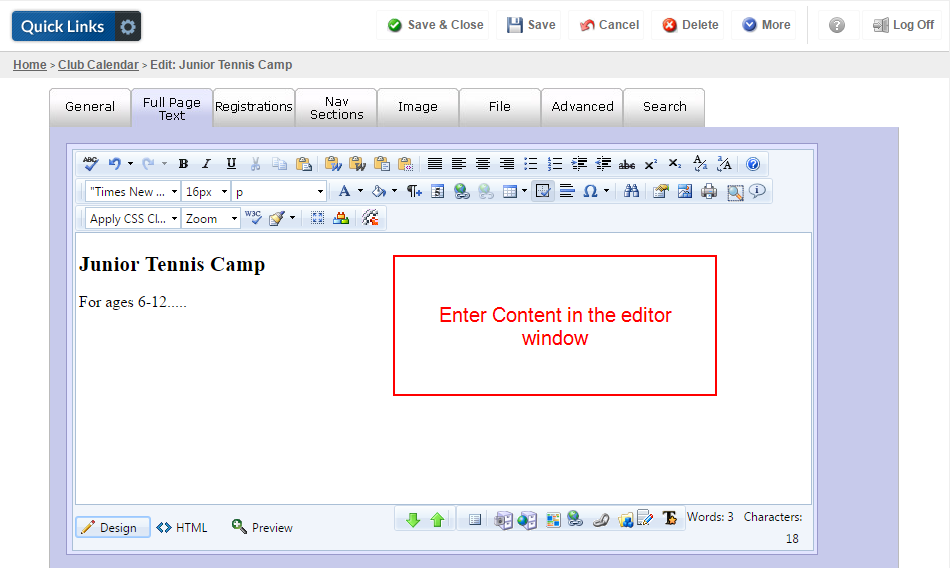 |
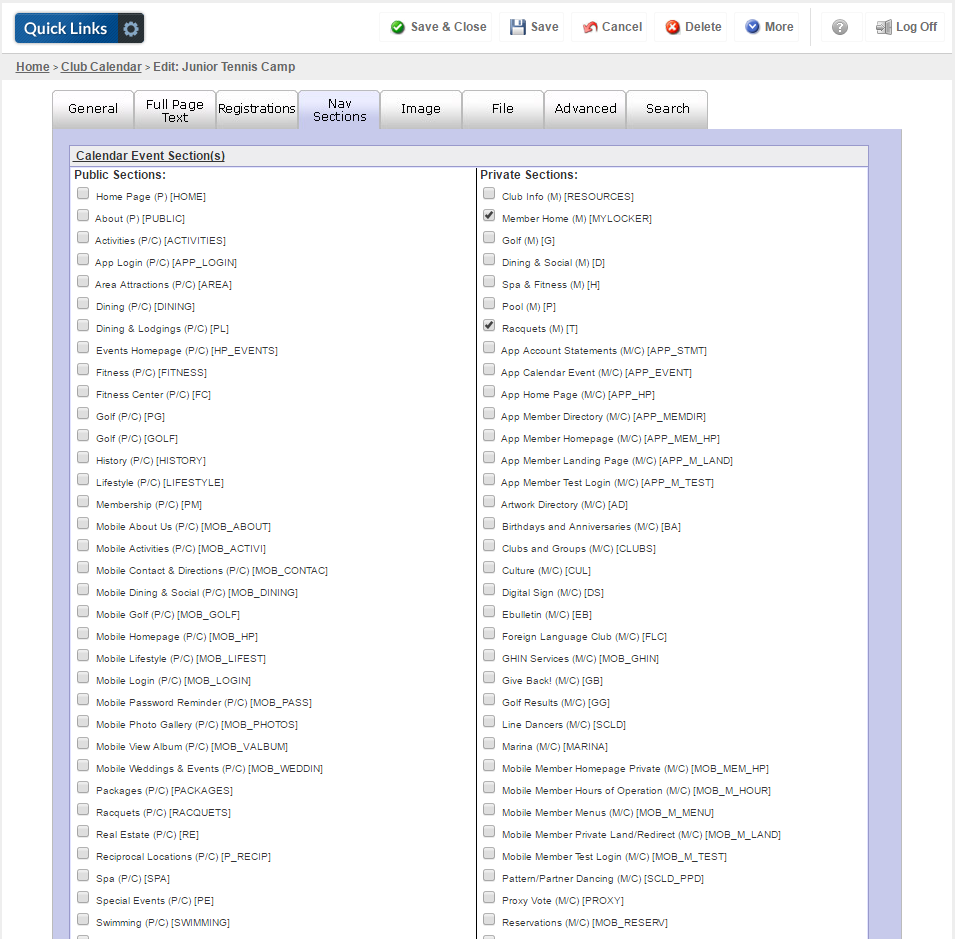
| Select the Nav Sections tab. Use the checkboxes to choose which areas of the website you would like to have your event display on. This only controls the "Upcoming Events" area on a particular section page typically located on the right side of private side pages (Member Home, Golf, Tennis etc.). For member-only calendar events, you will focus on Private Sections area to the right. |
 |
| Click the General tab. Make sure the Active box is checked. If you have the mobile app, make sure the Show on Mobile App box is checked as well. | 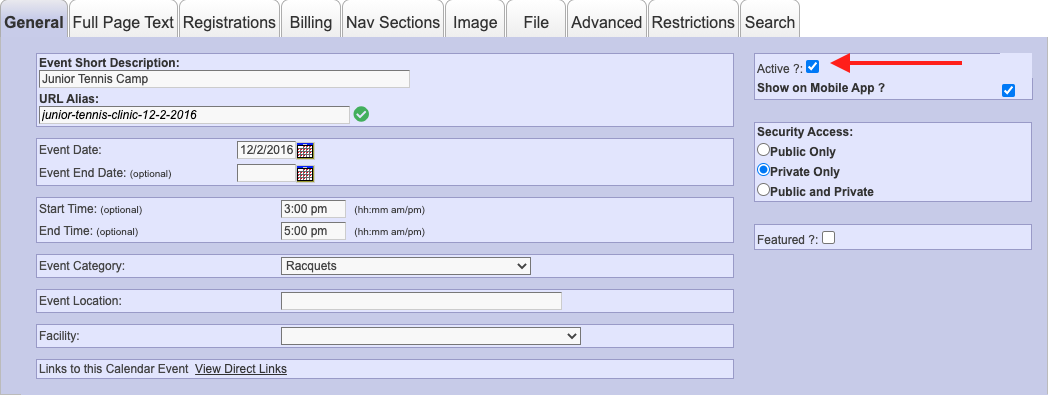 |
| Click Save & Close to finalize your work. |
The event should now display on the appropriate calendar (as well as the Member Homepage calendar by default). You can also visit the Nav Sections you selected to see the event listed on the right-side Upcoming Events.
Depending on your site configuration, there may be a limited number of days in the future to view Upcoming Events.