�How to Configure & Manage Event Registrations
Configuring Event Registrations
| Log into Admin Home on your web site. |  |
| Click on Club Content in the Applications box, then click on Club Calendar of Events. | 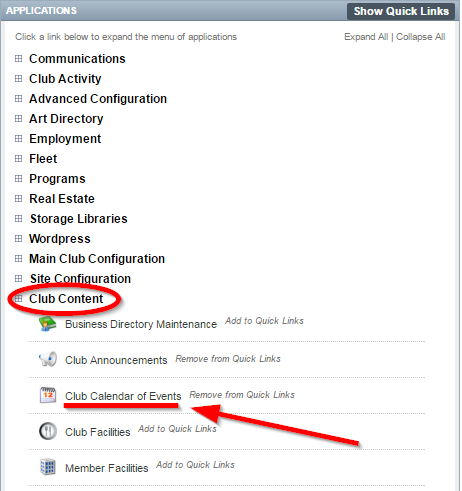 |
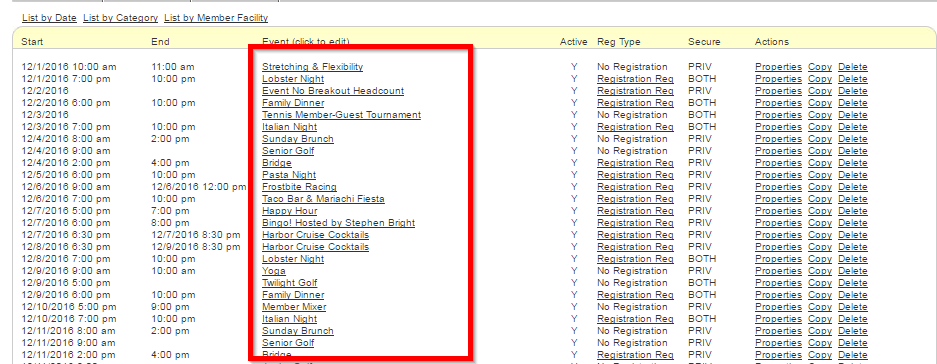
| Find the event you want to add registrations to. Click the event title. |
 |
| Click the Registrations tab. |  |
| Open the Event Registration Type dropdown menu and select Registration Required. |  |
| The Registration Start Date/Time and Registration Cutoff Date/Time fields open and close registrations at the specified times. |  |
| The Send Registration Email to field make the system send an email to the entered email addresses whenever a registration is made. |  |
| The Total Limit for Event fields will close registrations for the event when either the registration or headcount limit is met. |  |
| The Minimum/Maximum Headcount for single Registration fields will set the headcount requirements when registering for an event. |  |
|
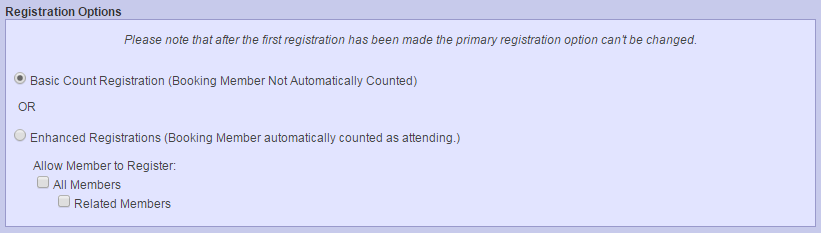
Use the Registration Options to determine if the event will allow Basic Count Registration or Enhanced Registrastions
|
 |
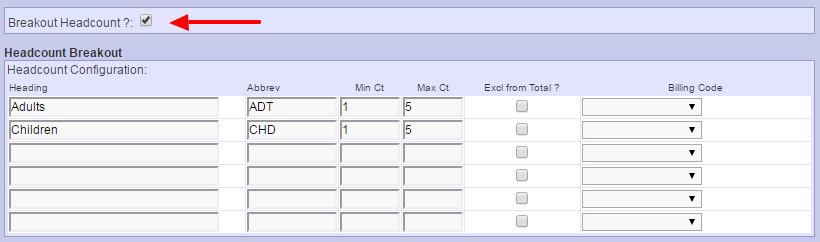
| Check the Breakout Headcount box if you want to create multiple headcount fields. Enabling this option will allow you to keep track of an restrict certain types of event guests. For example, you can create one field for adults and another for children. |
 |
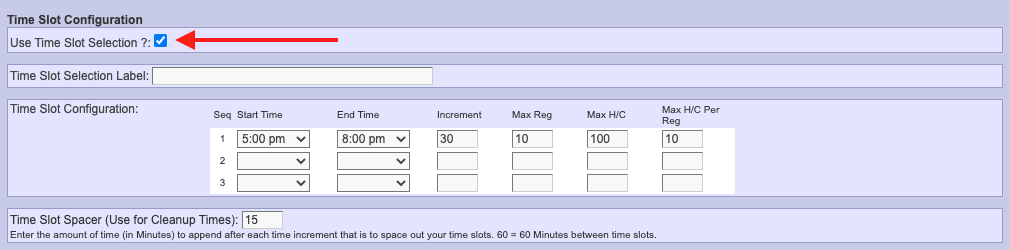
| Check the Use Time Slot Selection box if you users to register for time slots during the event. The Start Time and End Time fields are used to set the range of the time slots. The Increment field determines the length of each time slot in minutes. The Max Reg and Max H/C fields can be used to set a maximum registration count and head count for each time slot. In addition, the Max H/C Per Reg field allows you to limit the party size of each registration, if you wish it to be different than the Maximum Headcount for single Registration in the Registration Limit settings above. The Time Slot Spacer option allows you add an increment of time (in minutes) between each time slot. For example, a start time of 5:00 pm with 30 minute increments and a 15 minute time slot space would result in time slots from 5:00 to 5:30 pm, 5:45 to 6:15 pm, 6:30 to 7:00pm, etc. |
 |
| Check the Automatically confirm registrations box if you want the member's registration to be confirmed when submitted. |  |
| If you want the member to View Registrations for this Event, select your option from the corresponding drop down. |  |
| Check the Use Registration Notes box if you will allow for the member to include a note along with the registration. The label can also be changed as well. |  |
| If you want to allow members to cancel or edit their registrations, then use the options under Cancellations and Edit. | 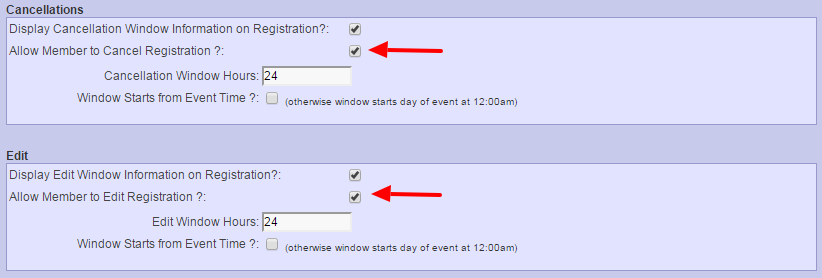 |
| If you want to have a custom message appear post registration, click on SHOW then enter the message into the Thank You Page Message field. |  |
|
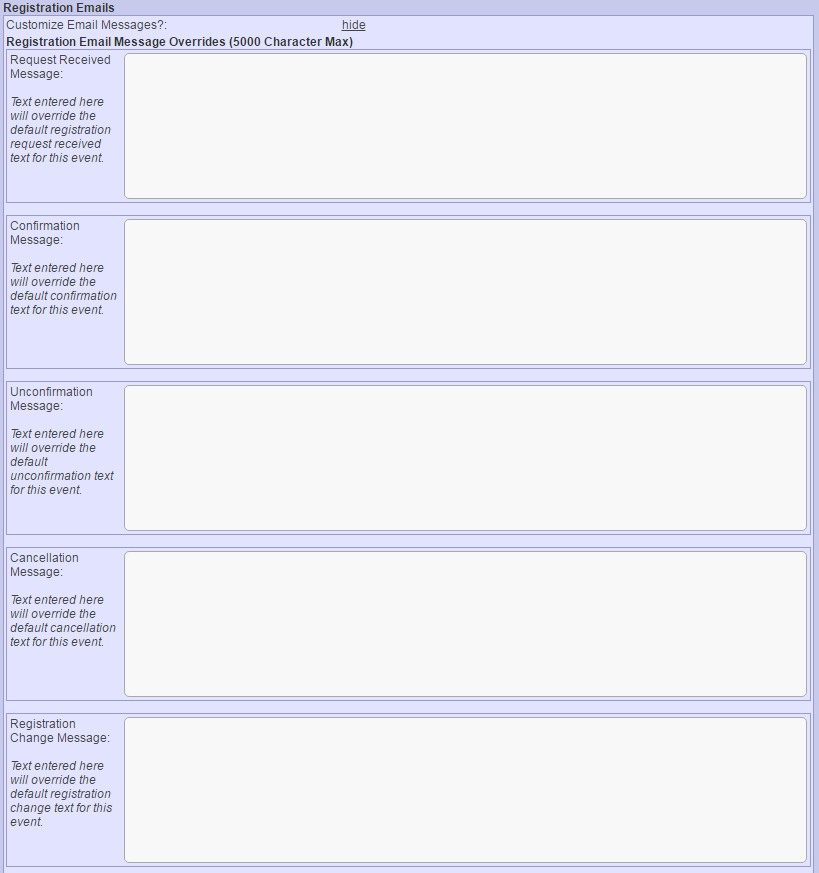
If enabled by the adminstrator, registrations email notifications can be customized on a universal level, or in this example, at the event level. After clicking SHOW, the user can add additional verbiage that will appear above the registration details. There are 5 types of email communications that can be generated during the registration process -Request Received, Confirmation Message, Unconfirmation Message, Cancellation Message and Registration Change Message. |
 |
| Click Save & Close to finalize your work. | 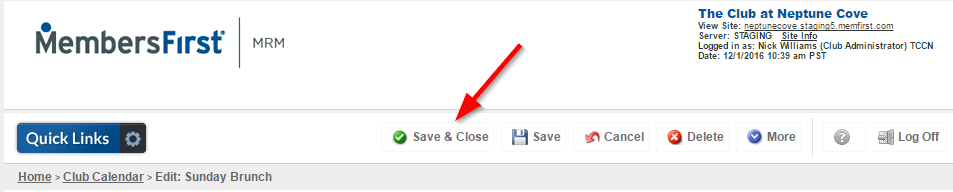 |
Managing Event Registrations
The event registration feature is part of the calendar. A calendar event can optionally be designated as a registration event. Members can then use the calendar to register for any event at the club. After a Member registers for an event their registration information is stored on the admin side. Club administrators are able to manage these registrations from the admin side of the website.
| Log into Admin Home on your web site. | |
| Click on Club Activity in the Applications box, then click on Event Registrations. | 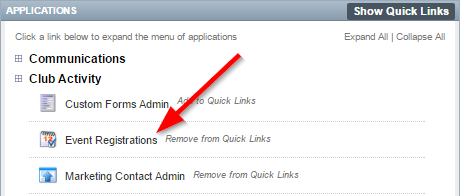 |
| Use the Filter Events dropdown to select which event you want to find registrations for. | 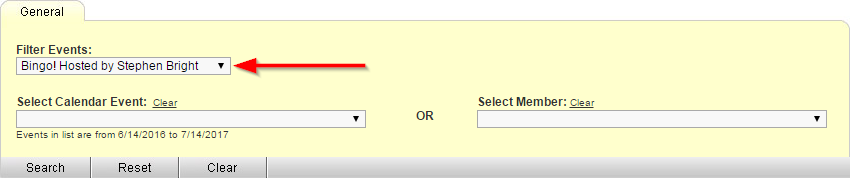 |
| Now use the Select Calendar Event dropdown to select an event on a specific date. Alternatively, you can use the Select Member dropdown to find all of one member's registrations. |
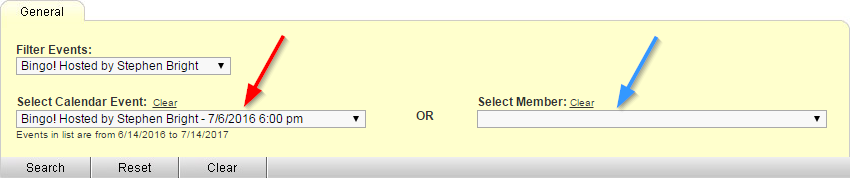 |
| Click Search to get your results. | 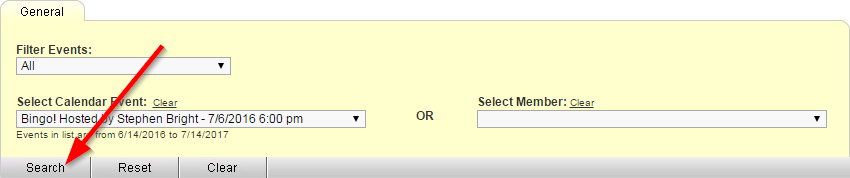 |
| The registrations will appear below the search parameters. You can click a Member Name to edit a registration. |
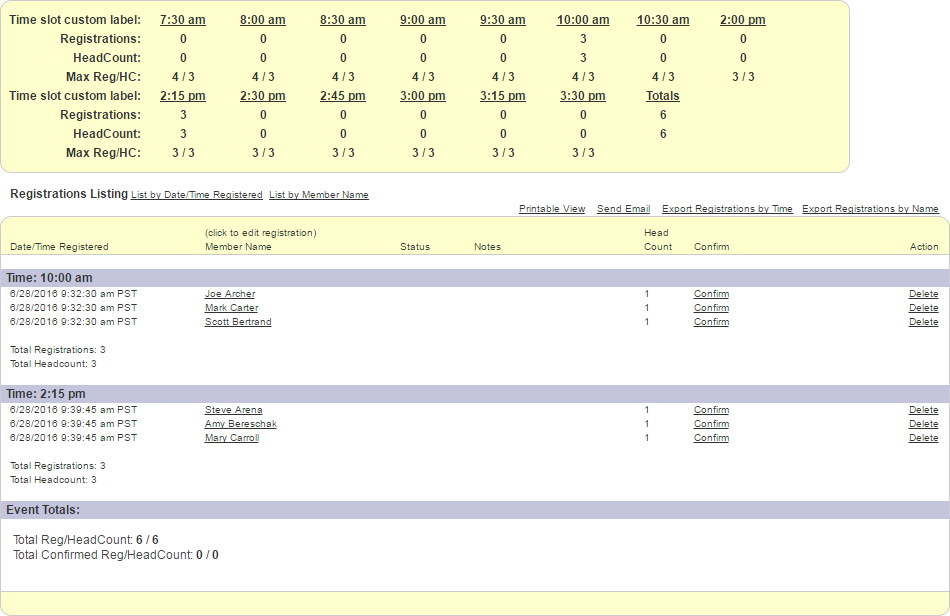 |
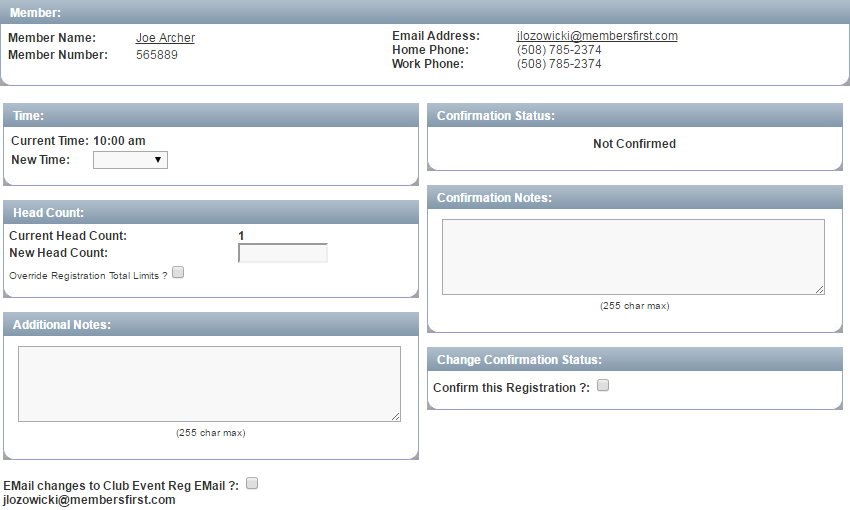
| You can change the registration time, headcount, and status on the registration edit page. You can also add confirmation notes and additional notes. You can send changes to the event registration email by checking the EMail changes to Club Event Reg Email box. |
 |