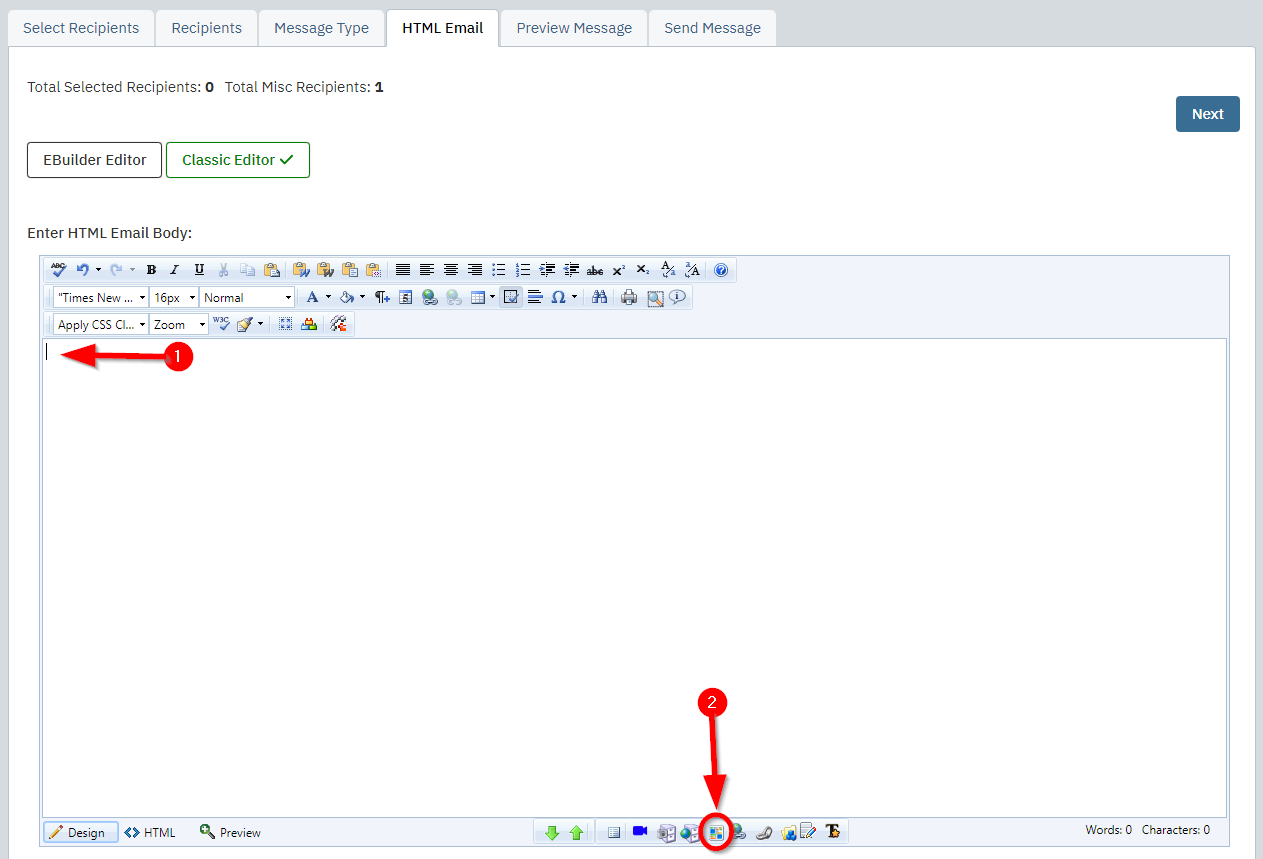
| Log into the admin side of you web site, start a new email, and navigate to the HTML Email tab. The editor should be blank. |
 |
| Place your cursor inside the blank area of the editor and then click on the Templates button on the bottom toolbar. |
 |
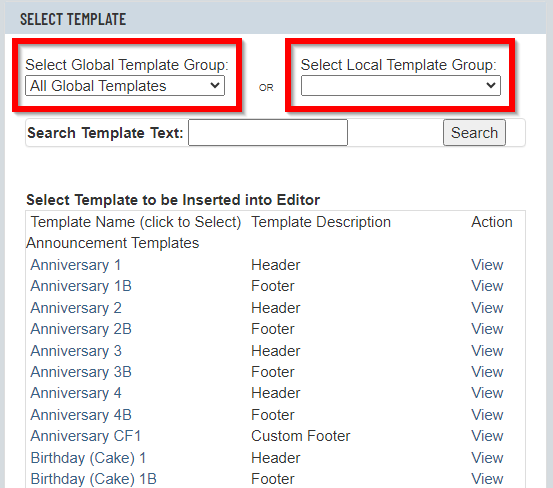
A pop up window will appear where you can select a template to drop into the editor.
Use the drop down menu on the top left if you want to choose a global template. These are templates that we have provided to all our clients, so they are kept very generic.
Use the drop down menu on the top right to select local templates. These are templates that have been designed specifically for your club. |
 |
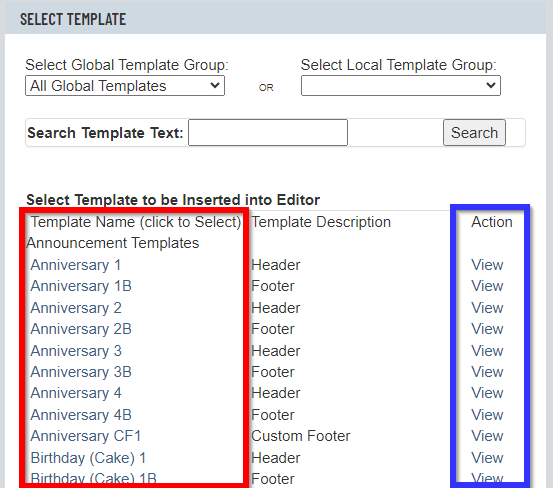
Once you have found a template you want to use, click on its title and the popup window will disappear. The template should be inside the editor.
You can click View in the right column to preview the template. |
 |
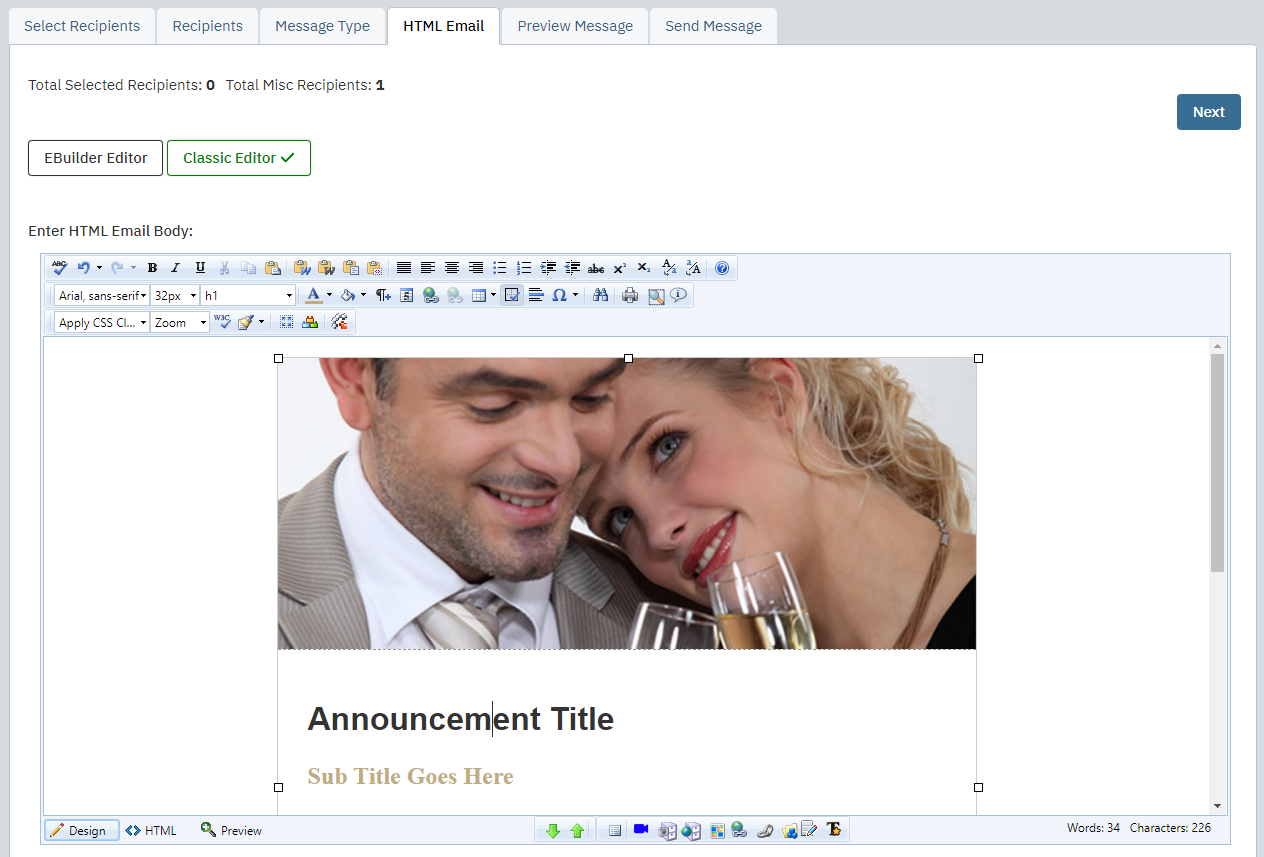
| Now you can highlight and type over the dummy text inside the template with your content. |
 |
Click on the Send Email tab.
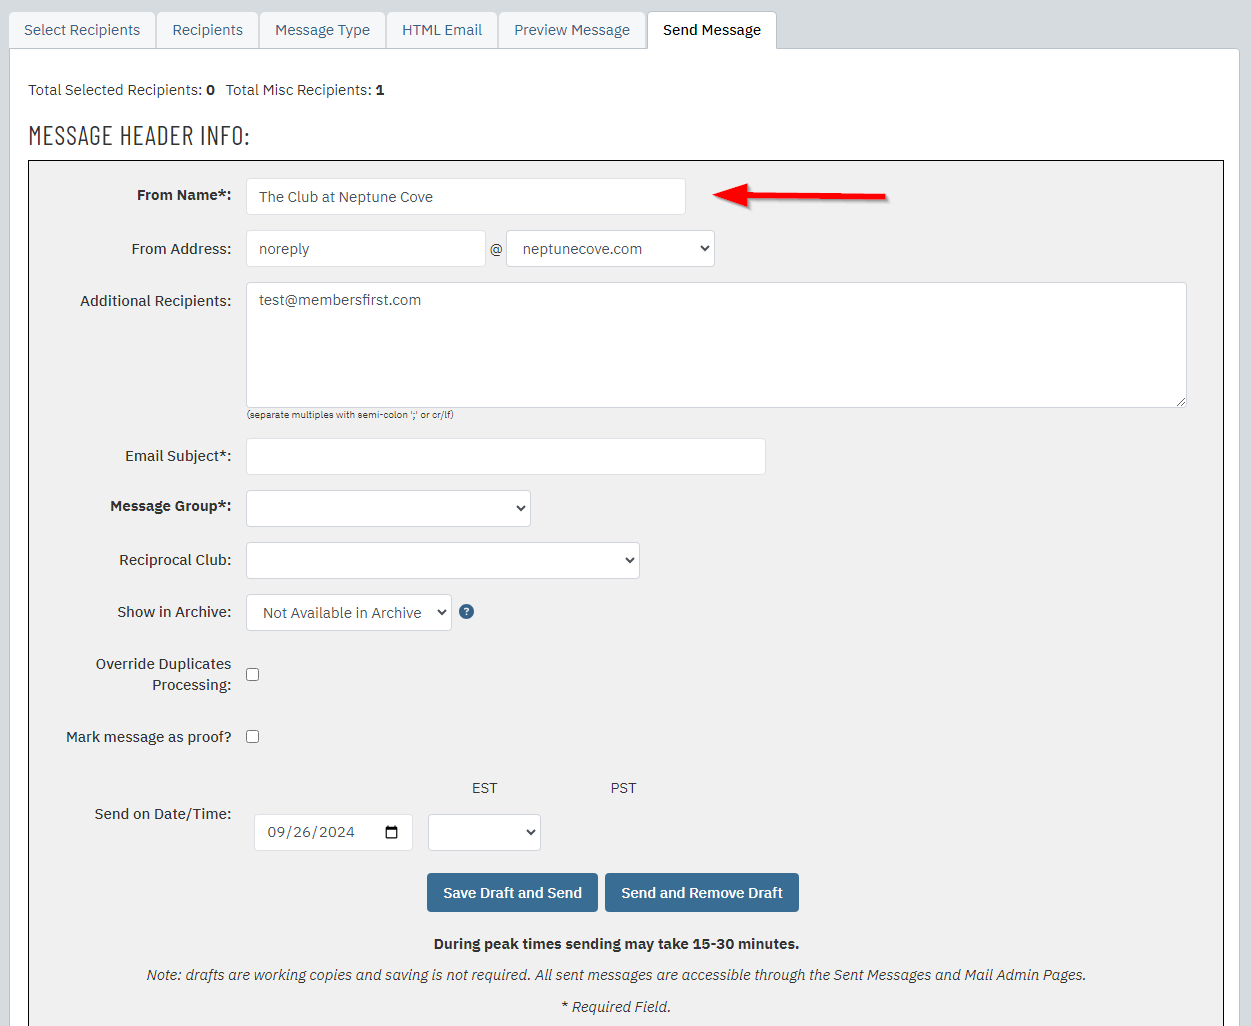
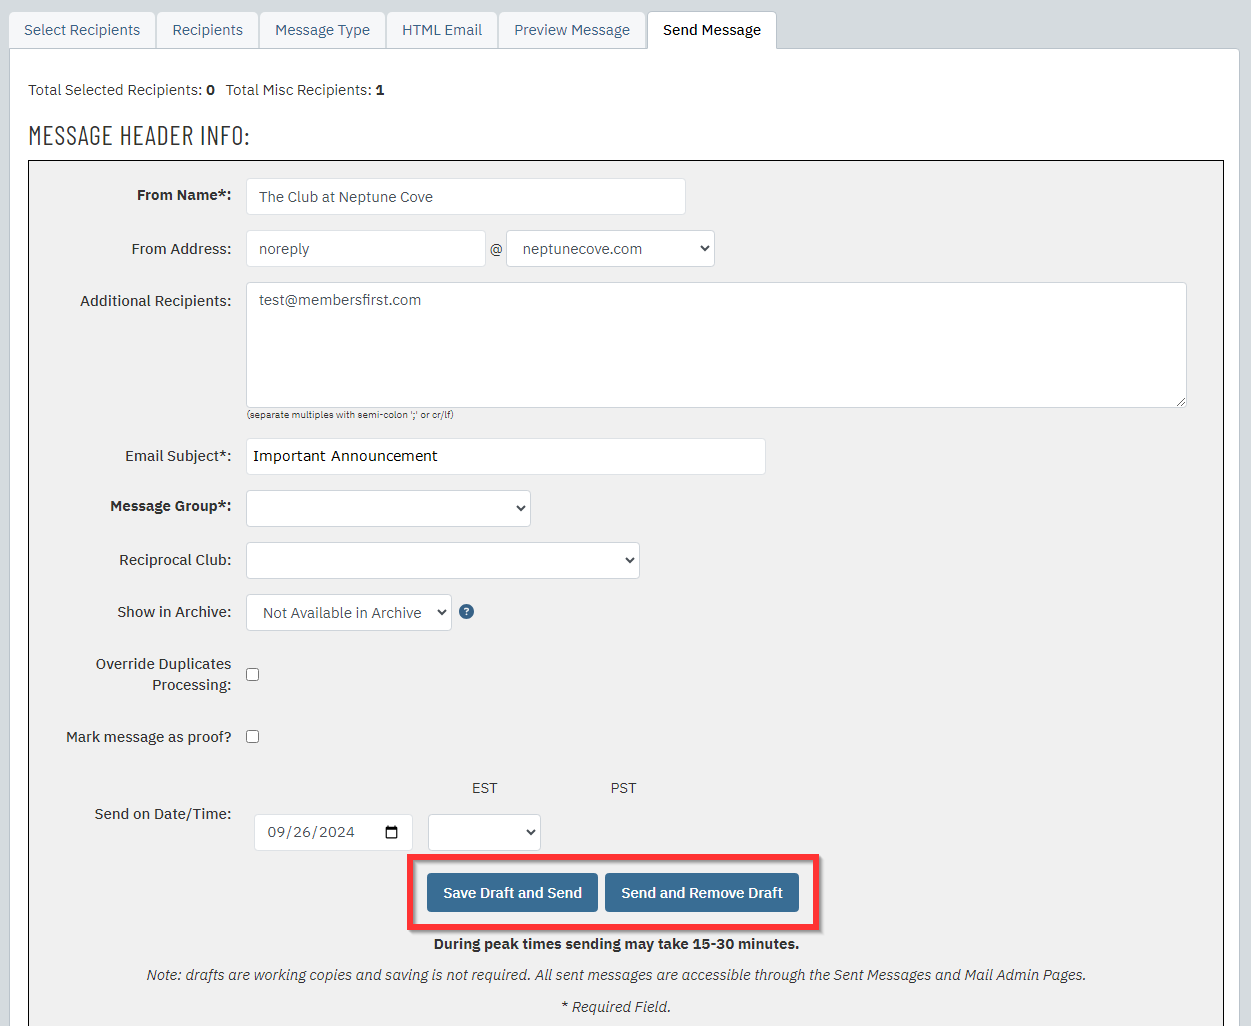
Enter the name you would like to have the email appear to be from in the From Name field. |
 |
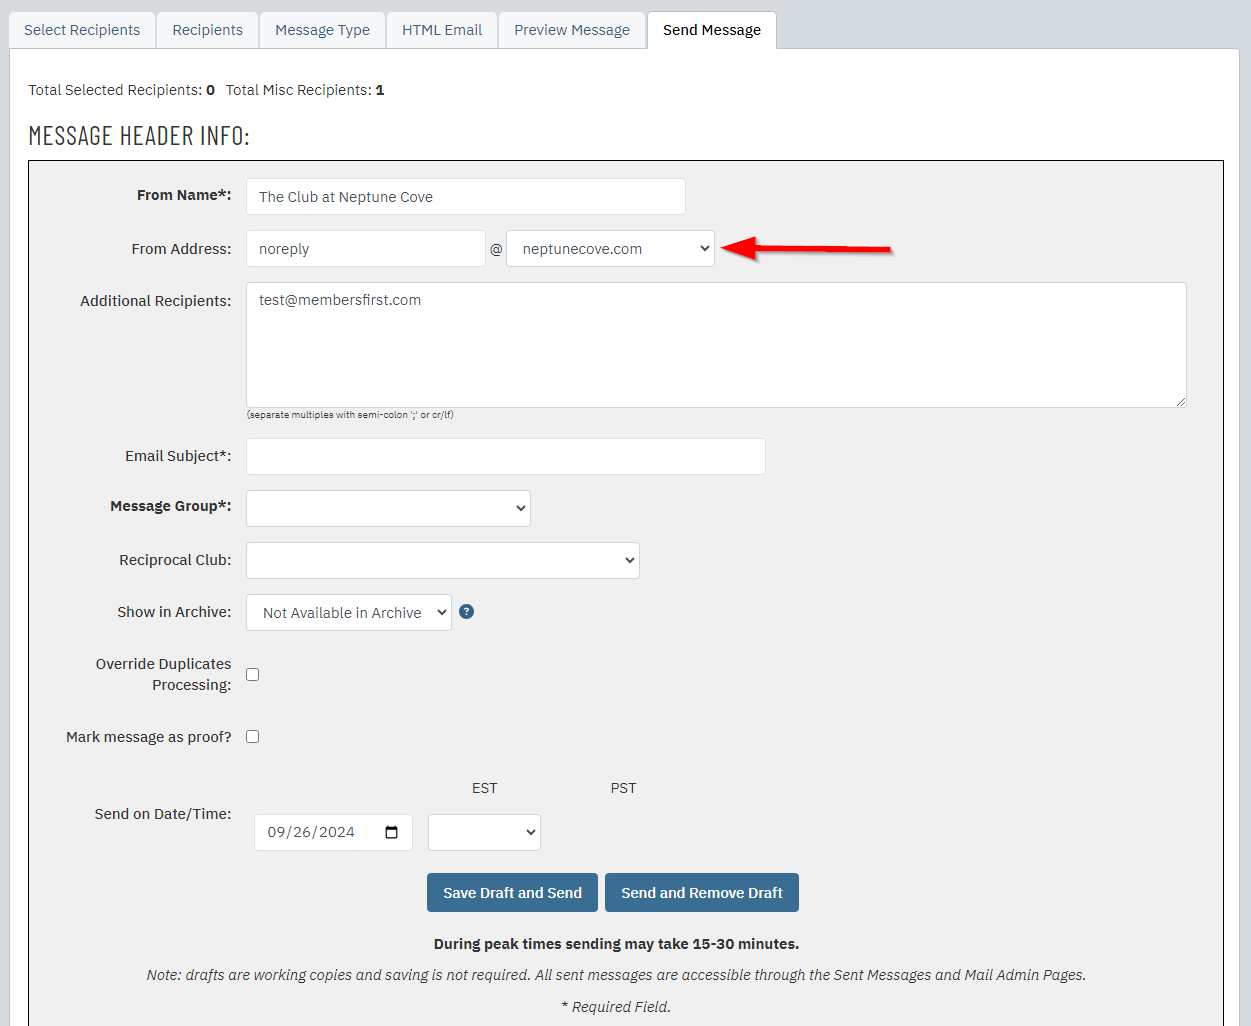
| In the From Reply to Email Address field, enter the email address that will appear if a recipient clicks Reply. |
 |
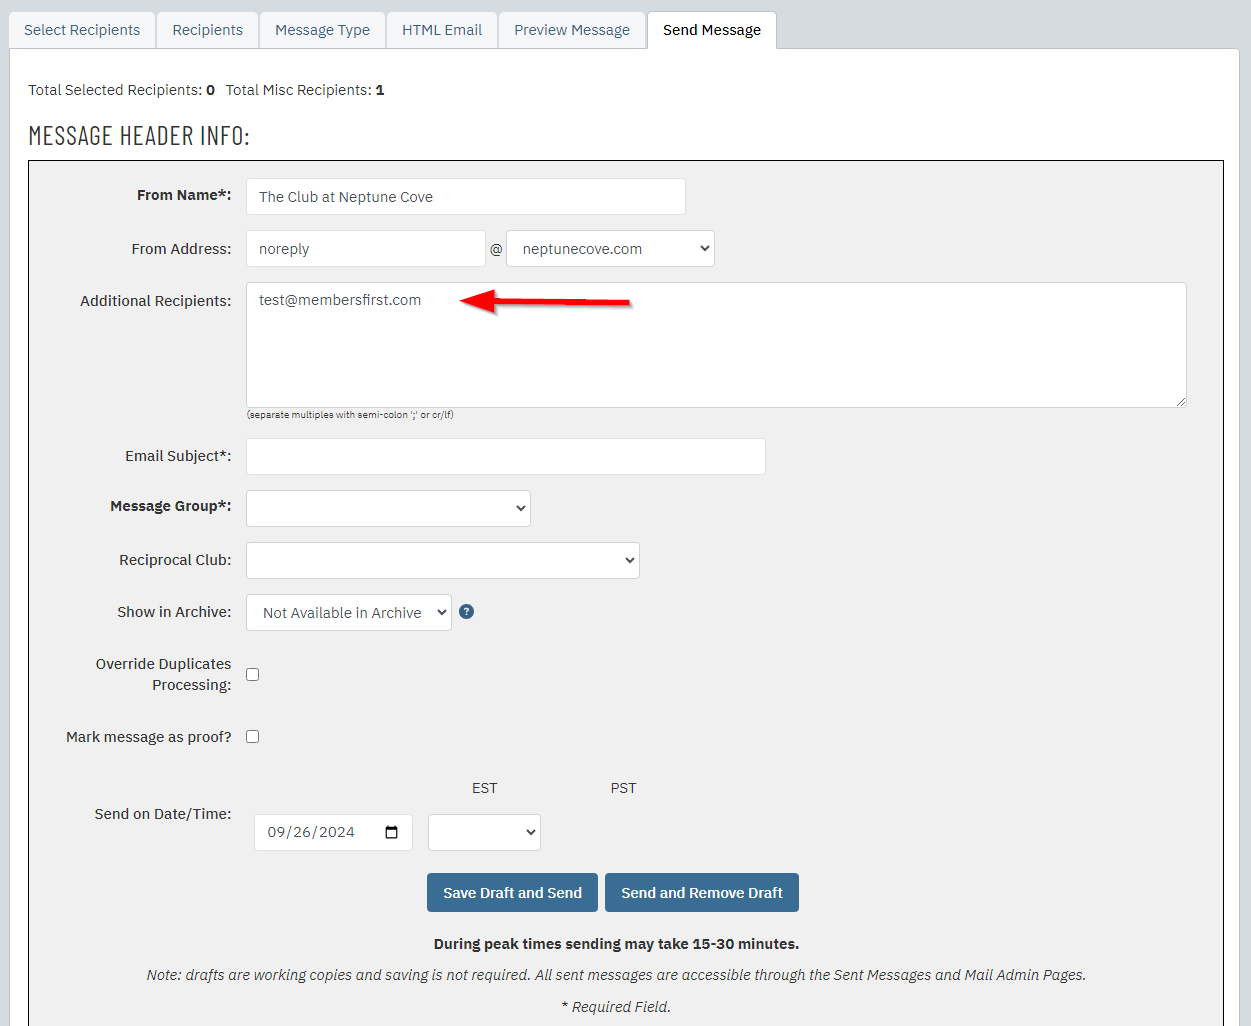
The Additional Recipients box will show the miscellaneous recipients we entered earlier.
You can make any changes to miscellaneous recipients here instead of return to the Recipients tab.. |
 |
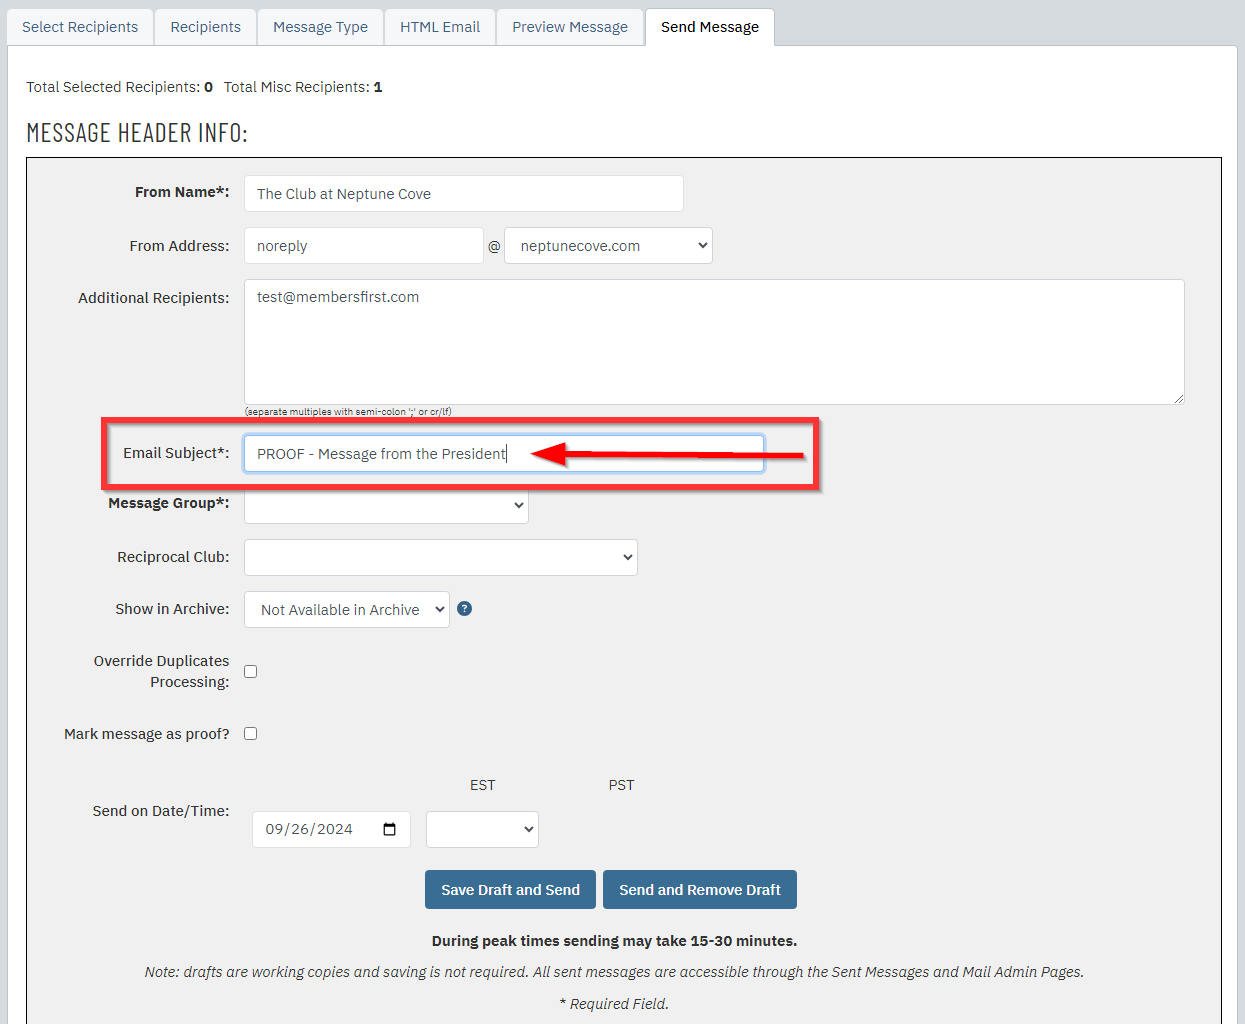
Enter the email's subject line into the Email Subject field.
When sending a proof, it is helpful to include "PROOF" before the actual subject line. (i.e. PROOF - Message from the President) |
 |
Click Save Draft and Send to send the email.
If you do not want to keep the email draft, you can click Send and Remove Draft instead. |
 |