Point of Sale
Follow the steps listed below in order to set up your Point of Sale. It is an easy process, but it requires numerous actions.
| First step is to create your Billing Codes. Log into the admin side of the Tee Sheet and then hover over Setup in the Primary NAV and select Billing Codes from drop-down menu. | 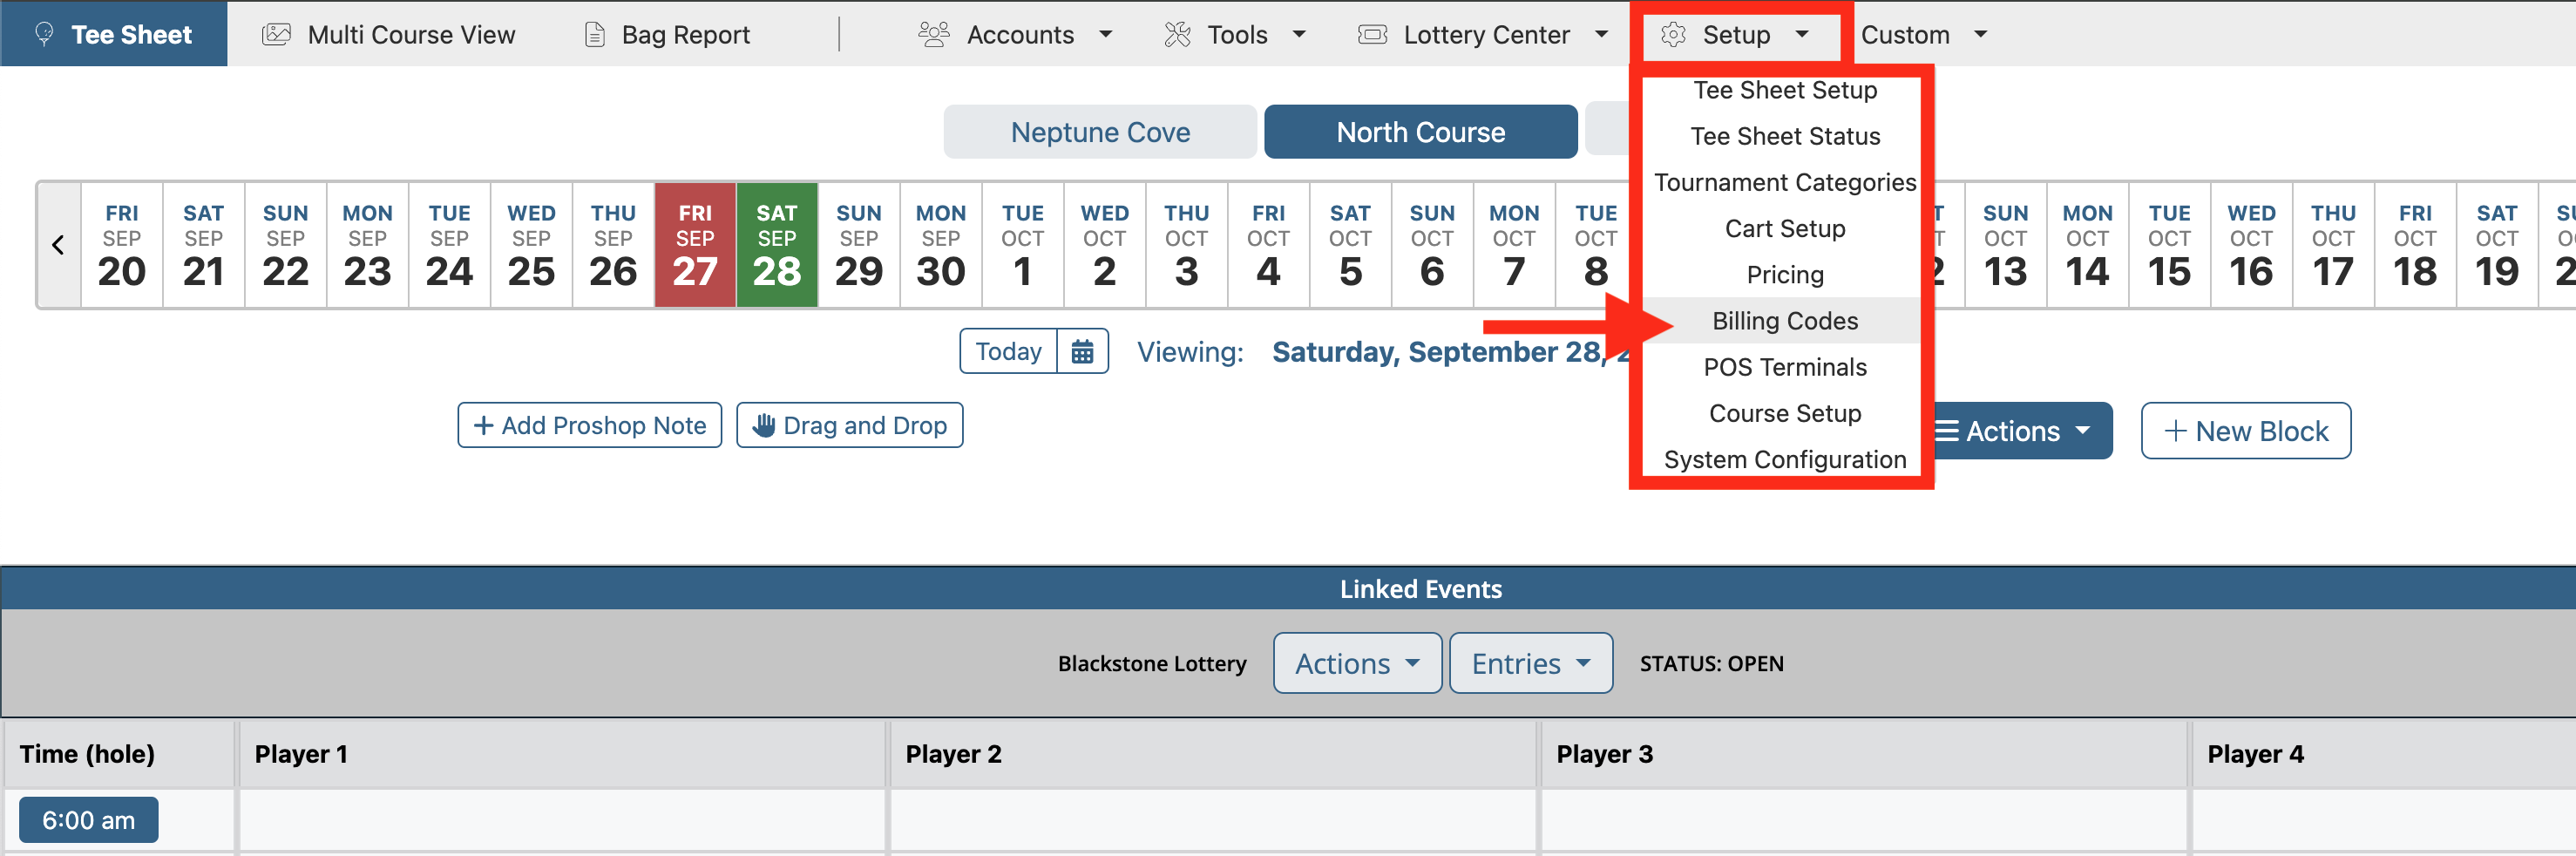 |
| On the Billings Codes page, you need to create each billing code associated with the each Code Type. Along the top of the page, select your Code Type from the drop-down menu. The Code Value and Shared Key are one and the same, and is simply the Jonas Sales # for that specific greens, cart, or no show fee. You can add a Value and Description, but ultimately these two fields are simply for your reference and are not required for setup. Hit the blue Save Code button to finalize your new billing code. | 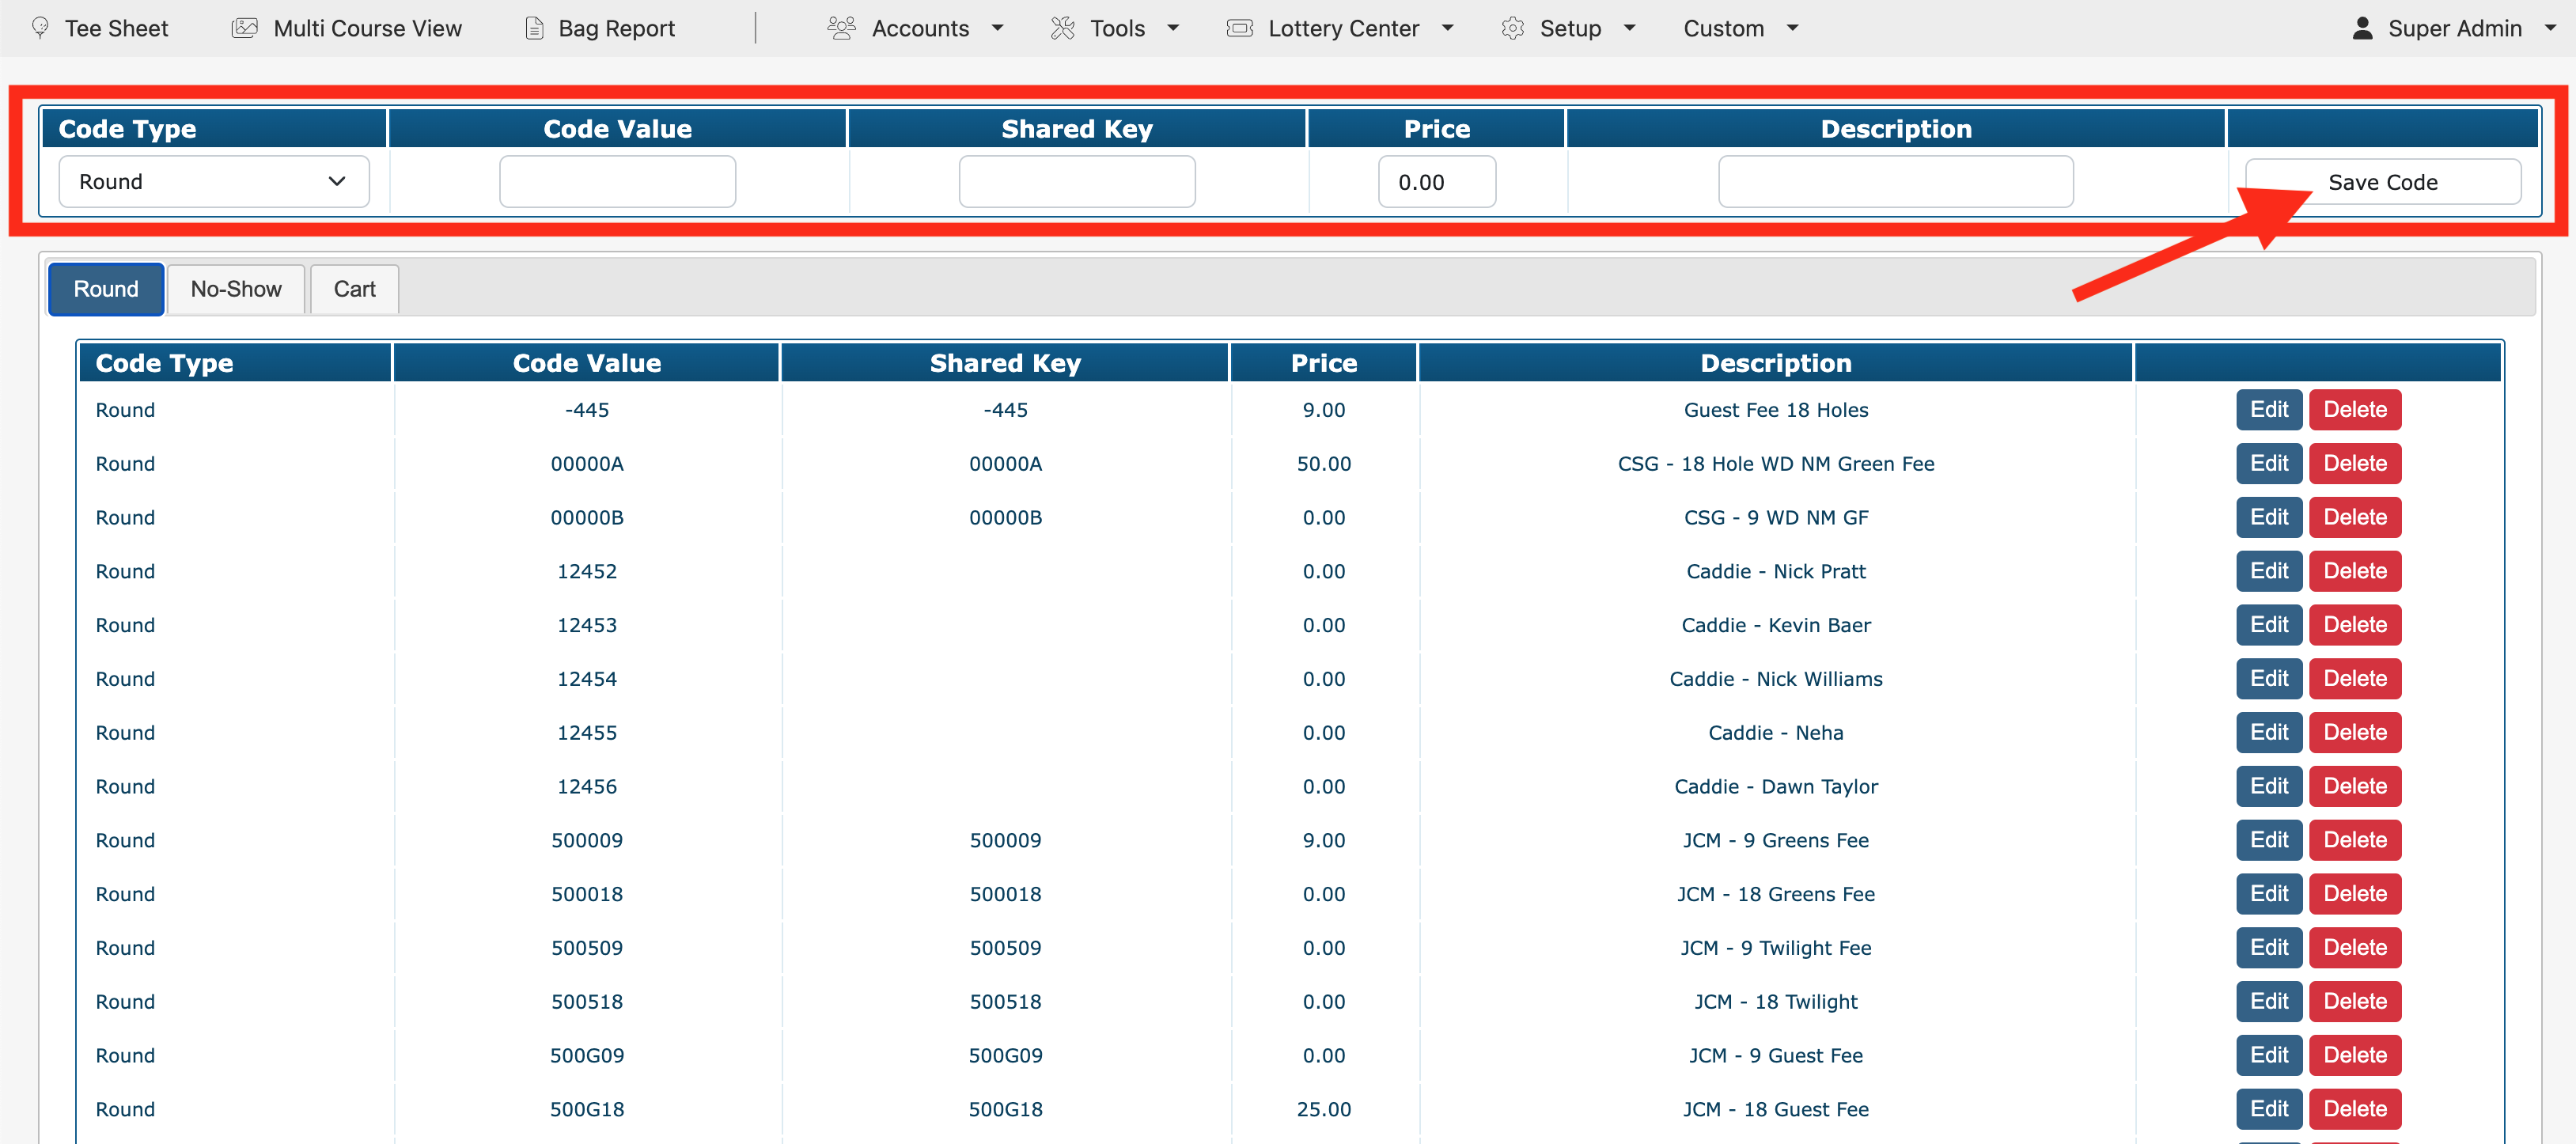 |
| After you save the billing code, it will be listed below within the tab that represents the code type created. At this point, to edit any of the fields or to delete any existing billing code, click on the Edit or Delete buttons to the right of billing code. |  |
| The next step in the POS set up is to create the Pricing Matrix for each Billing Code. The matrix is based Course, Day, Time and Player Category. | |
| To access the Pricing matrix, hover over Setup in the Primary NAV and select Pricing from drop-down menu. | 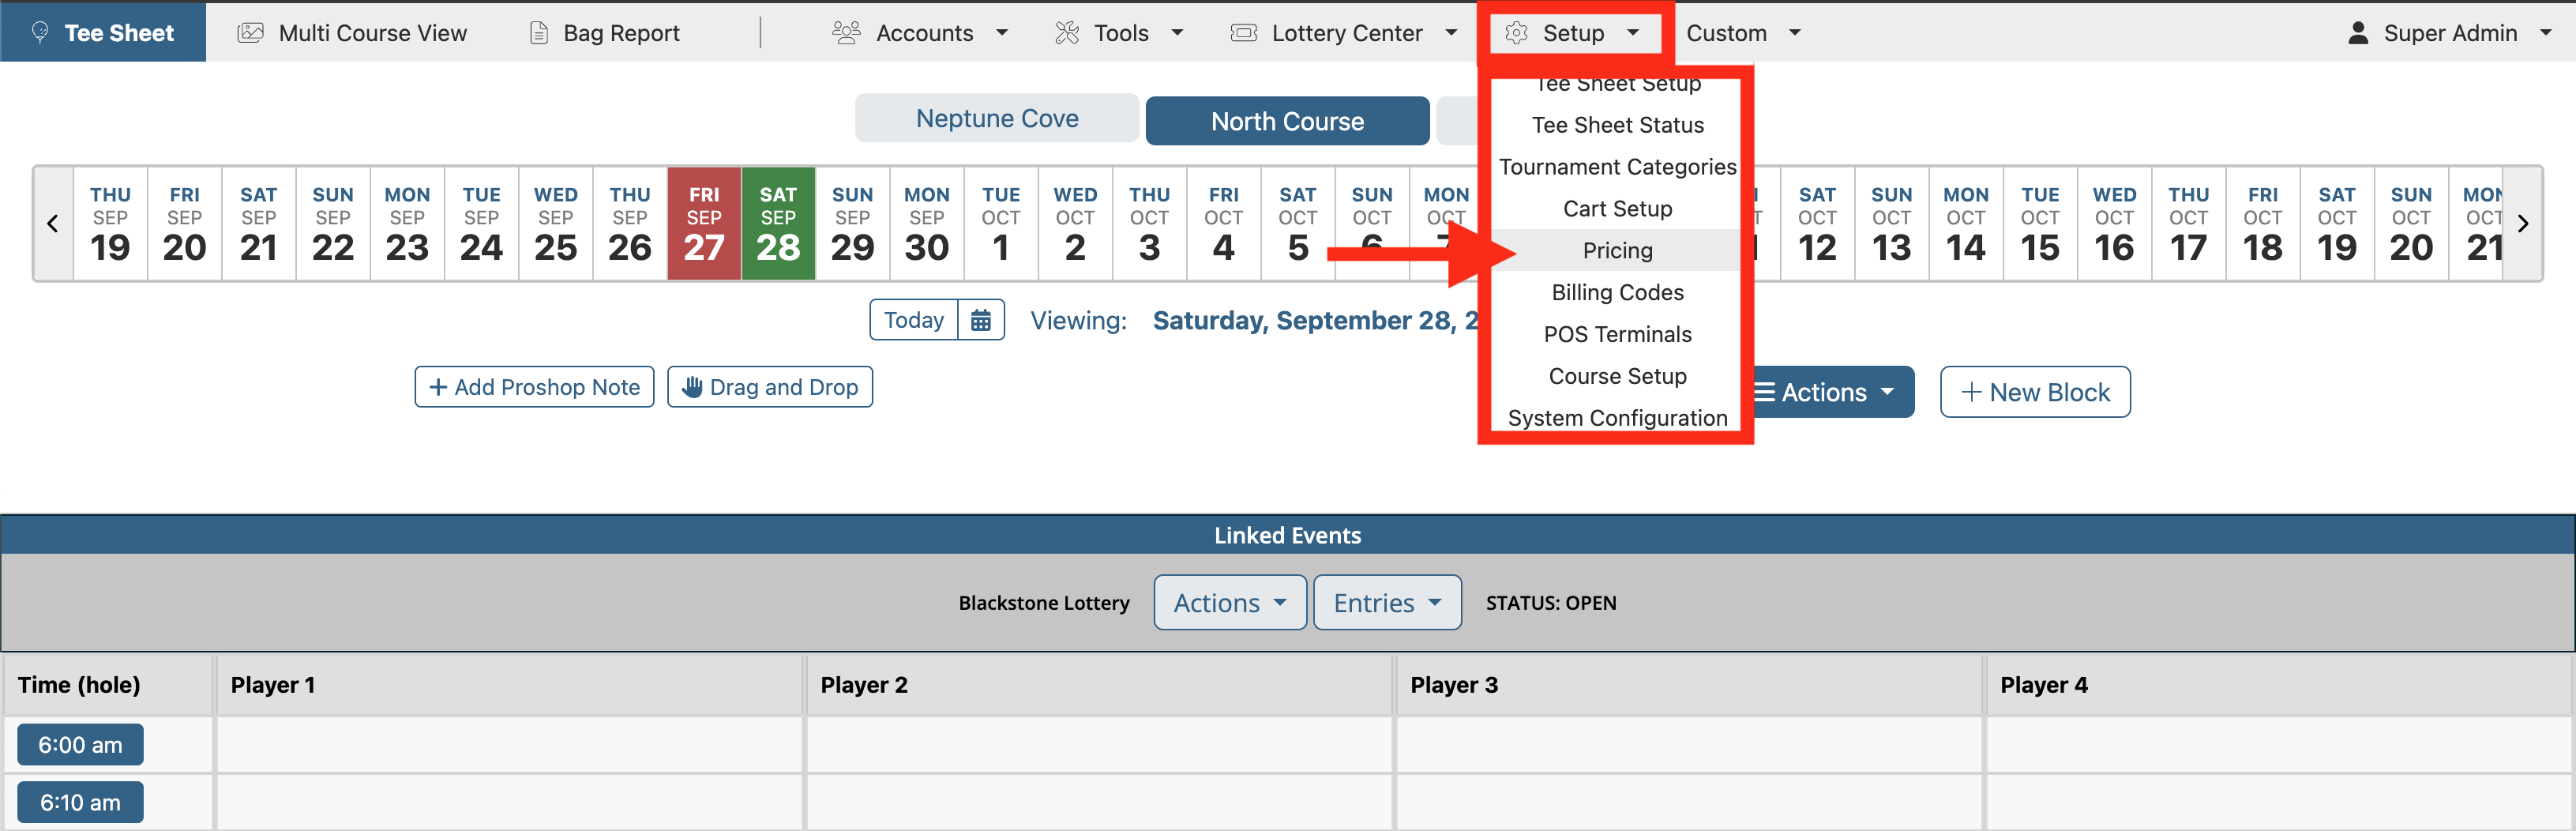 |
| From the list of Pricing Profiles, click on the blue Setup button for the profile you would like to create the matrix for. If you haven't created a Pricing Profile yet, click on the blue Create button, and just give it a Profile Name and submit. | 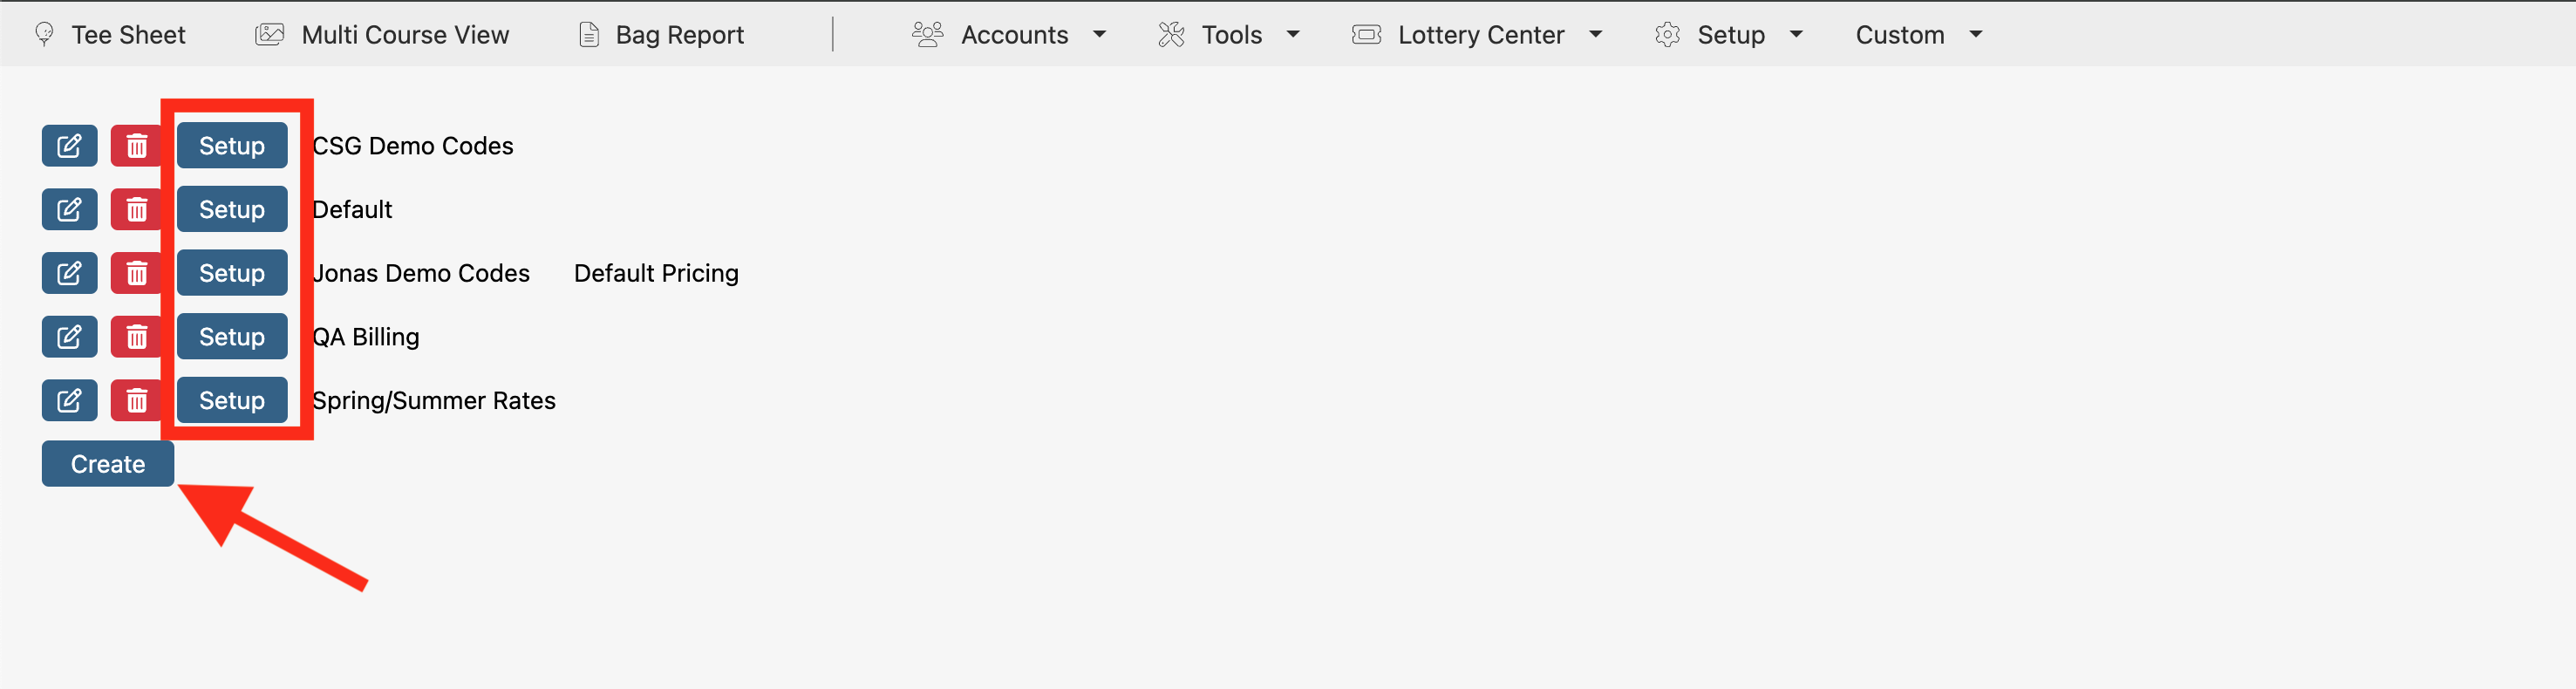 |
| On the pricing matrix page, you will see tabs along the top of matrix that represent all the different cart types you've created. The next step is to create a rule for each tab/cart type. You can create as many prices as you want for each cart type. To create, simply complete each field within the Pricing Spans section on left side of page. As you create them, the pricing span will load to the right. To edit or delete an existing pricing span, click on the blue Delete or Edit button to the right of each price span. | 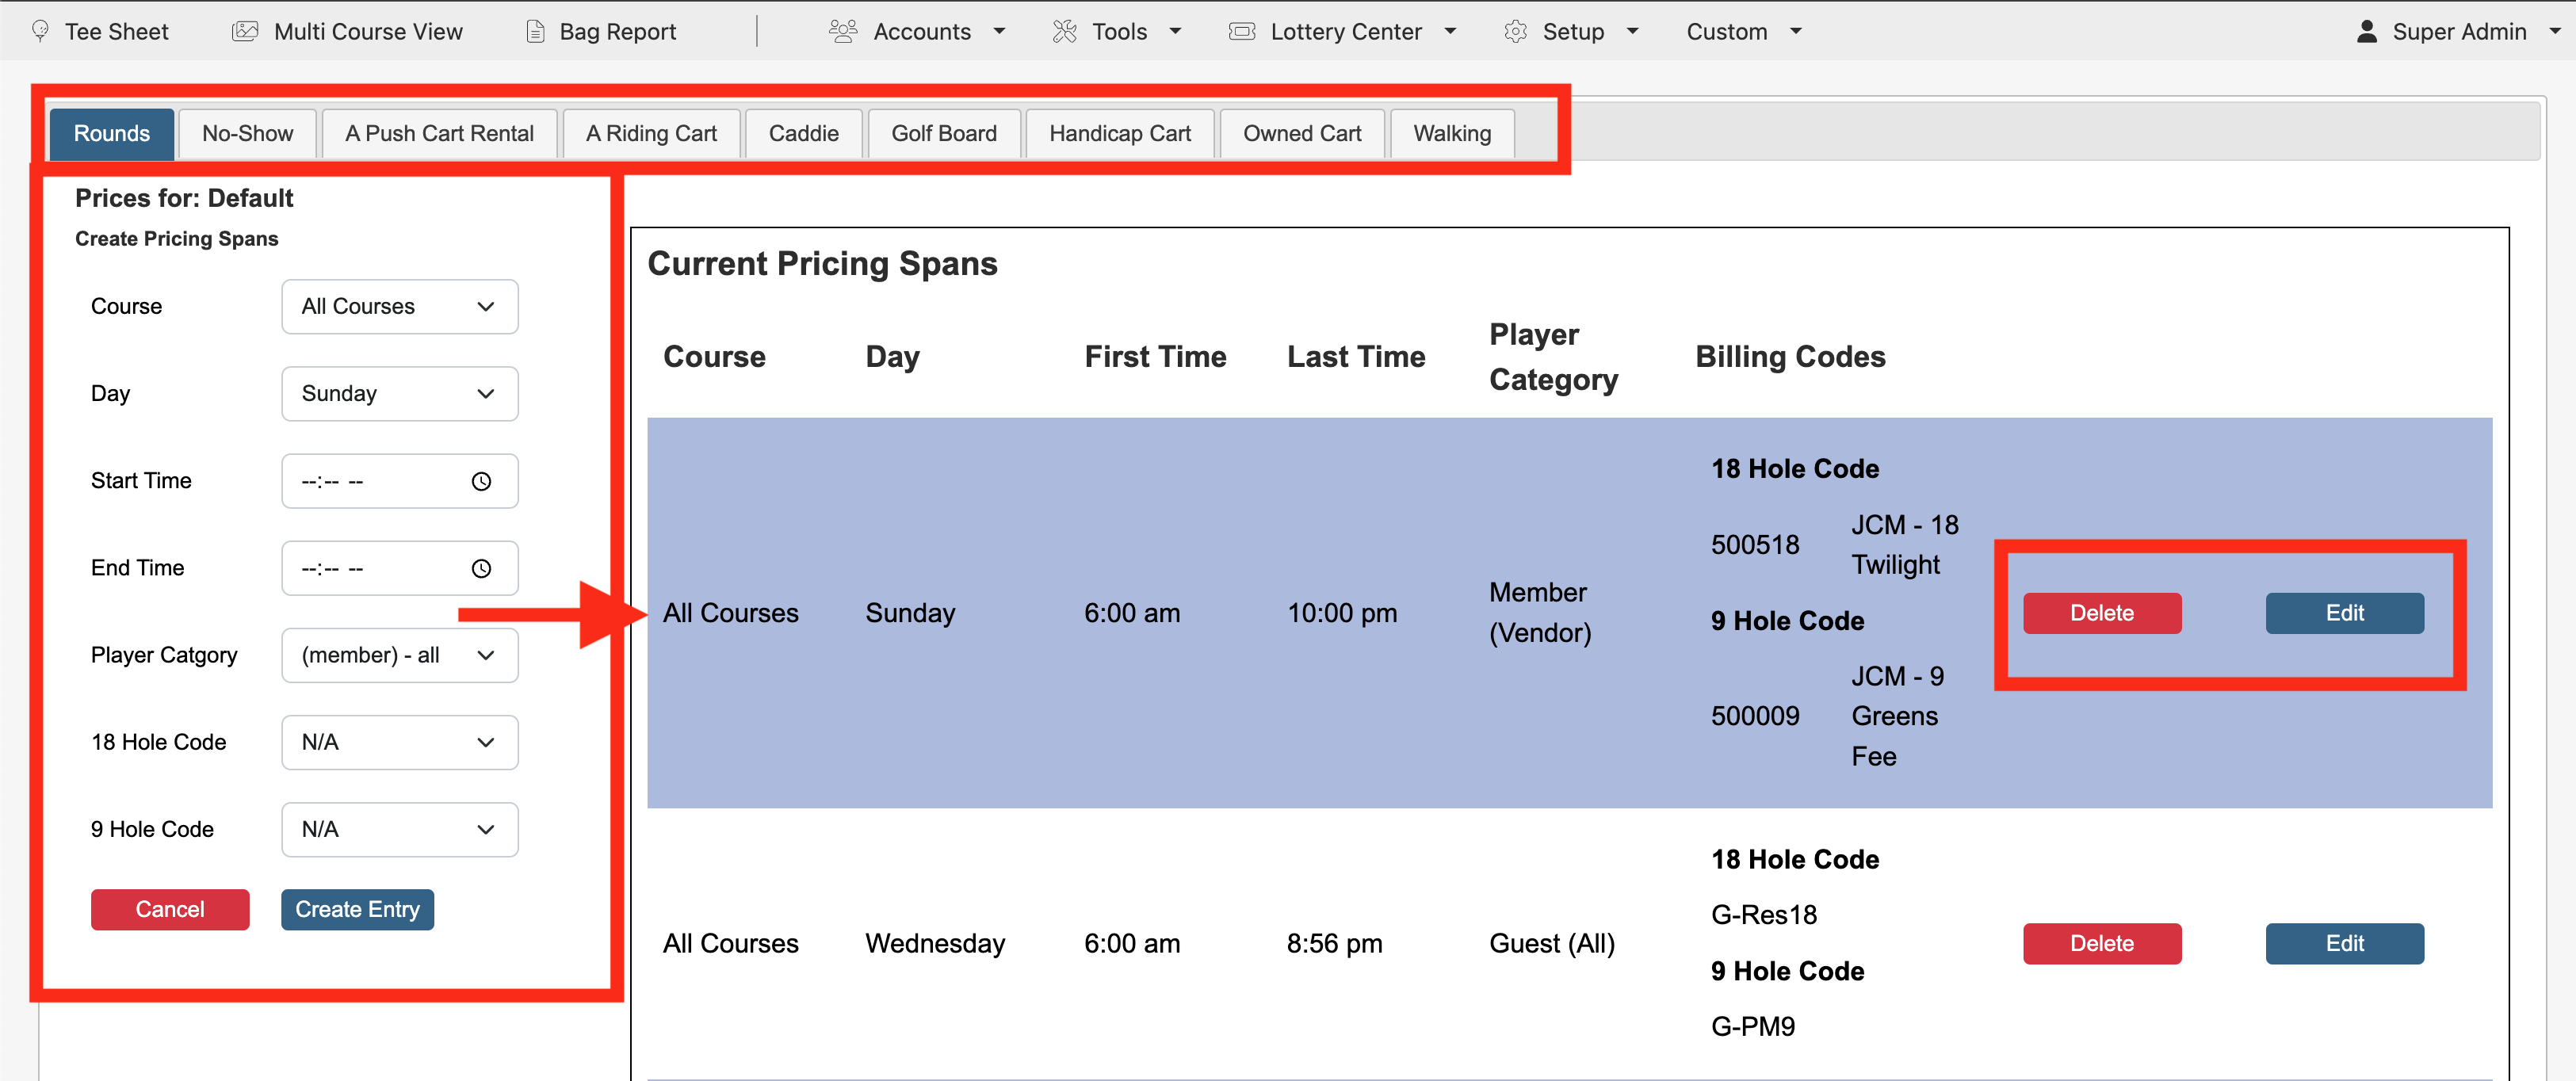 |
| Once all prices are created for the different pricing profiles, you next want to apply the appropriate Pricing Profile to the different course hours created in the Tee Sheet Setup. Hover over Setup in the Primary NAV and select Tee Sheet Setup from drop-down menu. | 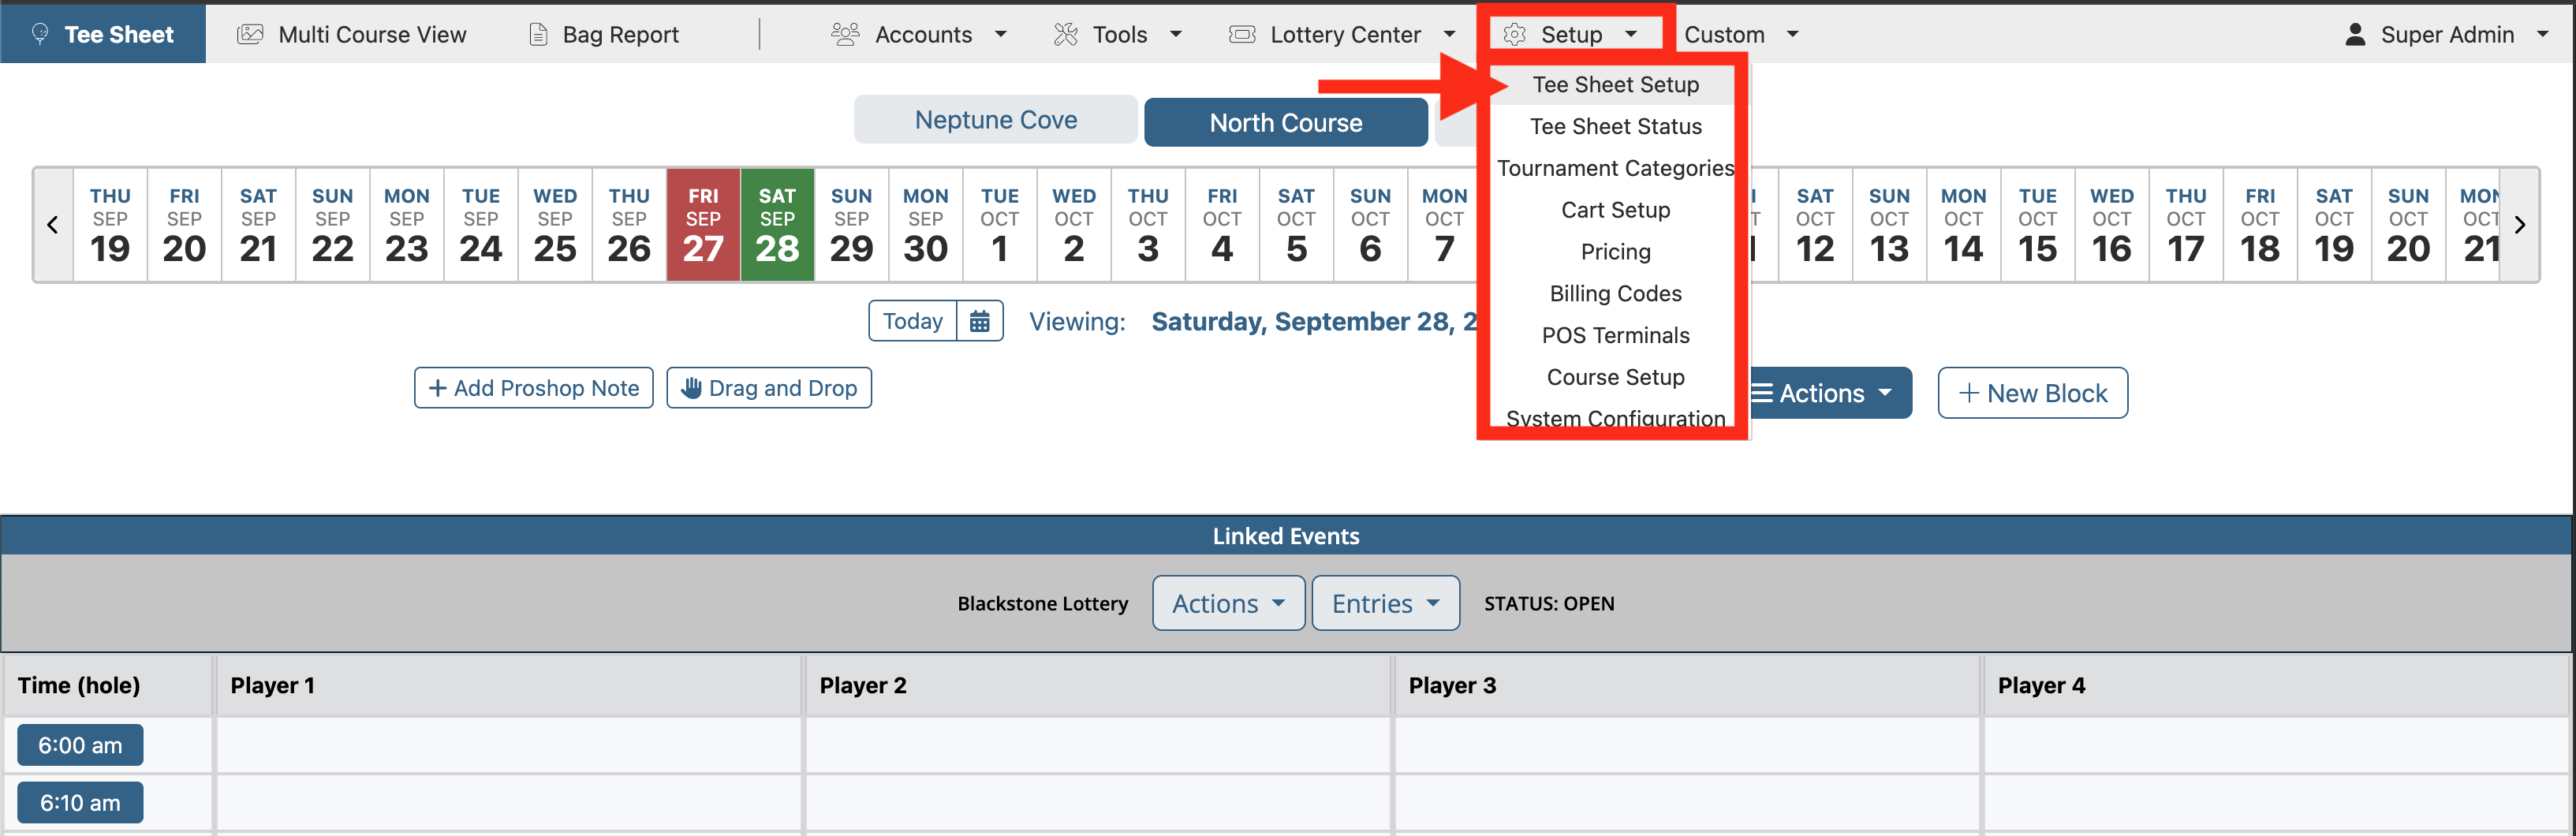 |
| Create the different course hours that will be available throughout the season. On the Pricing Profile drop-down, select the appropriate profile that corresponds to those course hours in which it should be used. | 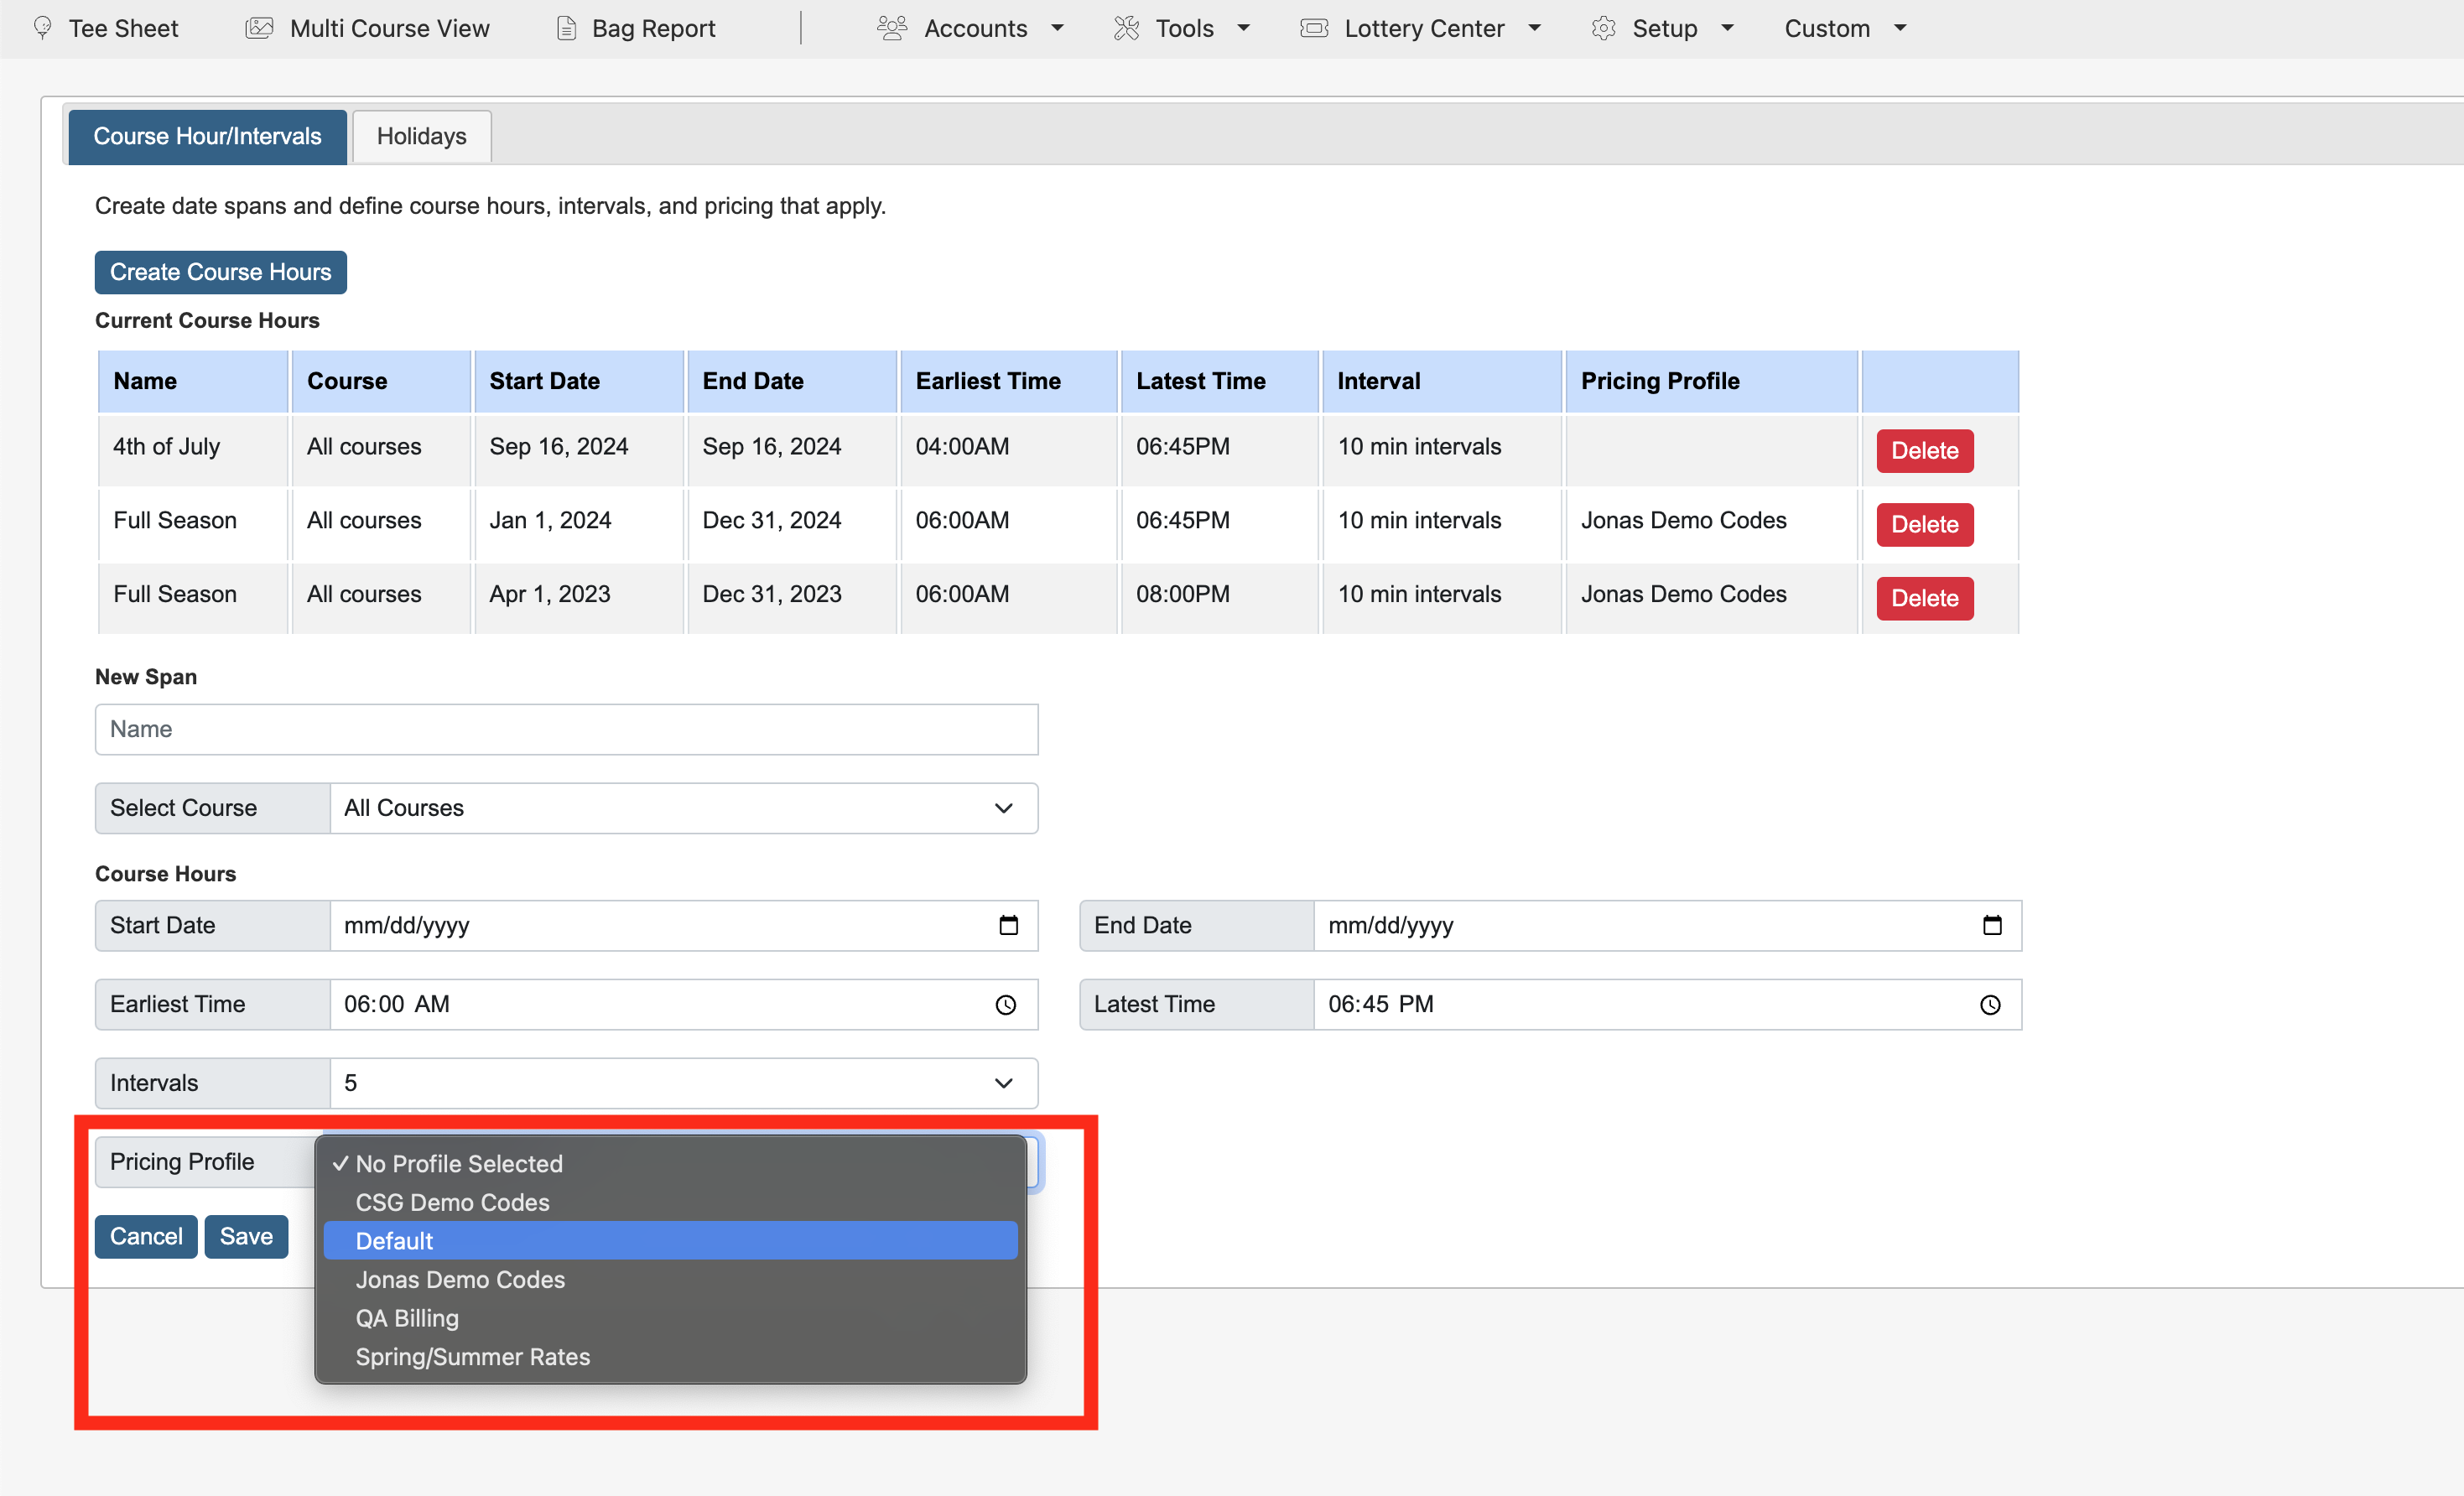 |