Managing Member Activities
Member Activities allow clubs to select different interest groups that members can opt themselves into, should you choose to let them. The various activities can be displayed on your members' profiles, and you can also email specific activity groups.
To Add New Activity Types:Log into Admin Home on your website. Select Member Directory. |
 |
| Click the blue Related button. |  |
| In the box on the right-hand side, click Member Activities. | 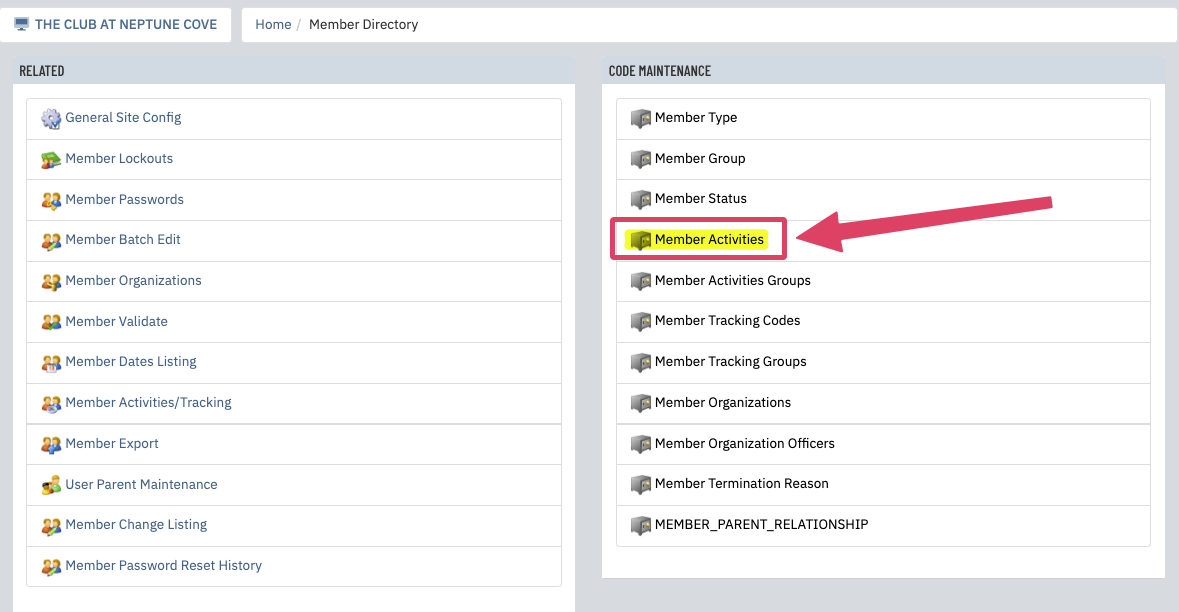 |
|
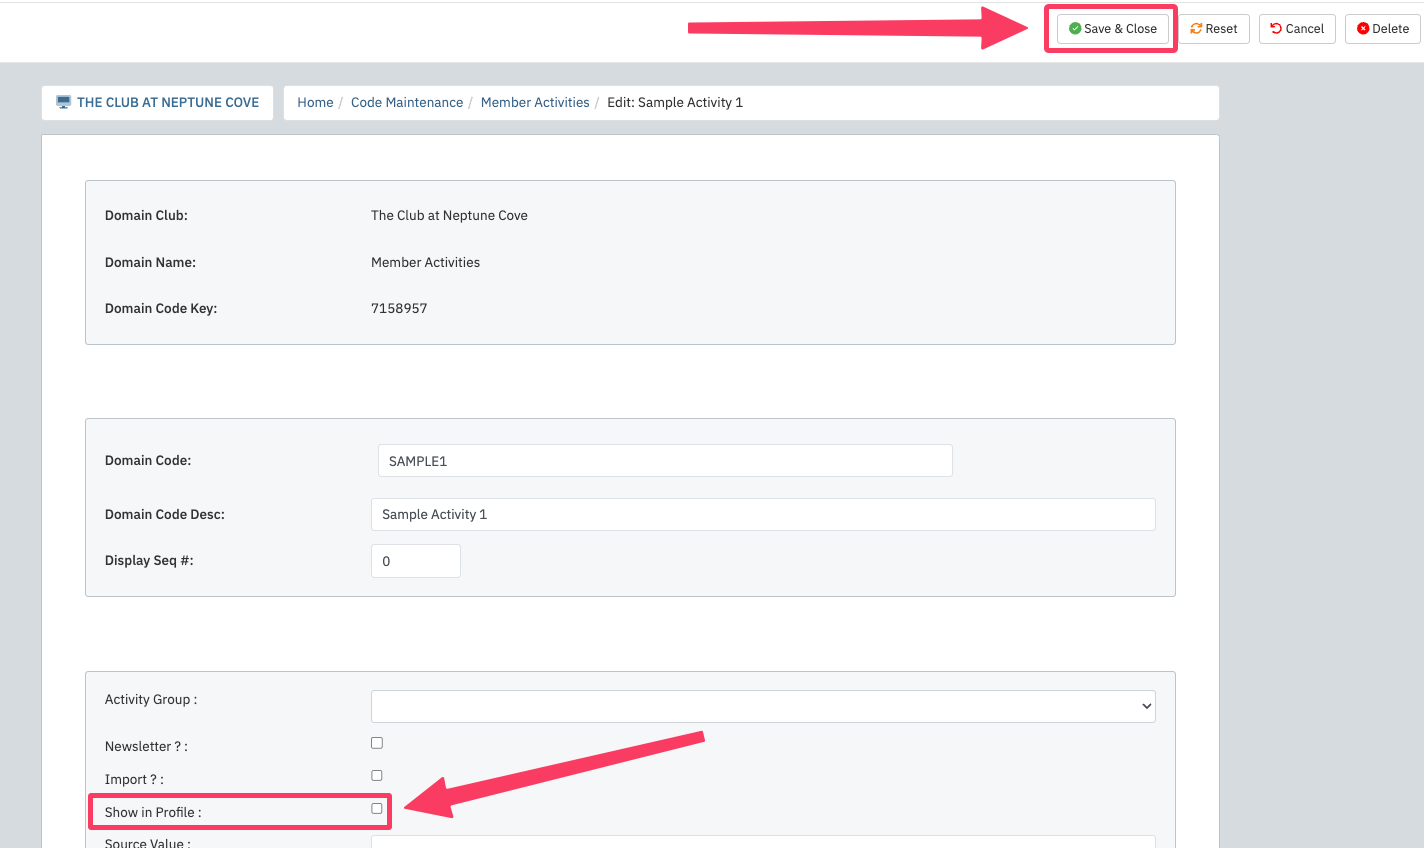
From here, you will see a list of your current activities if you're using them already. To add a new one, fill in the following fields:
Then click Add Code. |
 |
|
On the next screen, you have the option to Show in Profile. If this is checked off, the activity will appear in any member's profile who has indicated it as an interest. Click Save. Repeat these steps to add as many activities as needed. |
 |
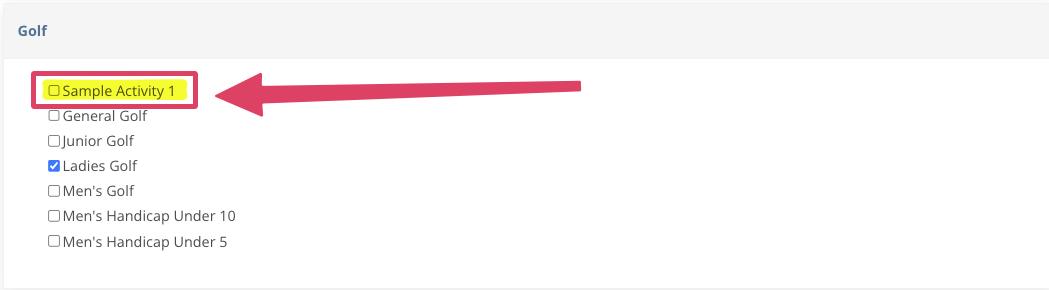
To Add a Member to an Activity Group (Admin Side):Follow Steps 1 and 2 above to access the Member Directory. Search for the member in question and click on their name. Click on the Activities tab, check off the appropriate activity, and click Save. |
 |
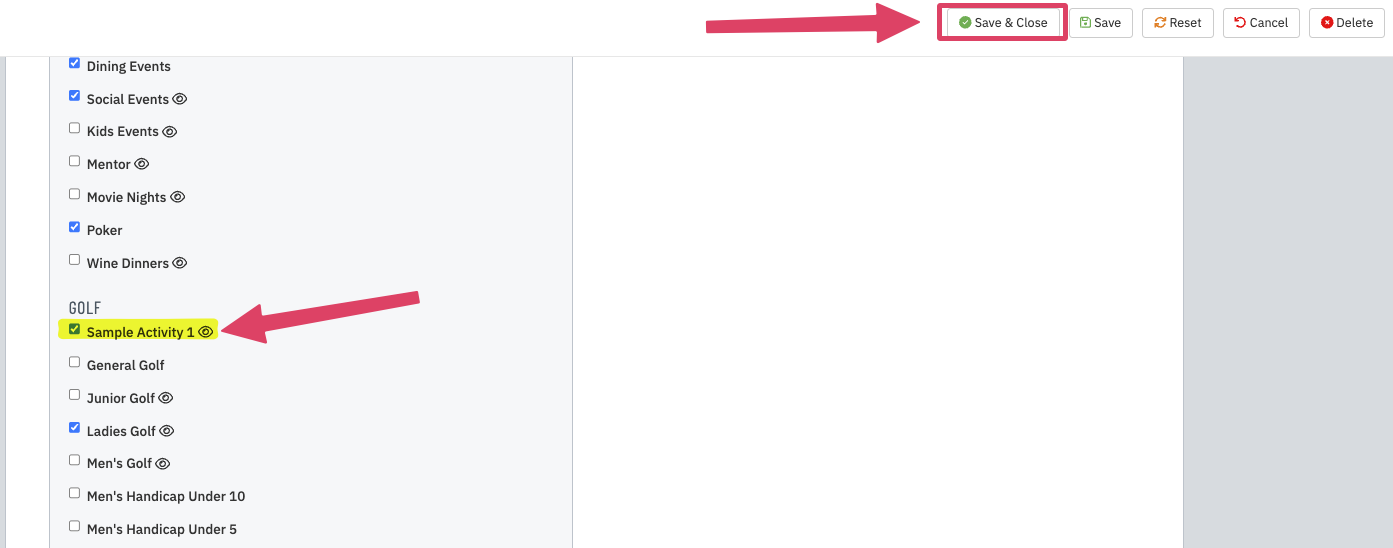
How a Member Can Add Themselves to an Activity Group:After logging in, the member should click on My Profile and then Edit My Info. In the Preferences or Advanced section, they can check off the activities that apply to them. Finally, they should click Save Data at the bottom of the page. |
 |
| Contact your Client Services Manager with any questions about Member Activities. |