| Log into Admin Home on your web site. |
 |
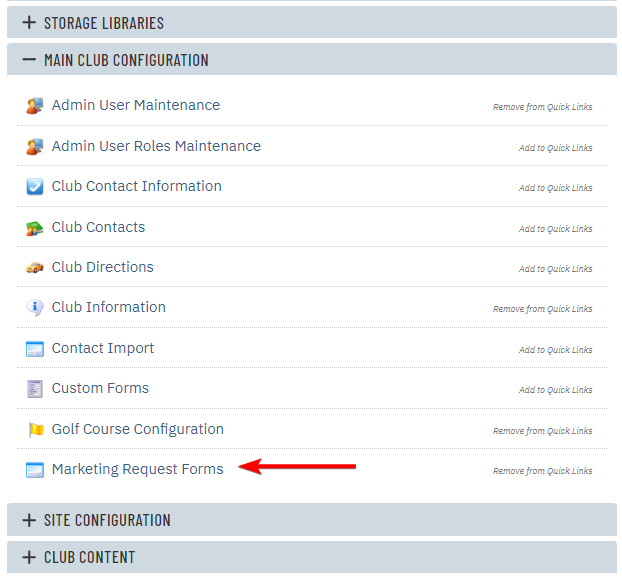
| Click on Main Club Configuration in the Applications box, then click on Marketing Request Forms. |
 |
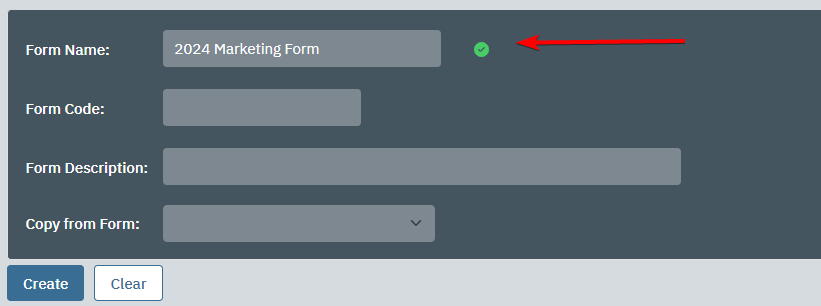
| Click New at the top of the page. |
 |
| Enter a Form Name. This is used to identify the form in the list view on the admin side. |
 |
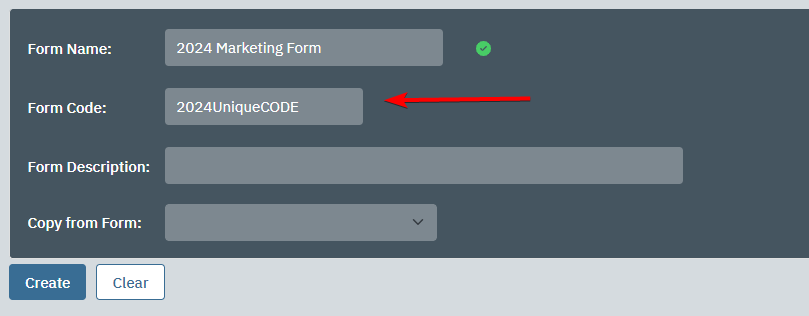
| Enter a Form Code. This is used as a unqiue ID for that form. Used for navigation |
 |
Enter a Form Description. This is what users will see at the top of the form page.
If the description is the same as the title, then you can leave this field blank. |
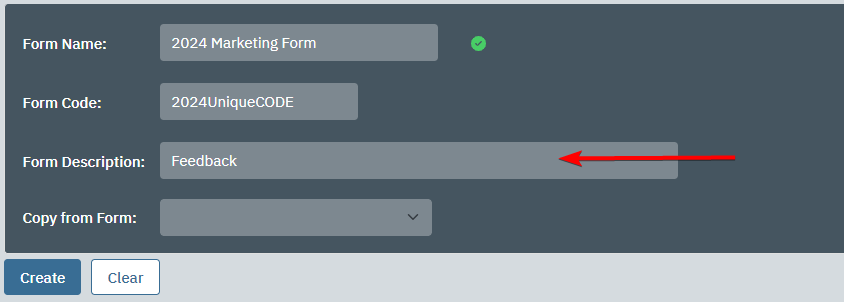 |
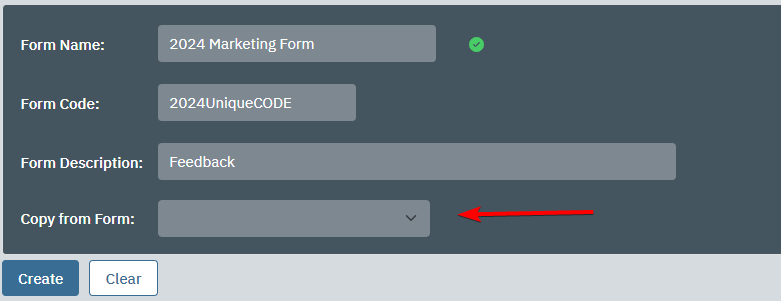
| Use the Copy from Form field if you already have a similar form whose fields you want to copy. |
 |
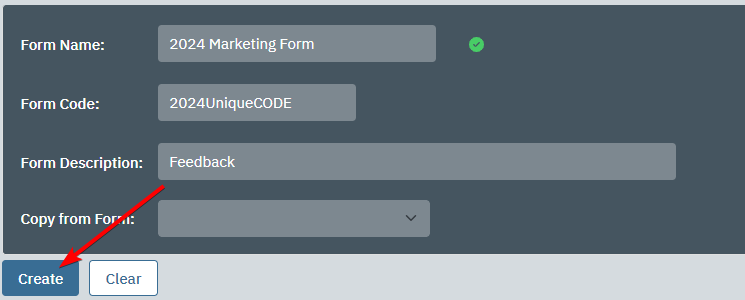
| Click Create Now. |
 |
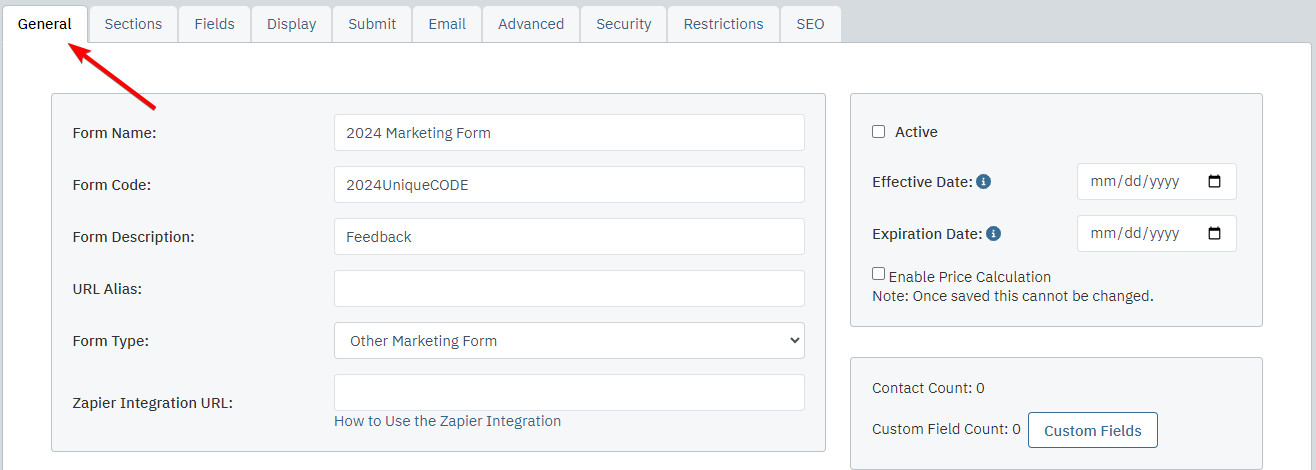
| Click the General tab. |
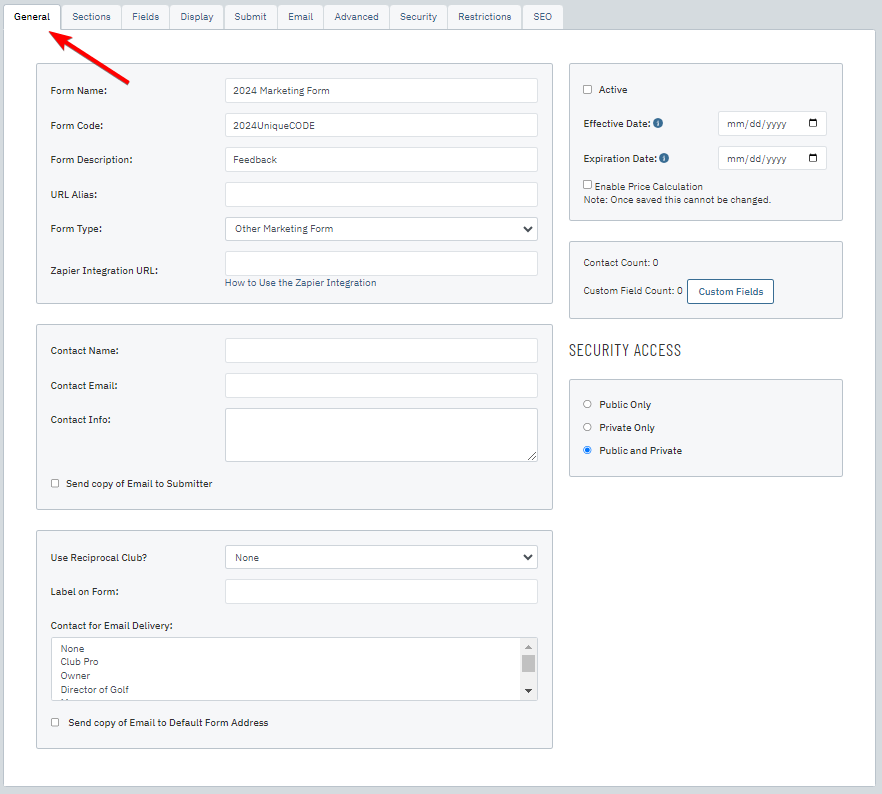 |
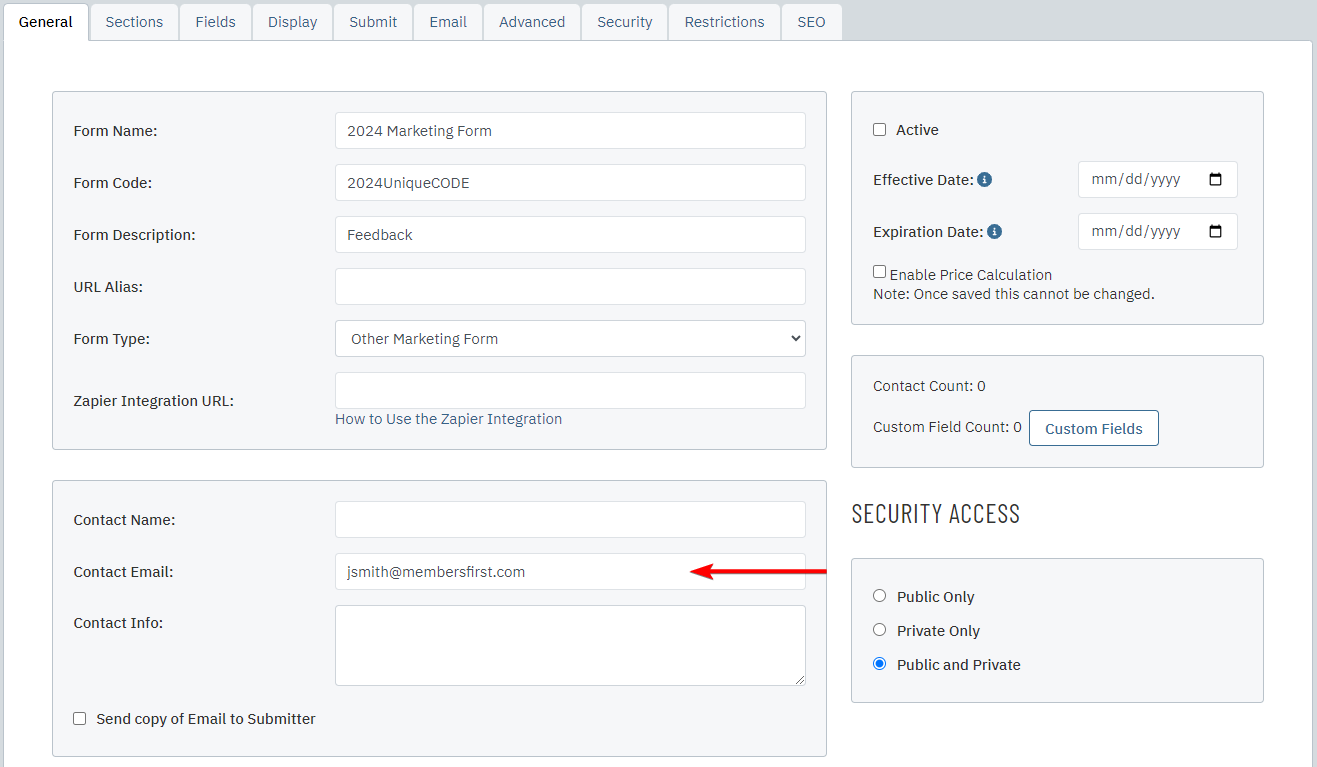
Enter the Contact EMail.
The email address entered here will receive an email when a new submission has been made. If using more than one email address, please separate them with a semi-colon and no spaces. [email protected];[email protected] |
 |
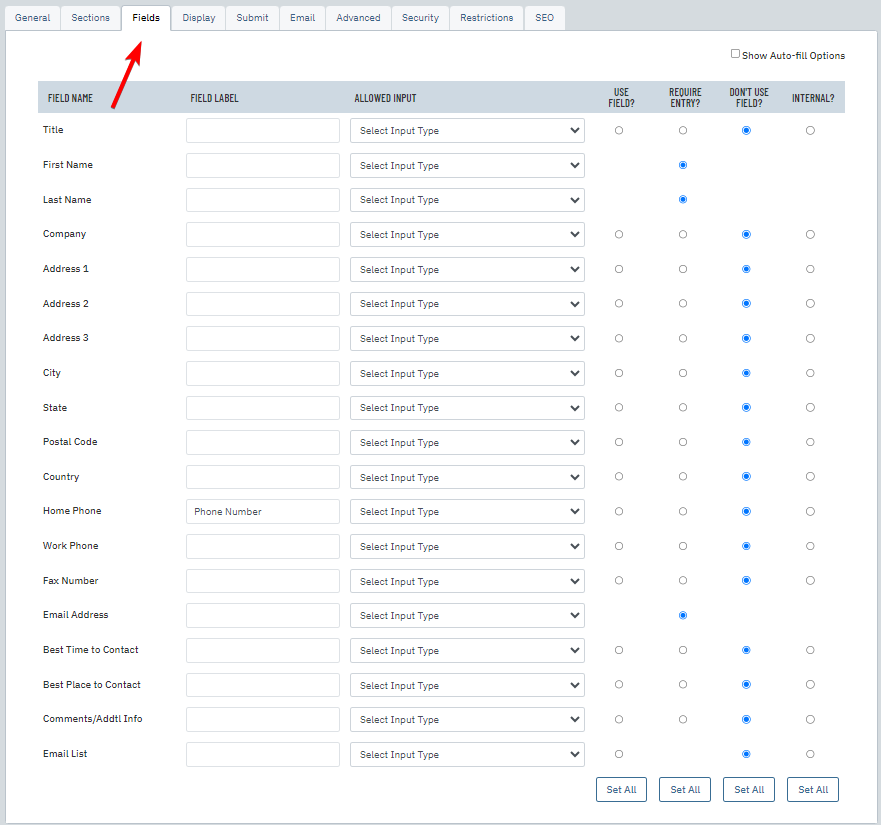
Click the Fields tab. Here you can change the settings for the default fields in our system.
If you want to change the name of one of these fields, then enter the new name in the Field Label column. |
 |
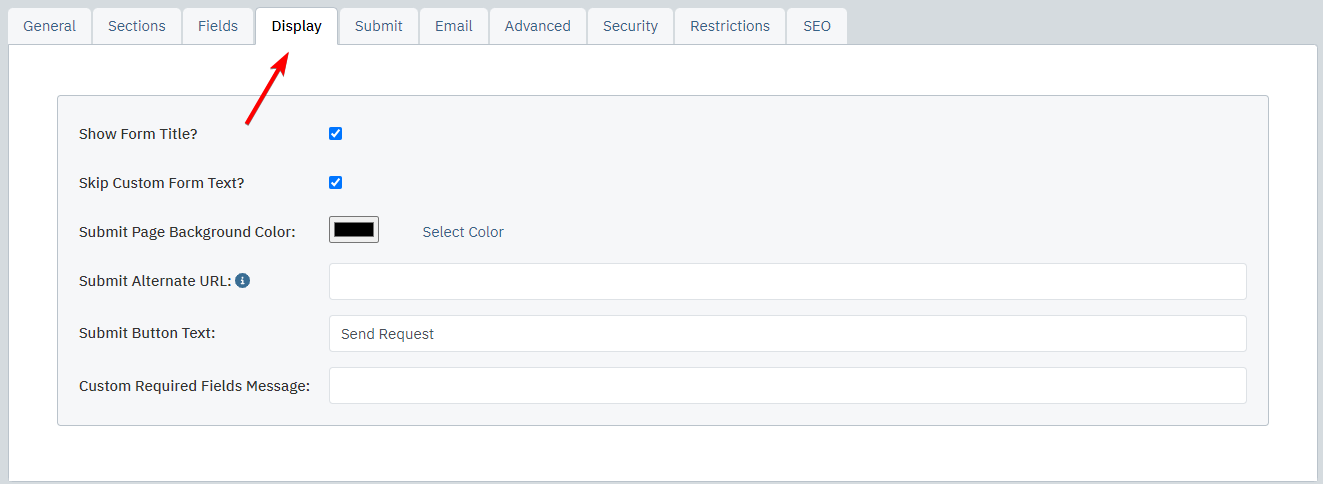
Click the Display tab.
If you want to enter a custom message that users will see after submitting the form, then uncheck the Use Standard Submit Process box. Then click the Submit tab and enter your own message. |
 |
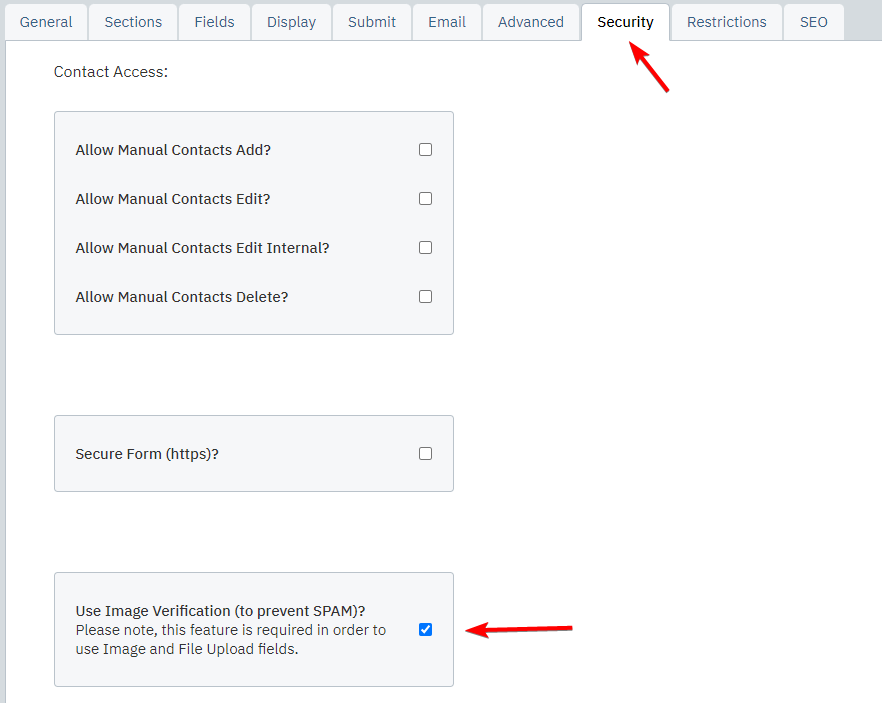
Click the Security tab. Here you can change the form's security settings.
We recommend checking Use Image Verification if you are going to display the form on the public side of your site. This setting will help prevent spam. |
 |
| Click back to the General tab. |
 |
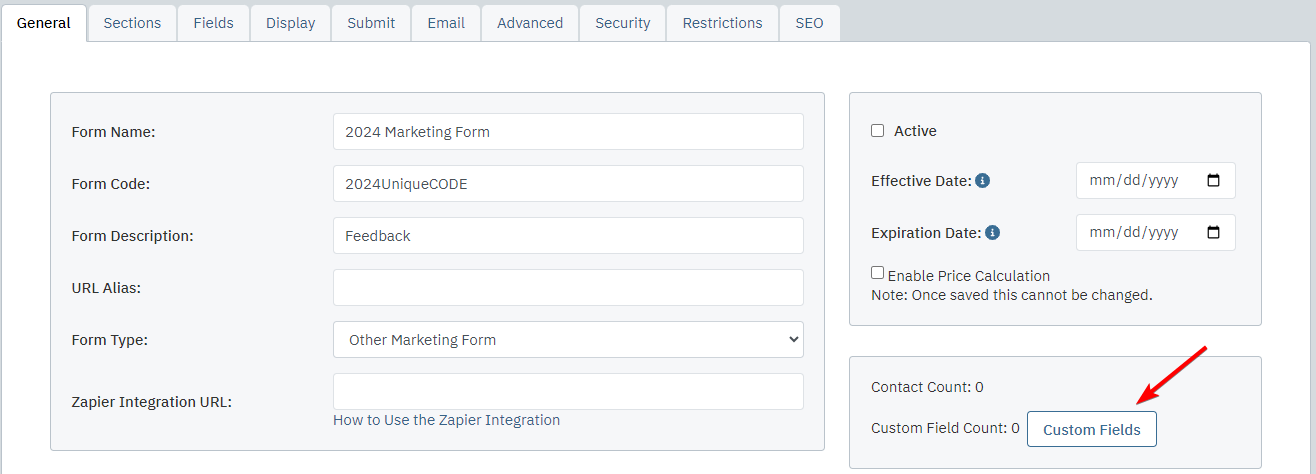
If you want to add custom fields to the form, then click Custom Fields.
A pop up will appear to ask you if you want to save your changes, click OK. |
 |
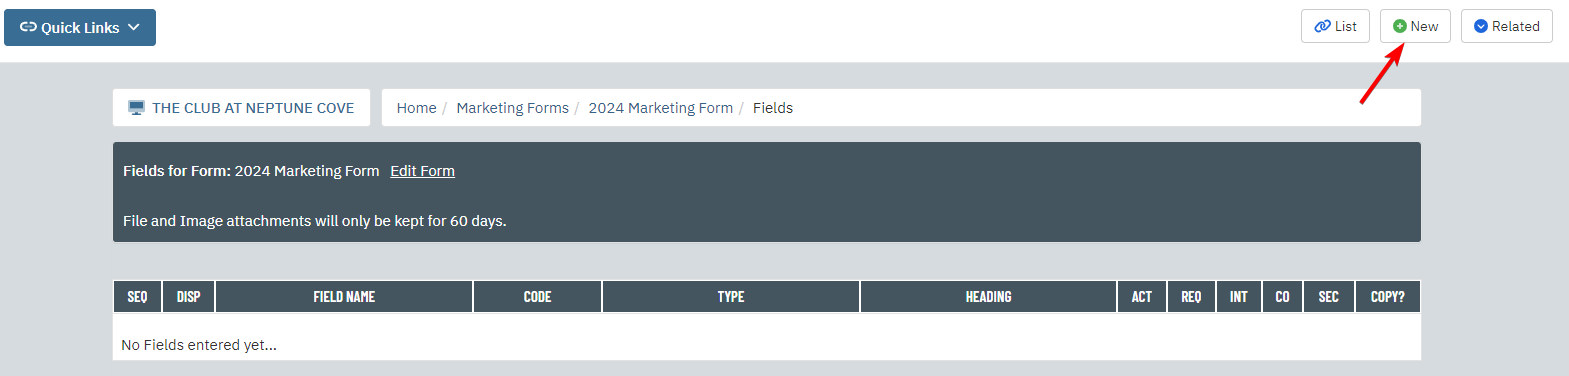
Click New to begin creating a new field.
A "Create" box will appear below the list of fields. |
 |
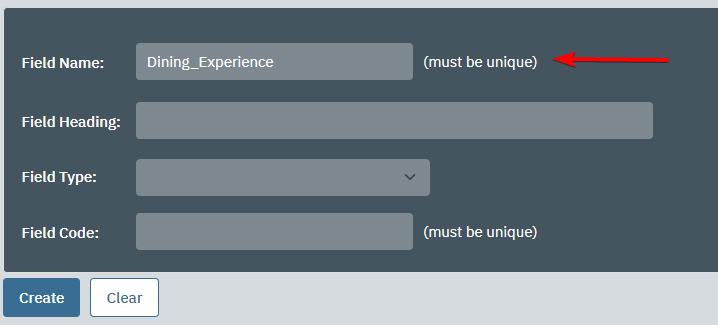
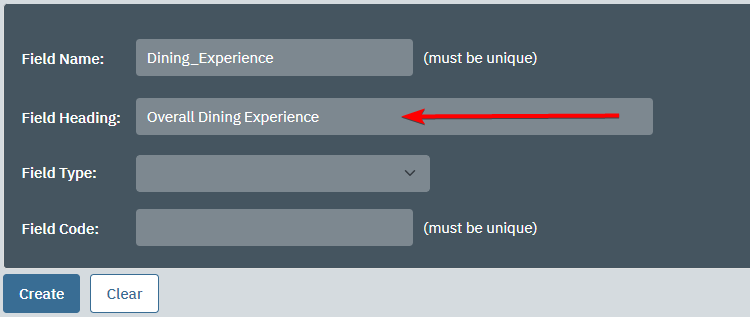
Enter a short description of the field into the Field Name field.
The field name is used to identify this field in the list above. |
 |
| In the Field Heading field, enter the heading which will be displayed on the form page for users. |
 |
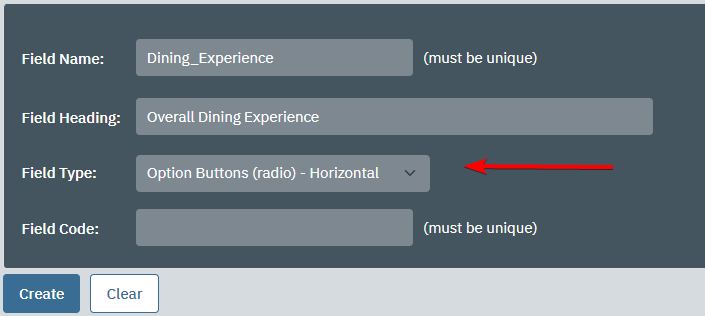
| Use the Field Type dropdown menu to select the type of field you want to create. |
 |
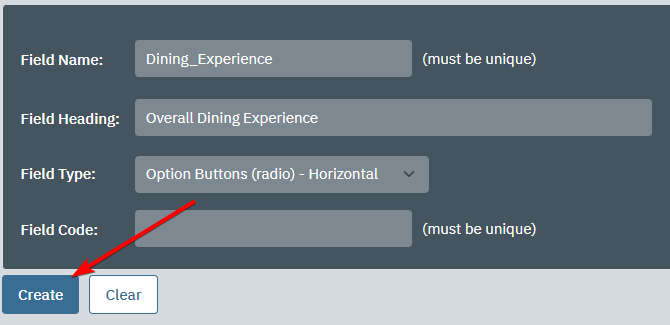
| Click Create Now. |
 |
Depending on the field type you selected, you may need to enter options for users to pick from.
If this is the case, then enter an option in the text field under Add Option and then click Add. Repeat this process for each option. |
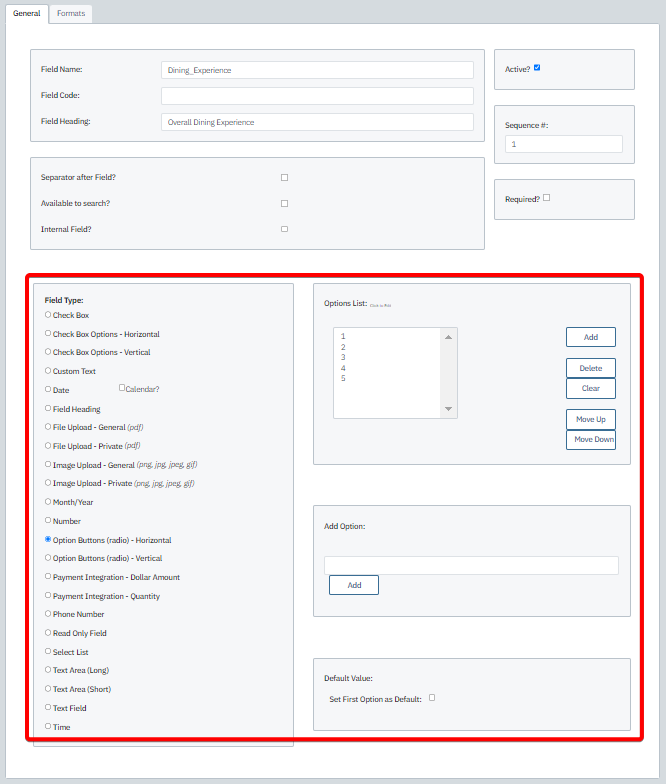 |
| Change the Sequence # if you want to reorder the fields. By default this will be set to be one more than the previous highest sequence number, so the field will appear last. |
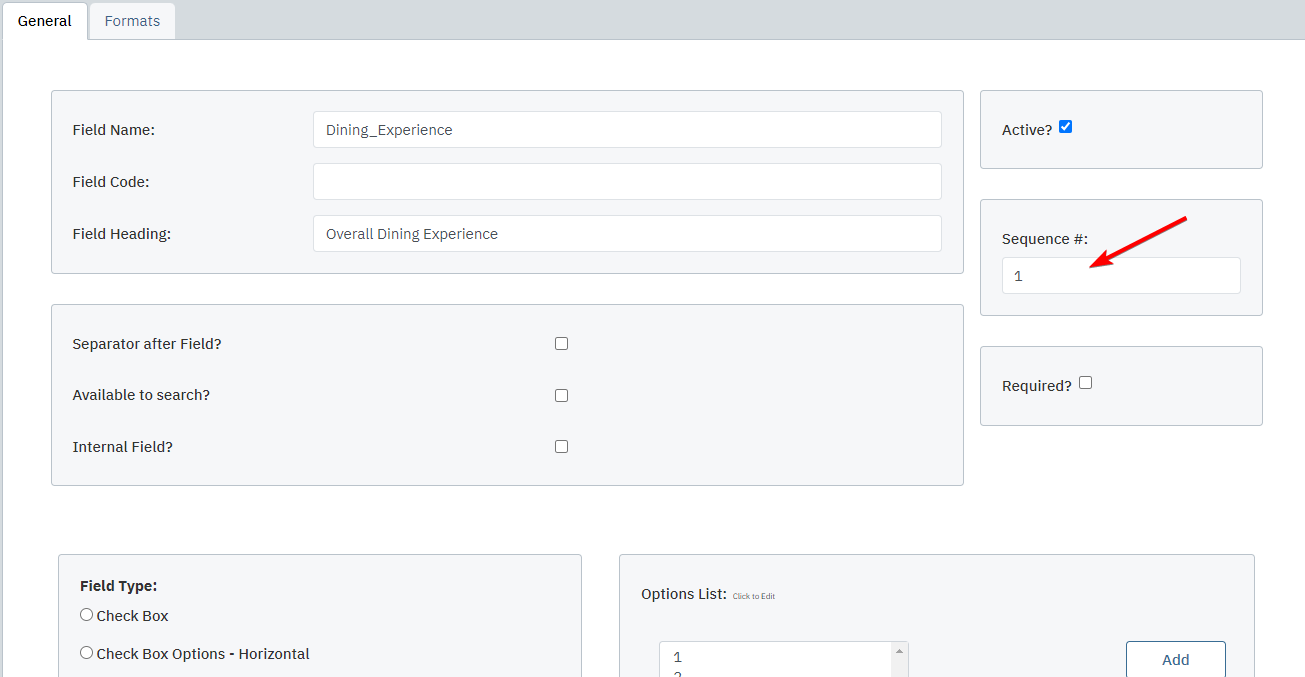 |
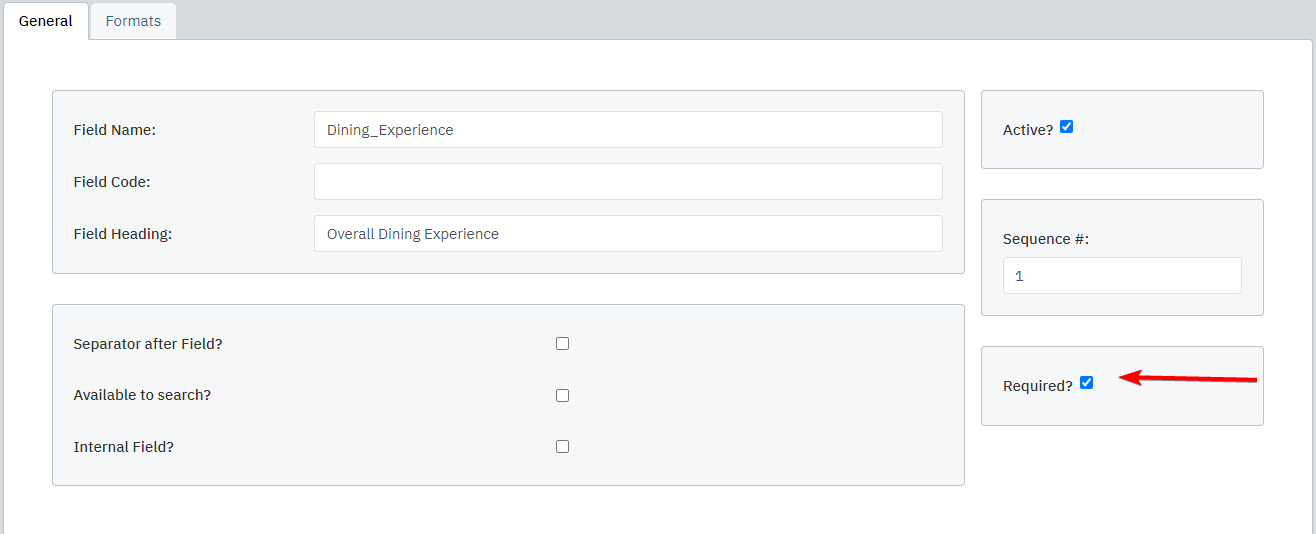
| Check the Required box if you want to make this a required field. |
 |
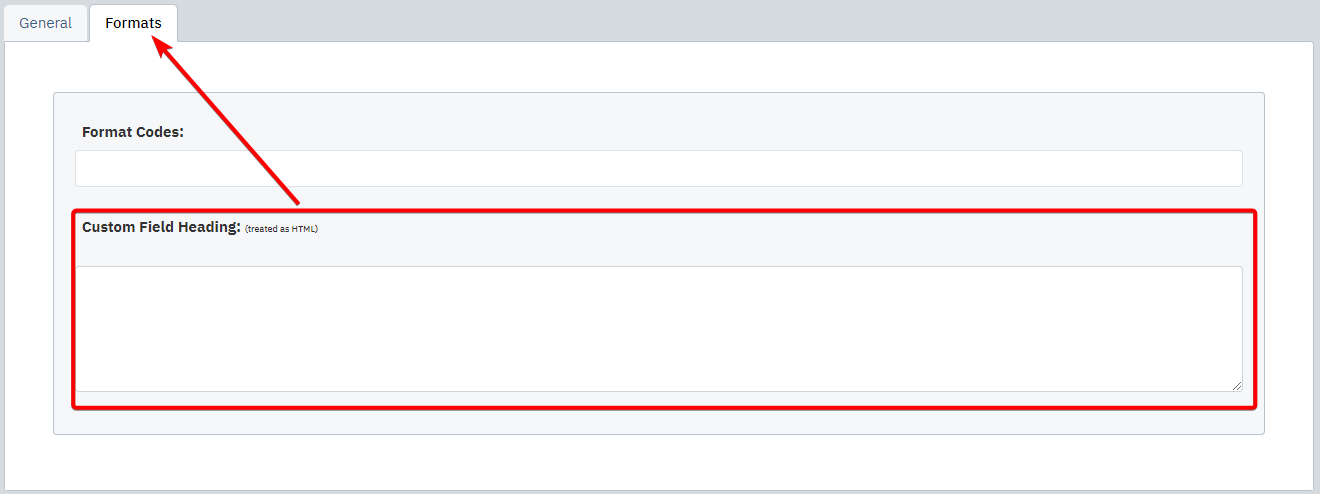
If the field should have a long heading, then click the Formats tab and enter the heading into the Custom Field Heading field.
This field will override Field Heading from the General tab. |
 |
| Click Save to save your changes to the custom field. |
 |
| Repeat steps 15-24 for each custom field. |
|
Once you have created all of your custom fields, click Edit Form to return to the form edit page.
You do not need to save changes when leaving the Custom Fields page. Changes are saved as soon as you click Create Now when creating a field, Save when editing a field, or OK when deleting a field. |
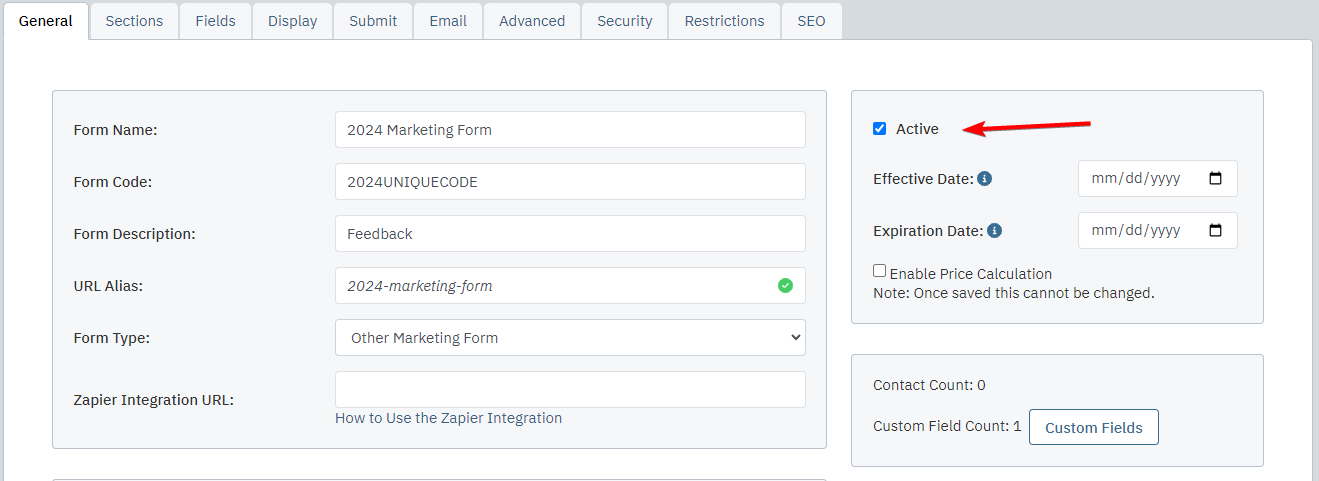 |
| Return to the General tab and check the Active box. |
 |
| Click Save & Close to finalize you work. |
 |