How to Check In Event Attendees
This is the fifth article in a series on how to set up billing for your events. To continue to the next article, click here for Jonas Encore » or click here for Jonas JCM »
On the day of the event, club employees can easily check in members and guests from any workstation or tablet device. Employees can also make registration changes on the fly, changing billing items for specific individuals or the entire party if necessary. If a member or guest isn't registered, employees can quickly add a new registration from the same screen.
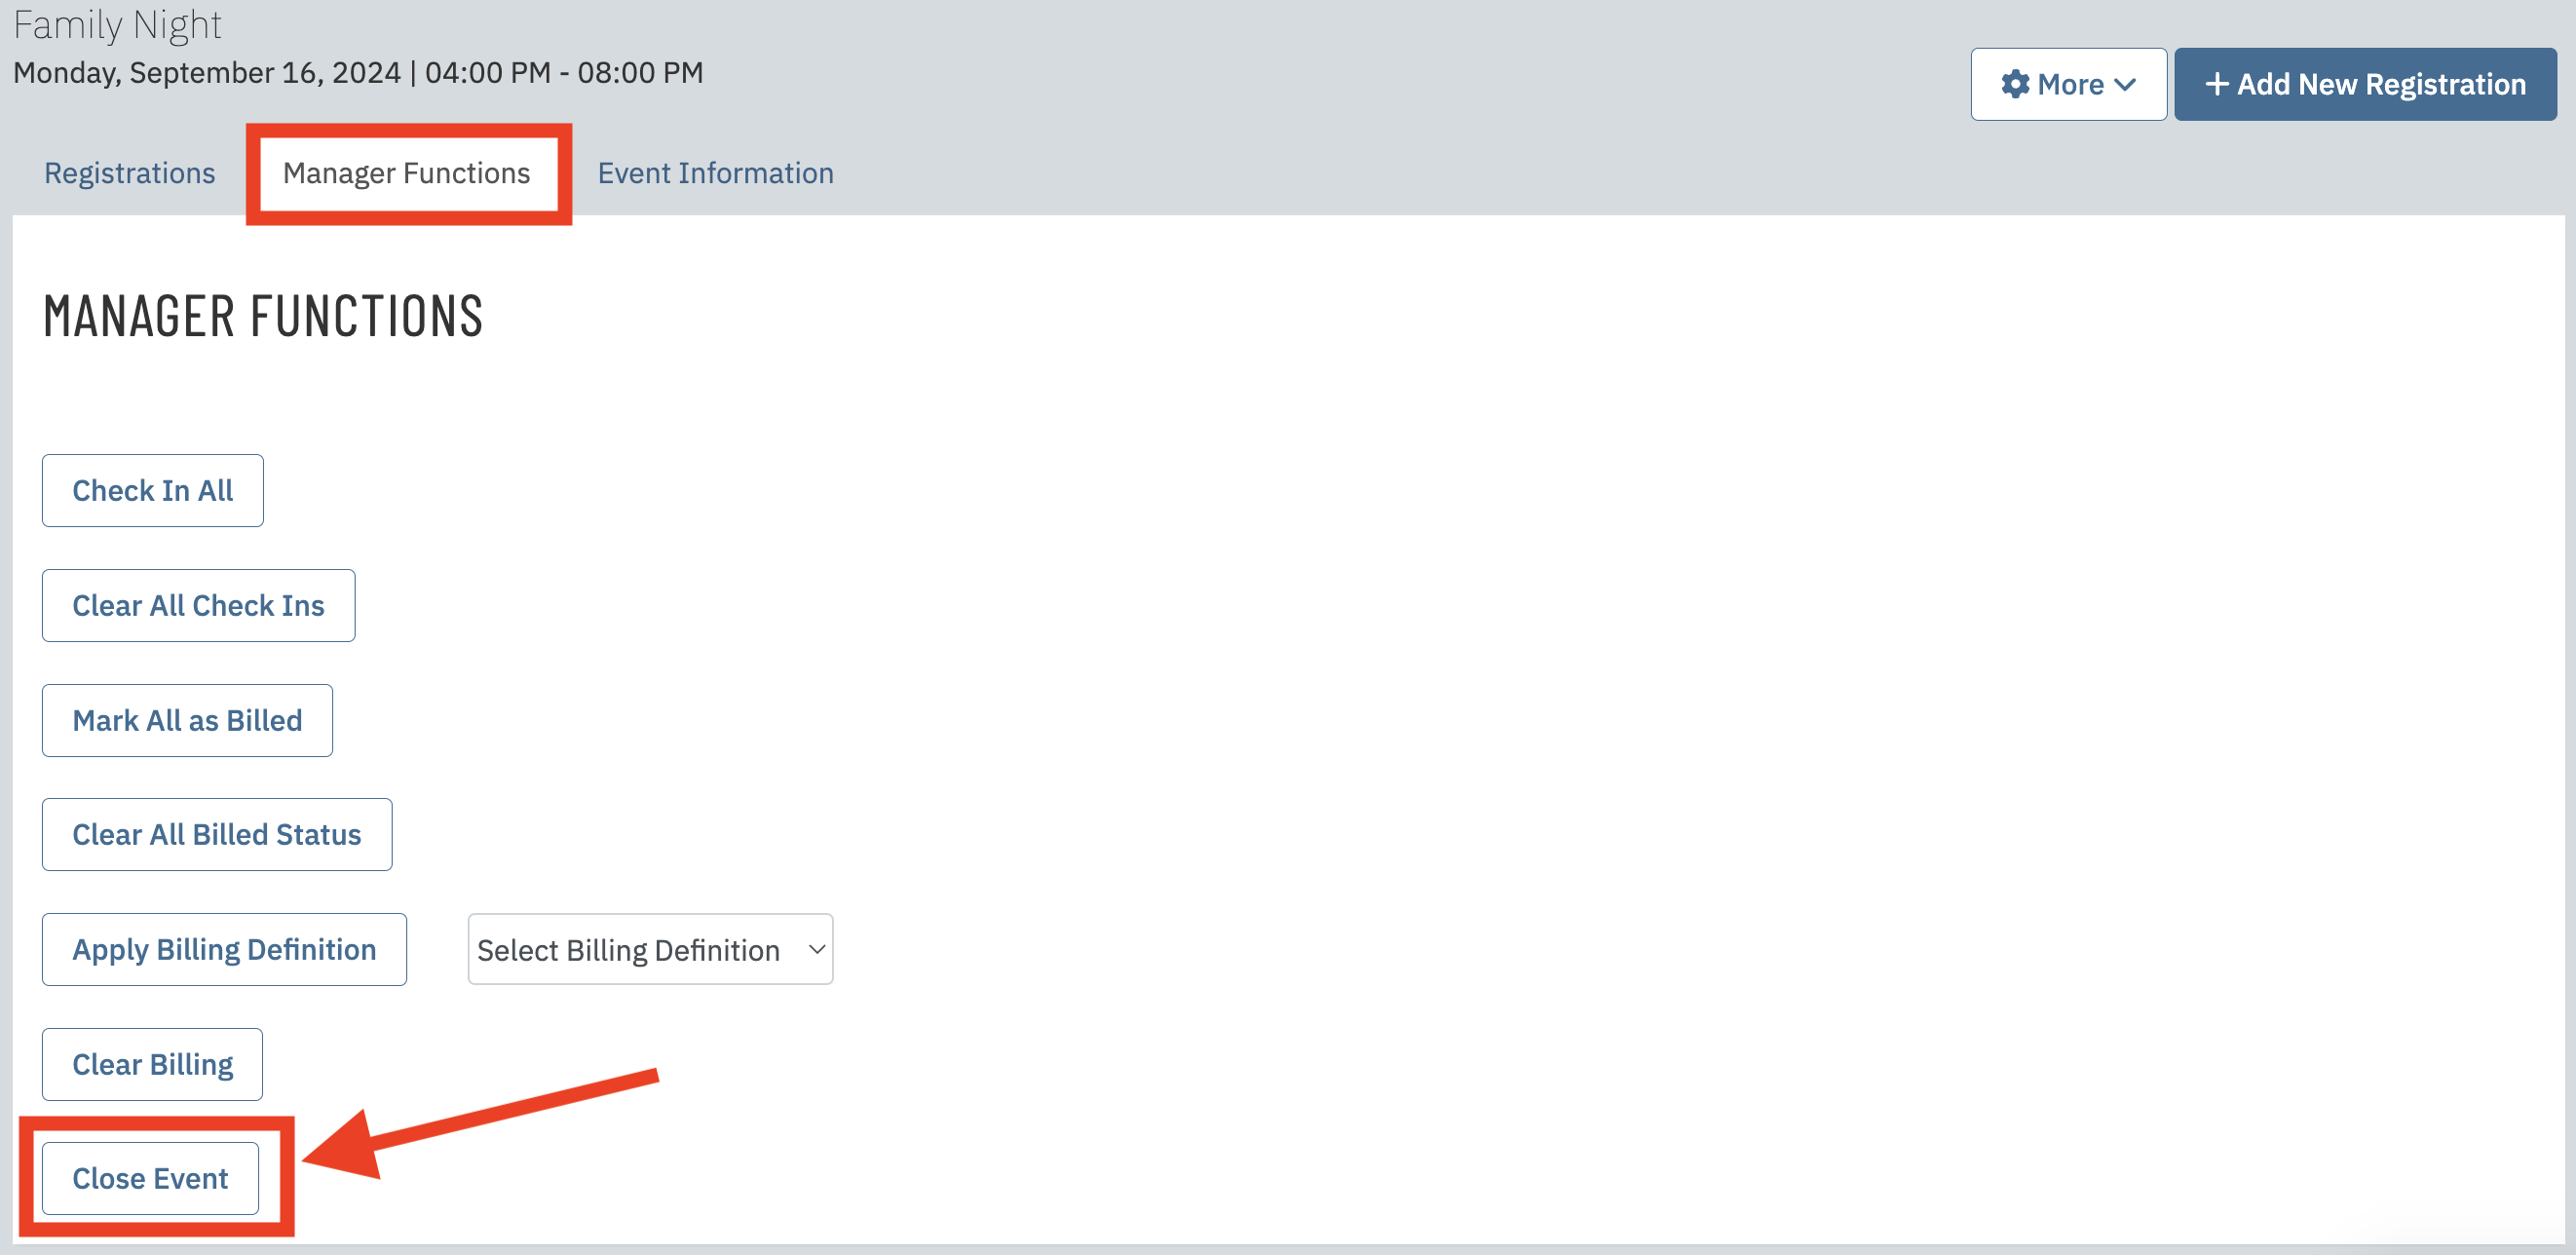
Additional options exist to those with manager permissions, such as the ability to clear, set, or change the billing for the entire event and close the event to prevent further registrations or check-ins. These actions are available from the Manager Functions tab.
Once the check-in process is complete, the same page is used to export the billing file that will be brought over to the POS system.
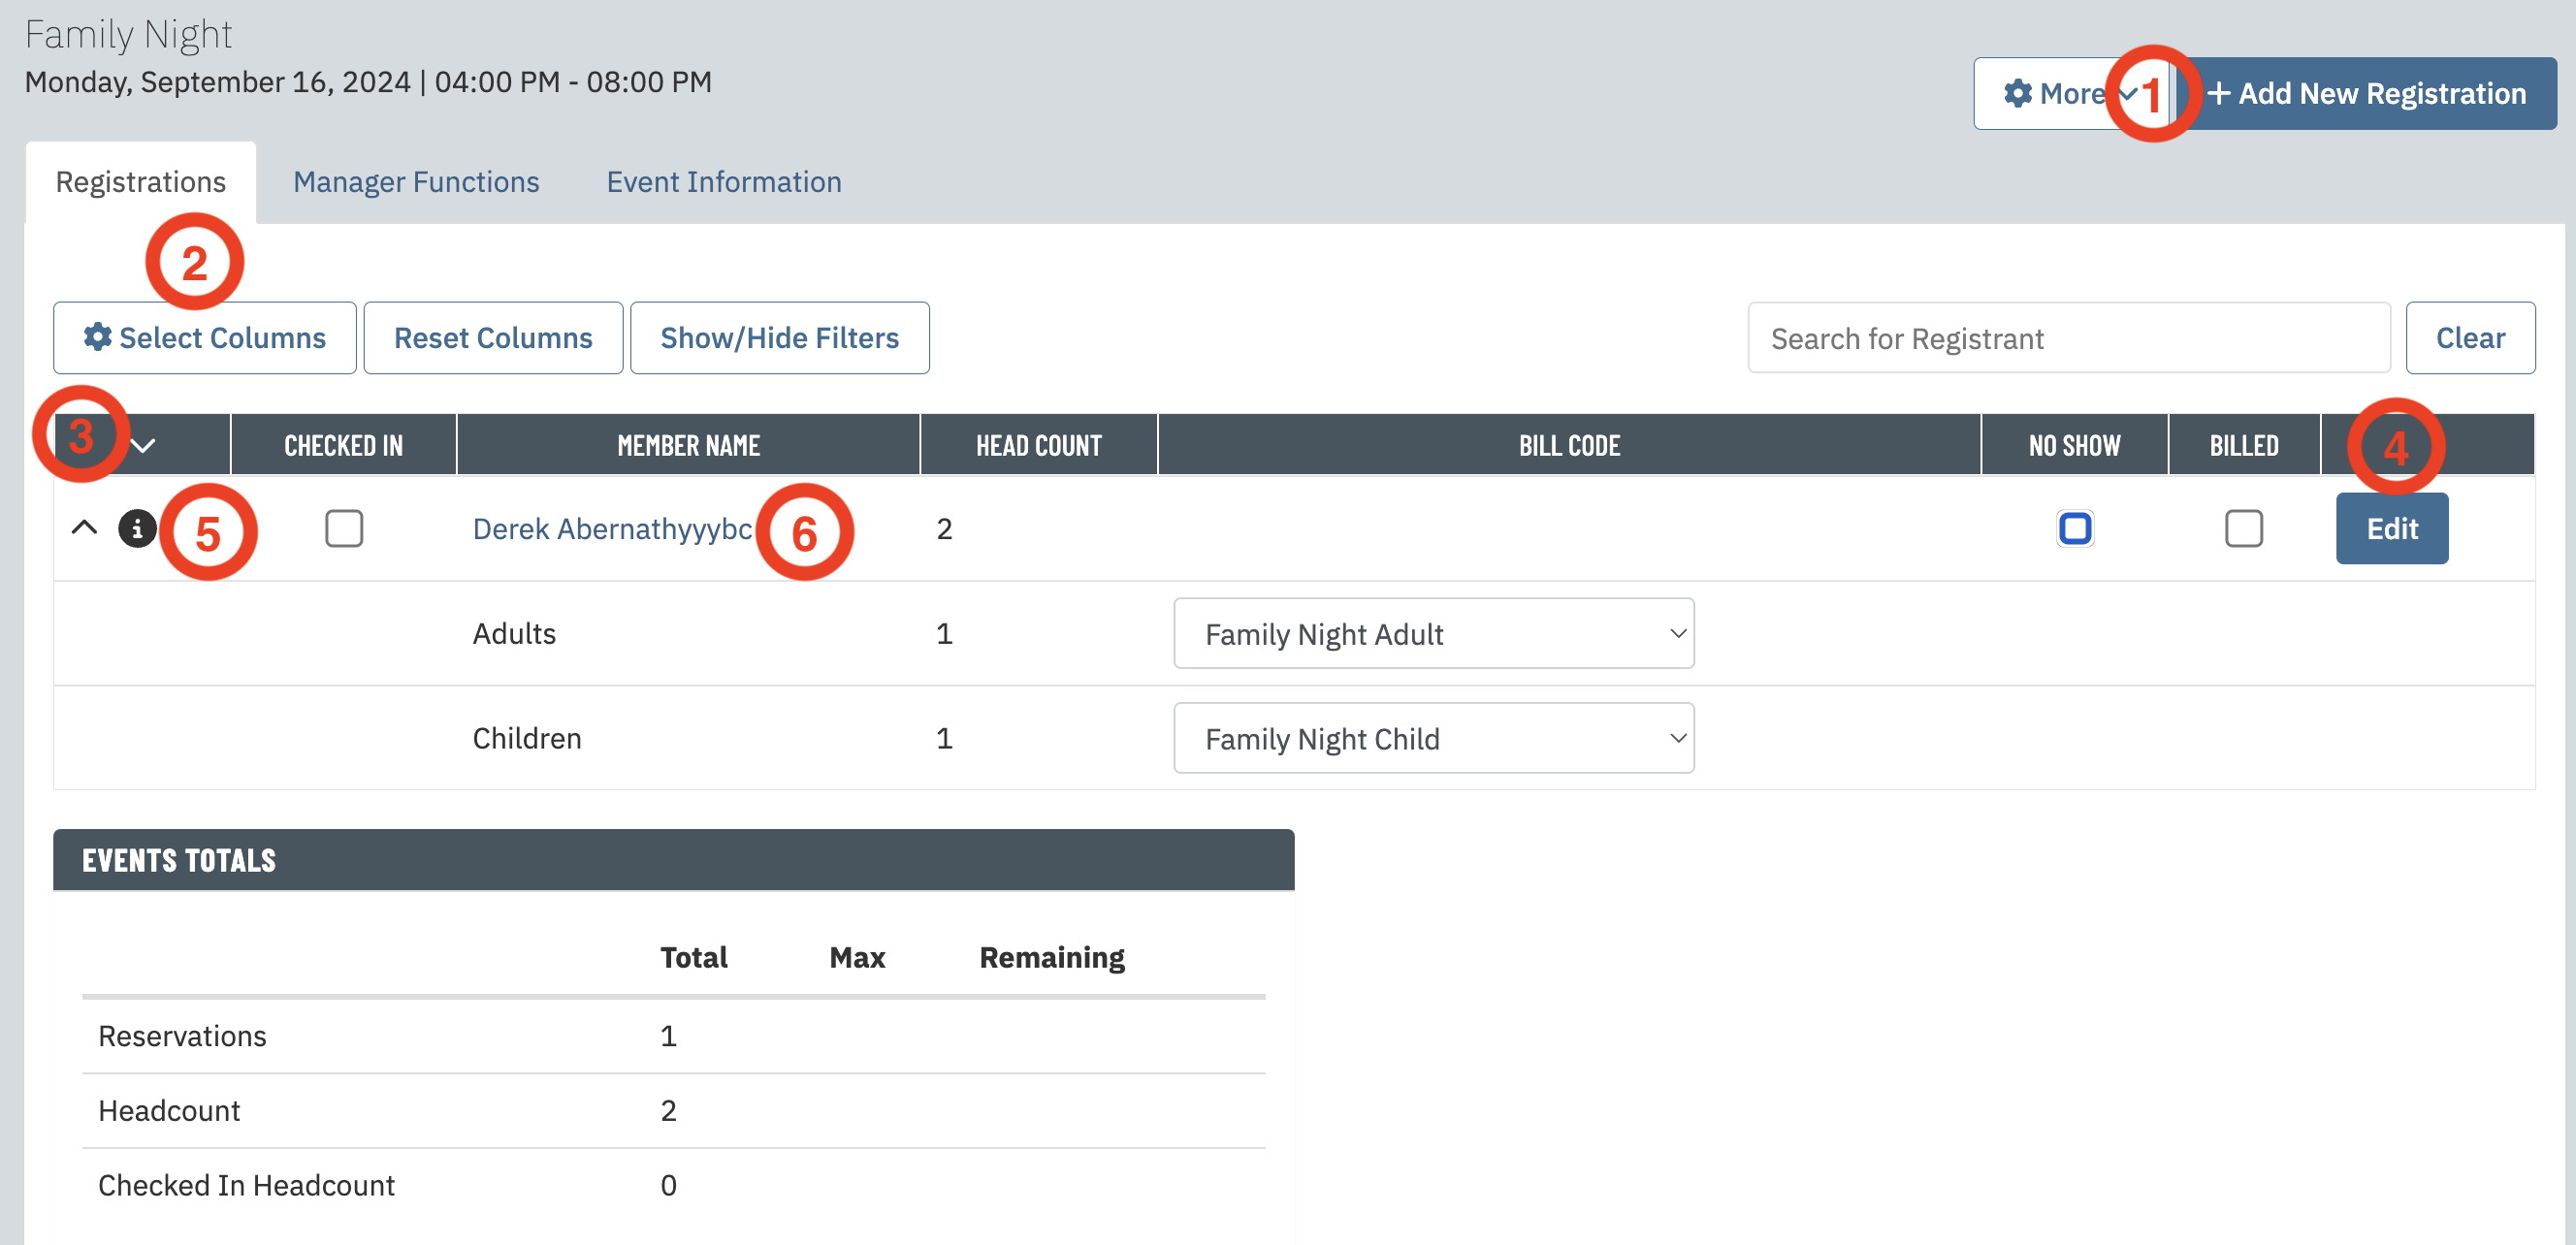
| Go to Applications > Billing > Event Check-in and select the name of your event from the Event Selection search/dropdown menu. |  |
| Locate the name of the member or guest you need to check in. You can also use the search field to quickly find their name. | 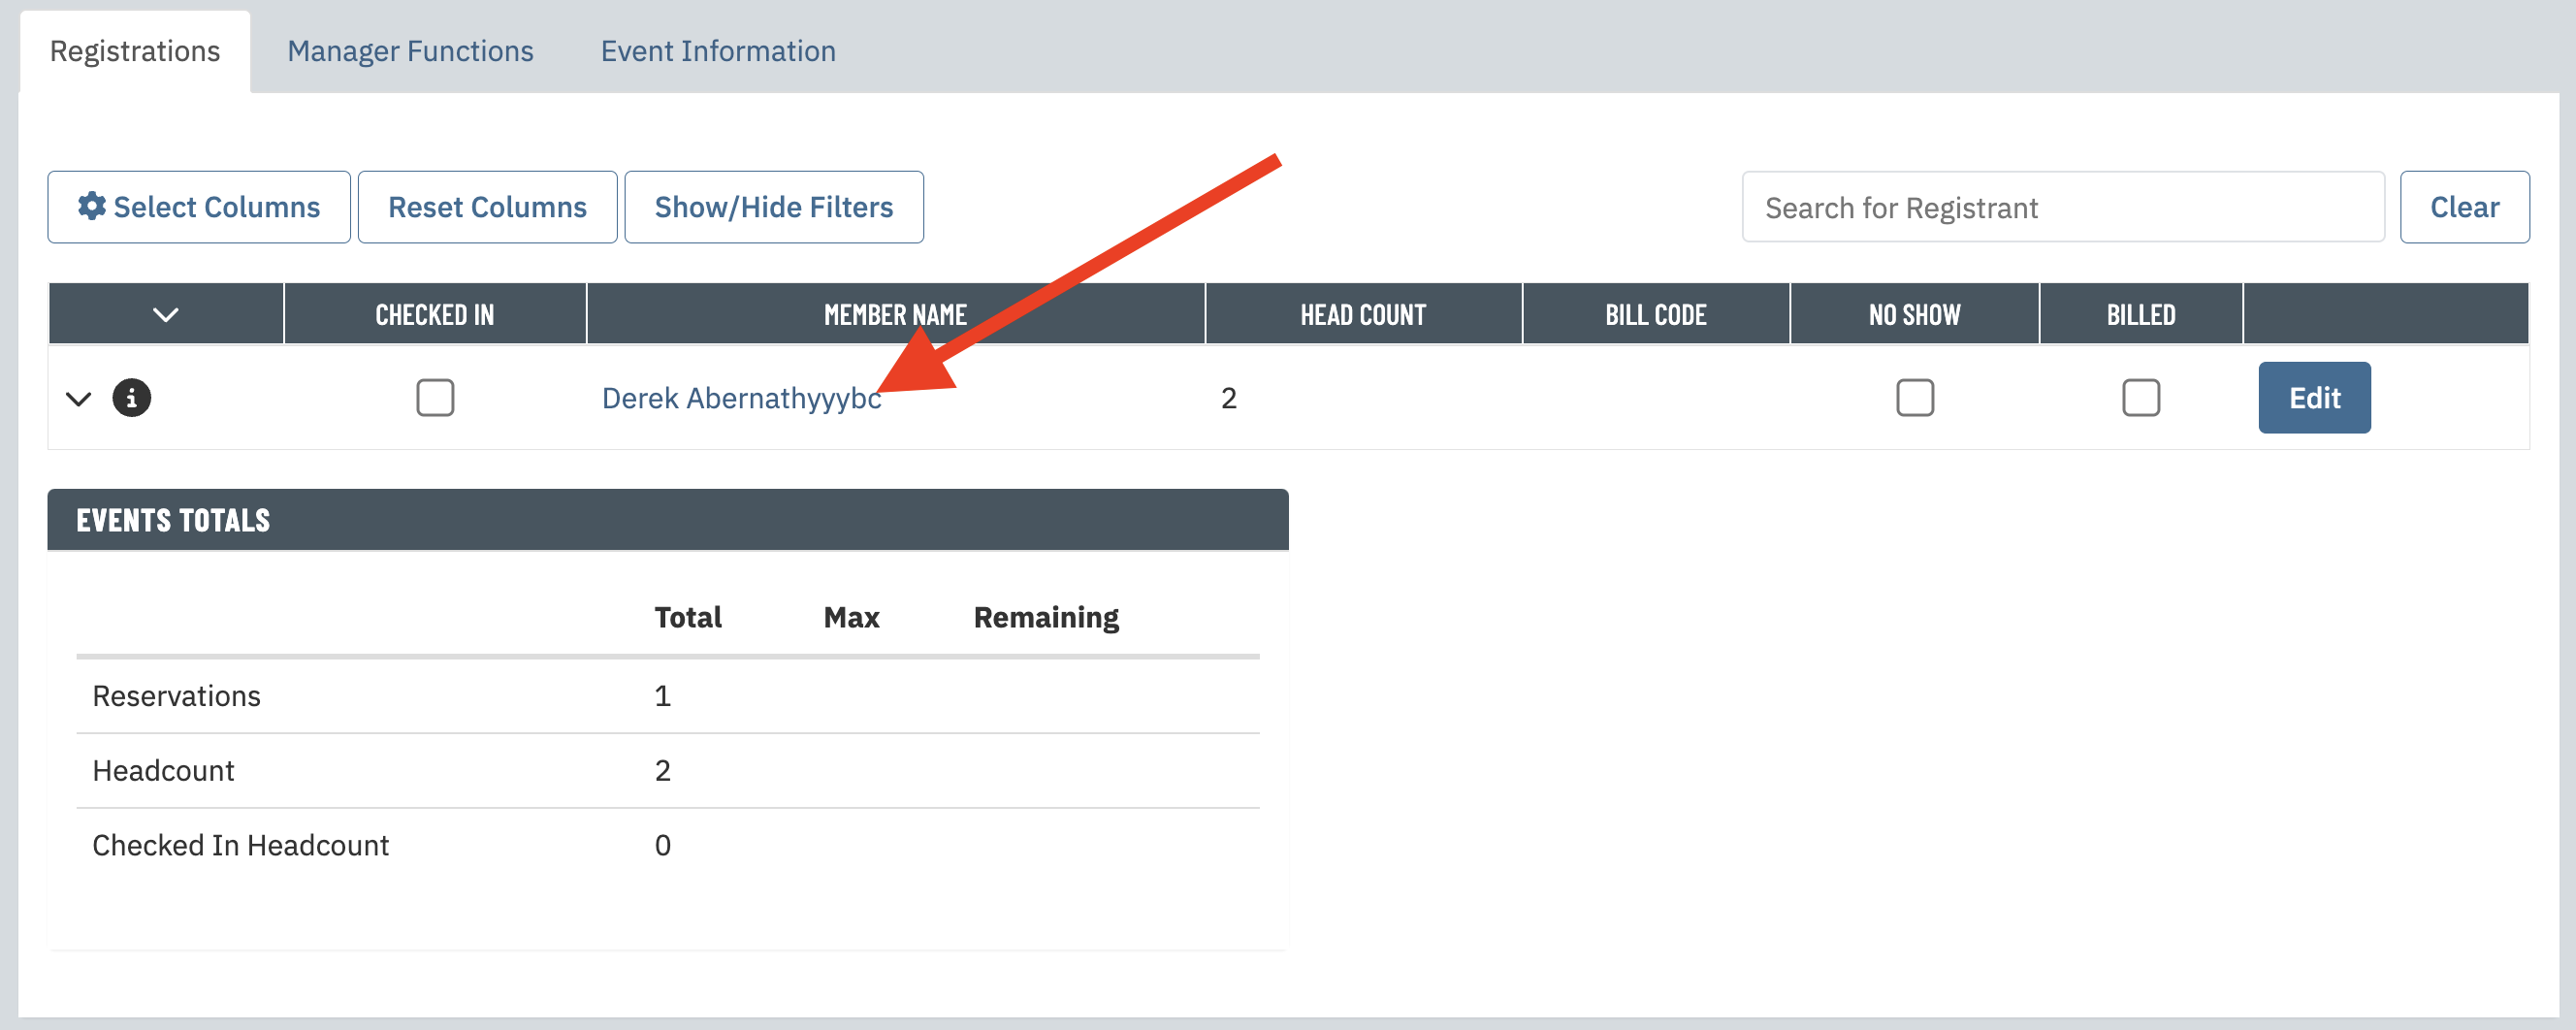 |
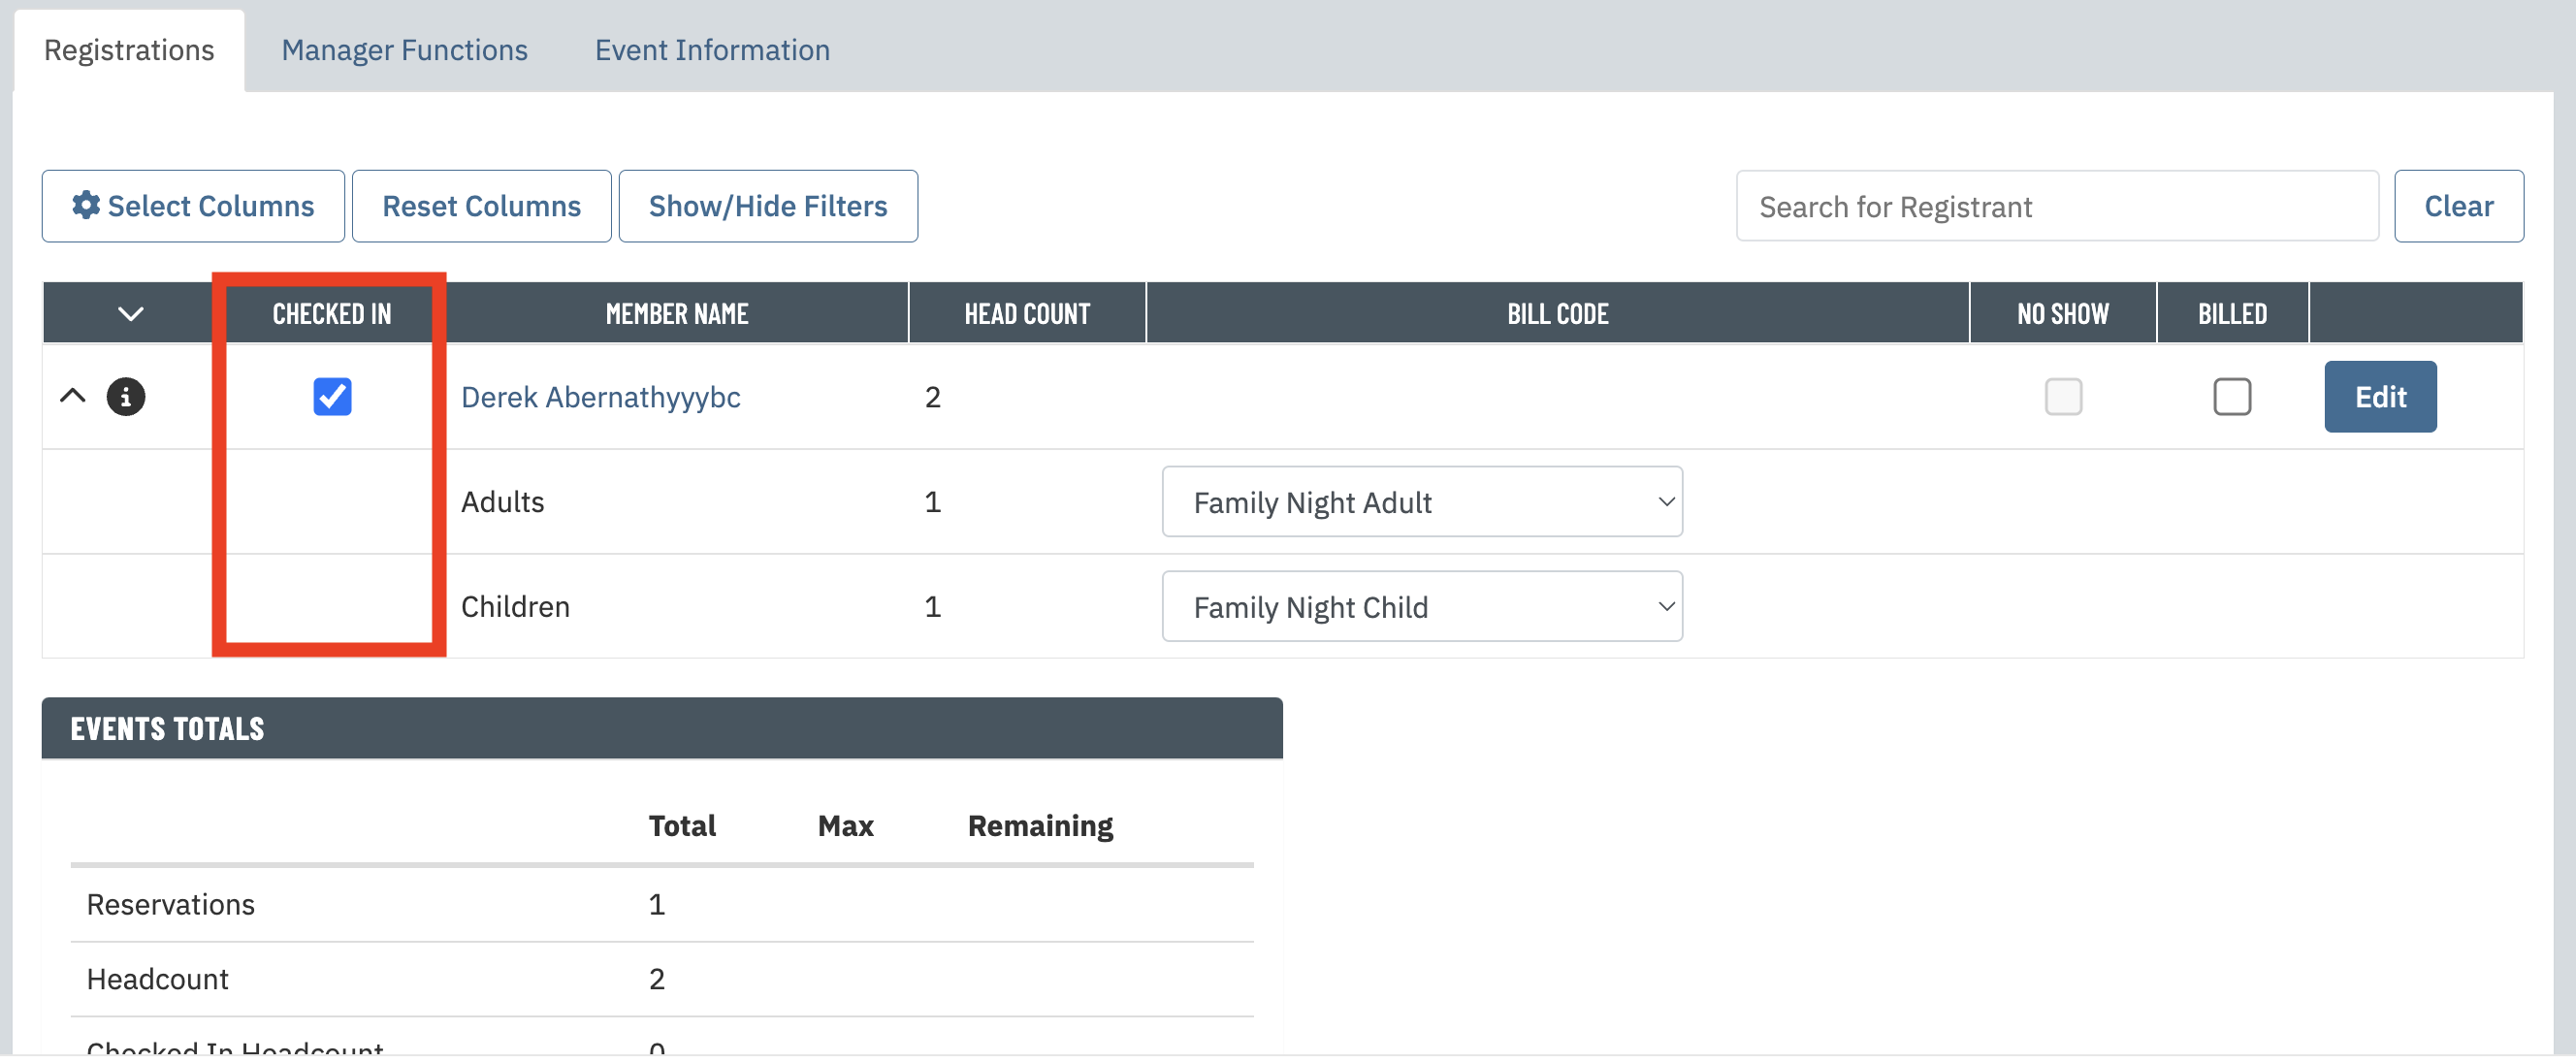
| Flag the checkbox in the "Checked In" column beside the member’s name to check them in. You can quickly check in an entire party by flagging the box beside the booking member’s name. If anyone from the party is not present, you can un-flag the checkbox beside their name without affecting the rest of the registration.
Note: If you need to add or remove individuals from an existing registration, click the Edit button to alter their registration. |
 |
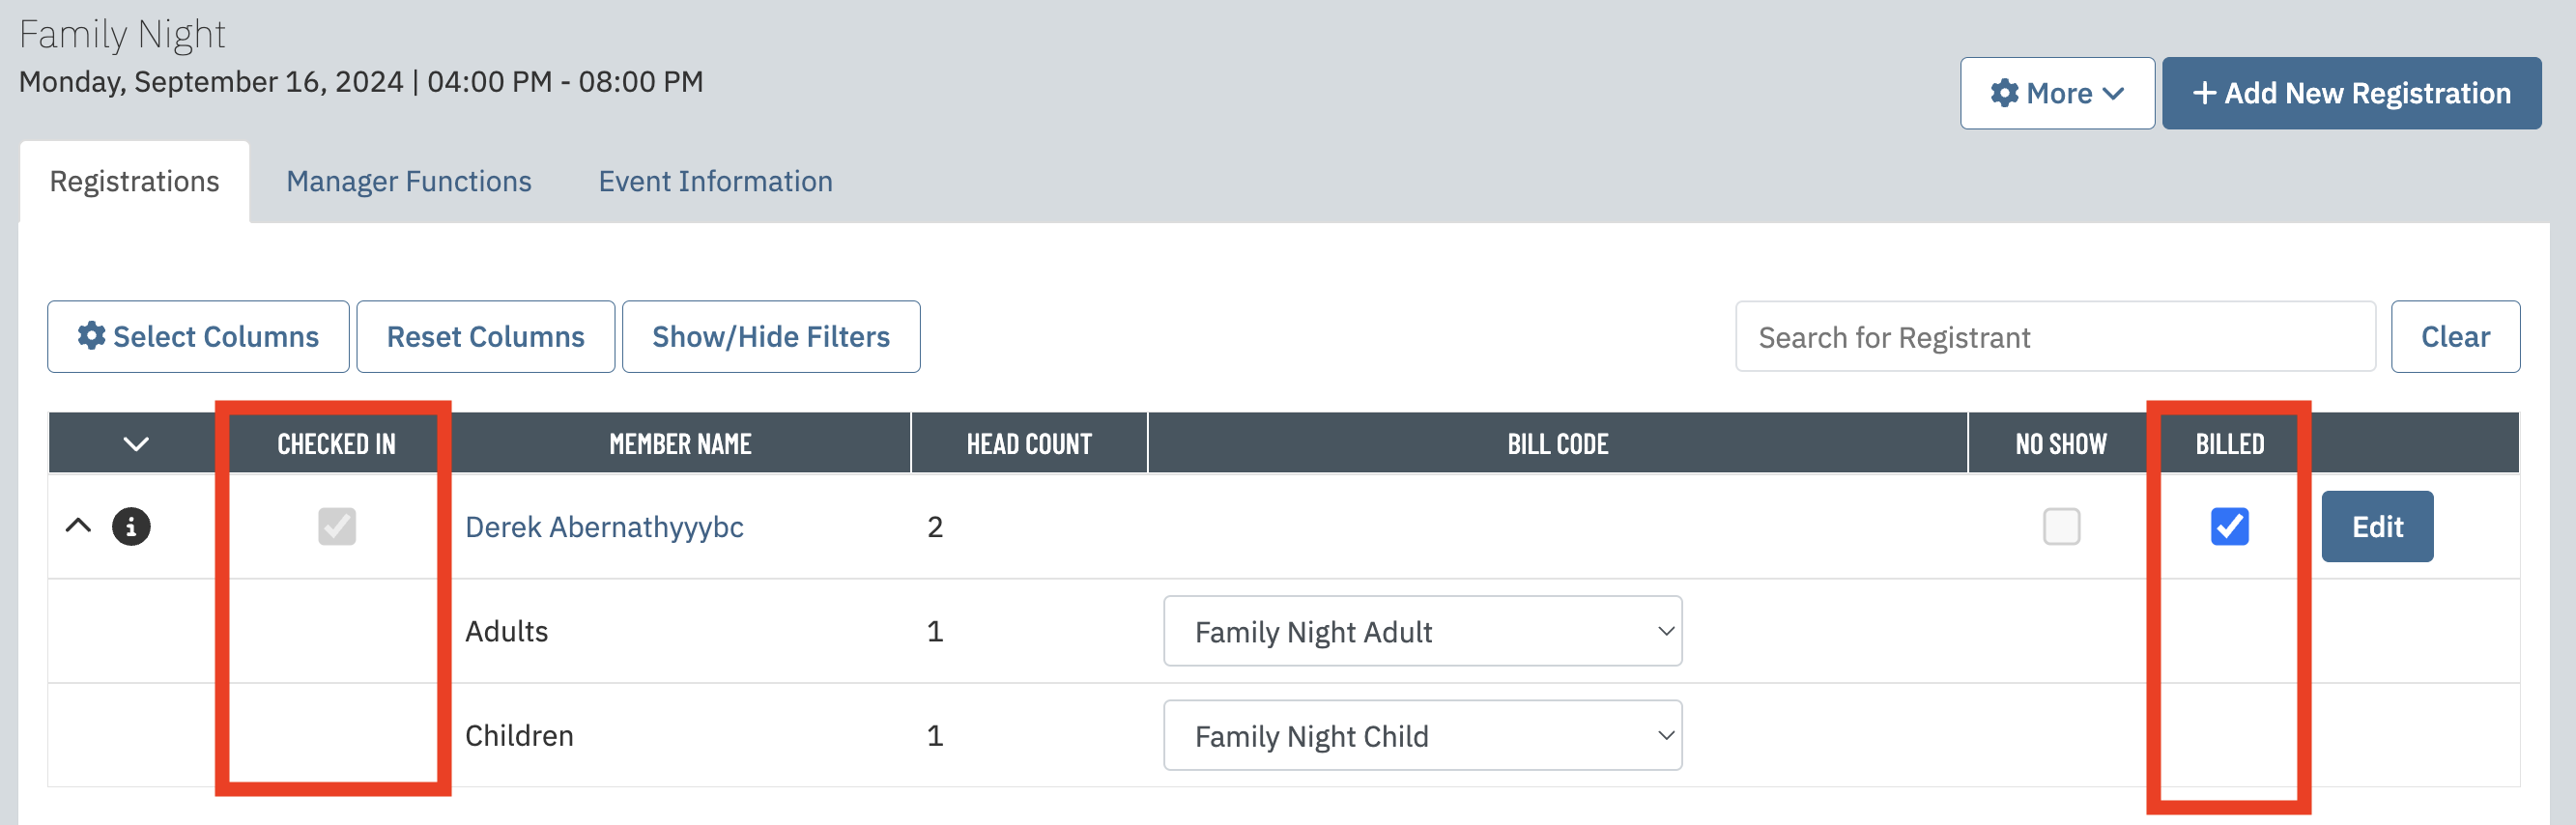
After the check-in process is completed, registrants who didn't get checked in can be marked as a no show by selecting the checkbox in the "No Show" column. Those marked as no shows will also be included in the exported billing file. Note: If you don't see the "No Show" column, click on "Select Columns" and click the box for "No Show" to enable it for your check in view. | 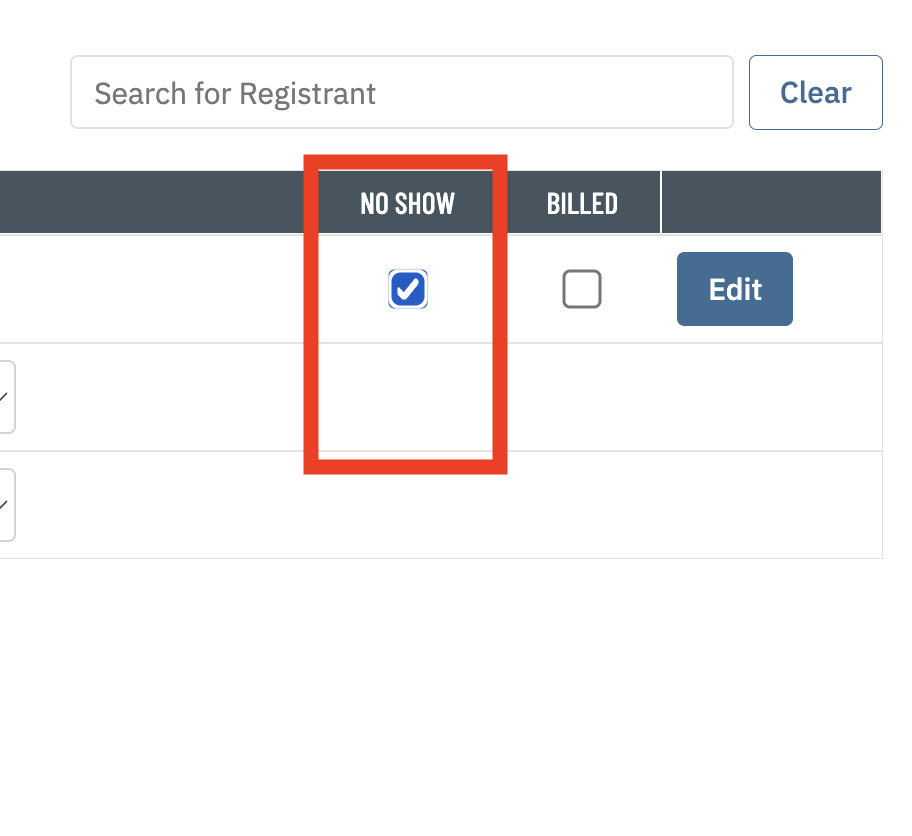 |
| Confirm that the billing codes are correct and use the dropdowns to update them if necessary. | 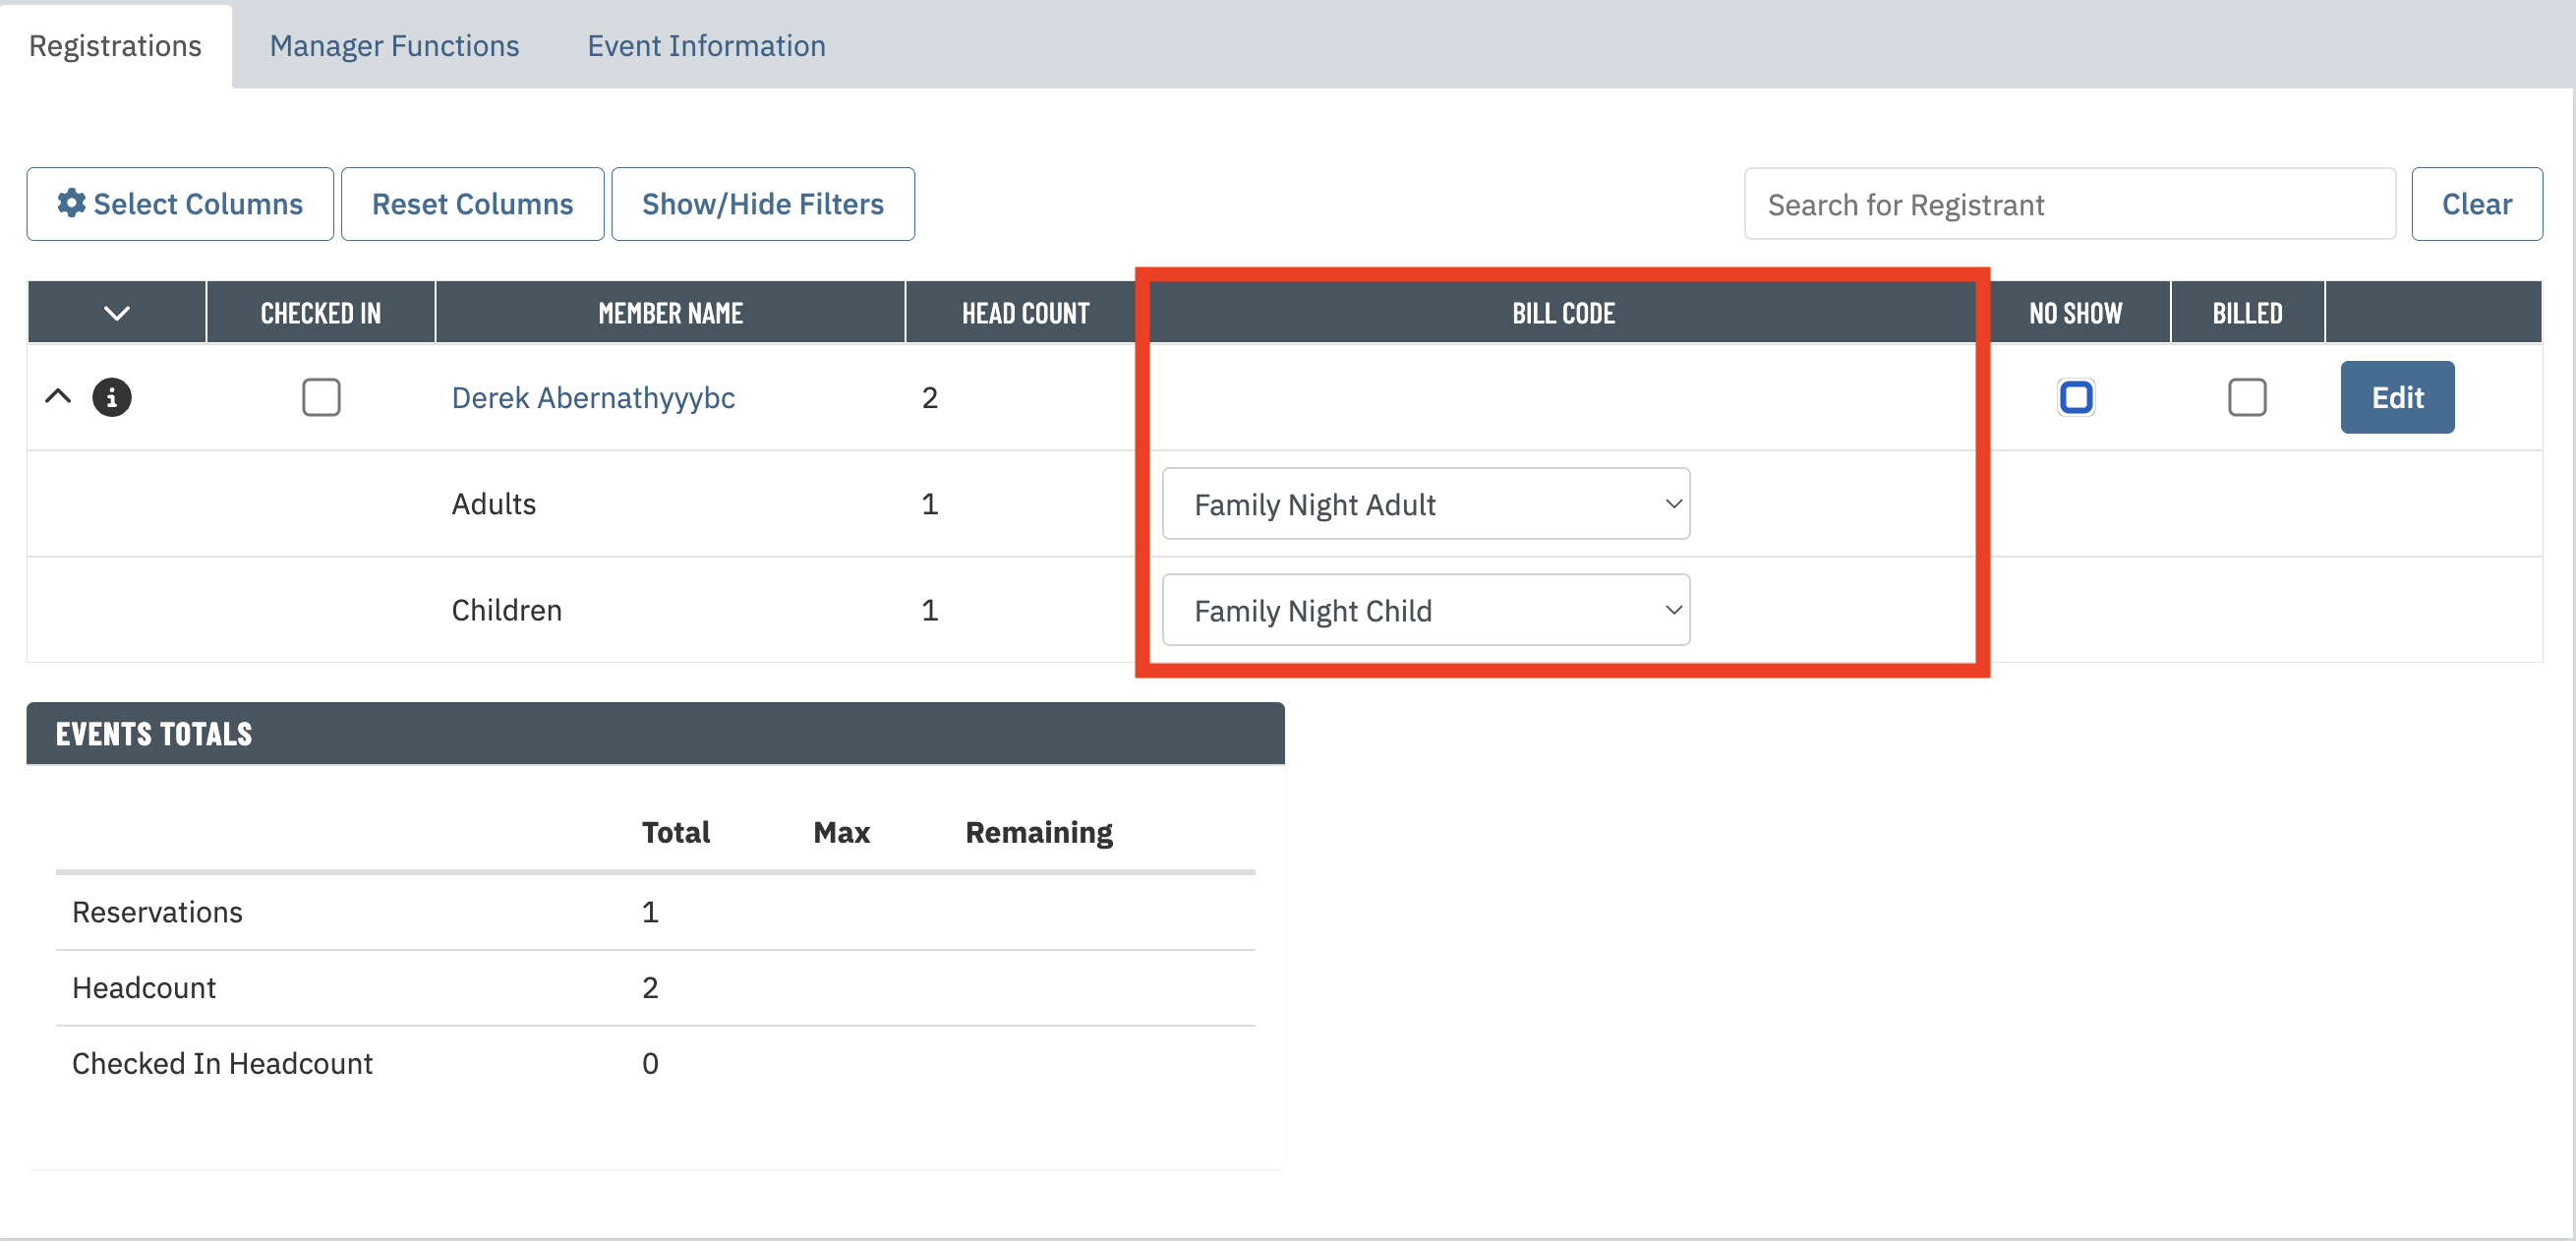 |
Other features of the Check-in page include:
|  |
Important: Only registrants who have been marked as "Checked In" or "No Show" but have not yet been marked as "Billed" will be included in the exported billing file. Tip: Marking a registrant as "Billed" is an indication to the system that they've already paid or been charged. This status can be used to export the billing in separate batches if desired.
|  |
Once an event has ended and all attendees have been checked in, Managers have the option of closing the event by going to the Manager Functions tab and clicking Close Event. When an event is closed, no new registrations, modifications, or check-ins will be allowed. Managers can reopen events if additional changes are necessary. |
 |
Now we're ready to export the billing information into a file that can be imported into your POS system. From the More dropdown on the Check-In page, click Billing Export. |  |
This will direct you to the Billing Export Summary page, giving you an overview of all billing details to be included in your exported file. After final review, click the export button that corresponds with your POS system. This will download a file with all data formatted correctly for import into the POS. | 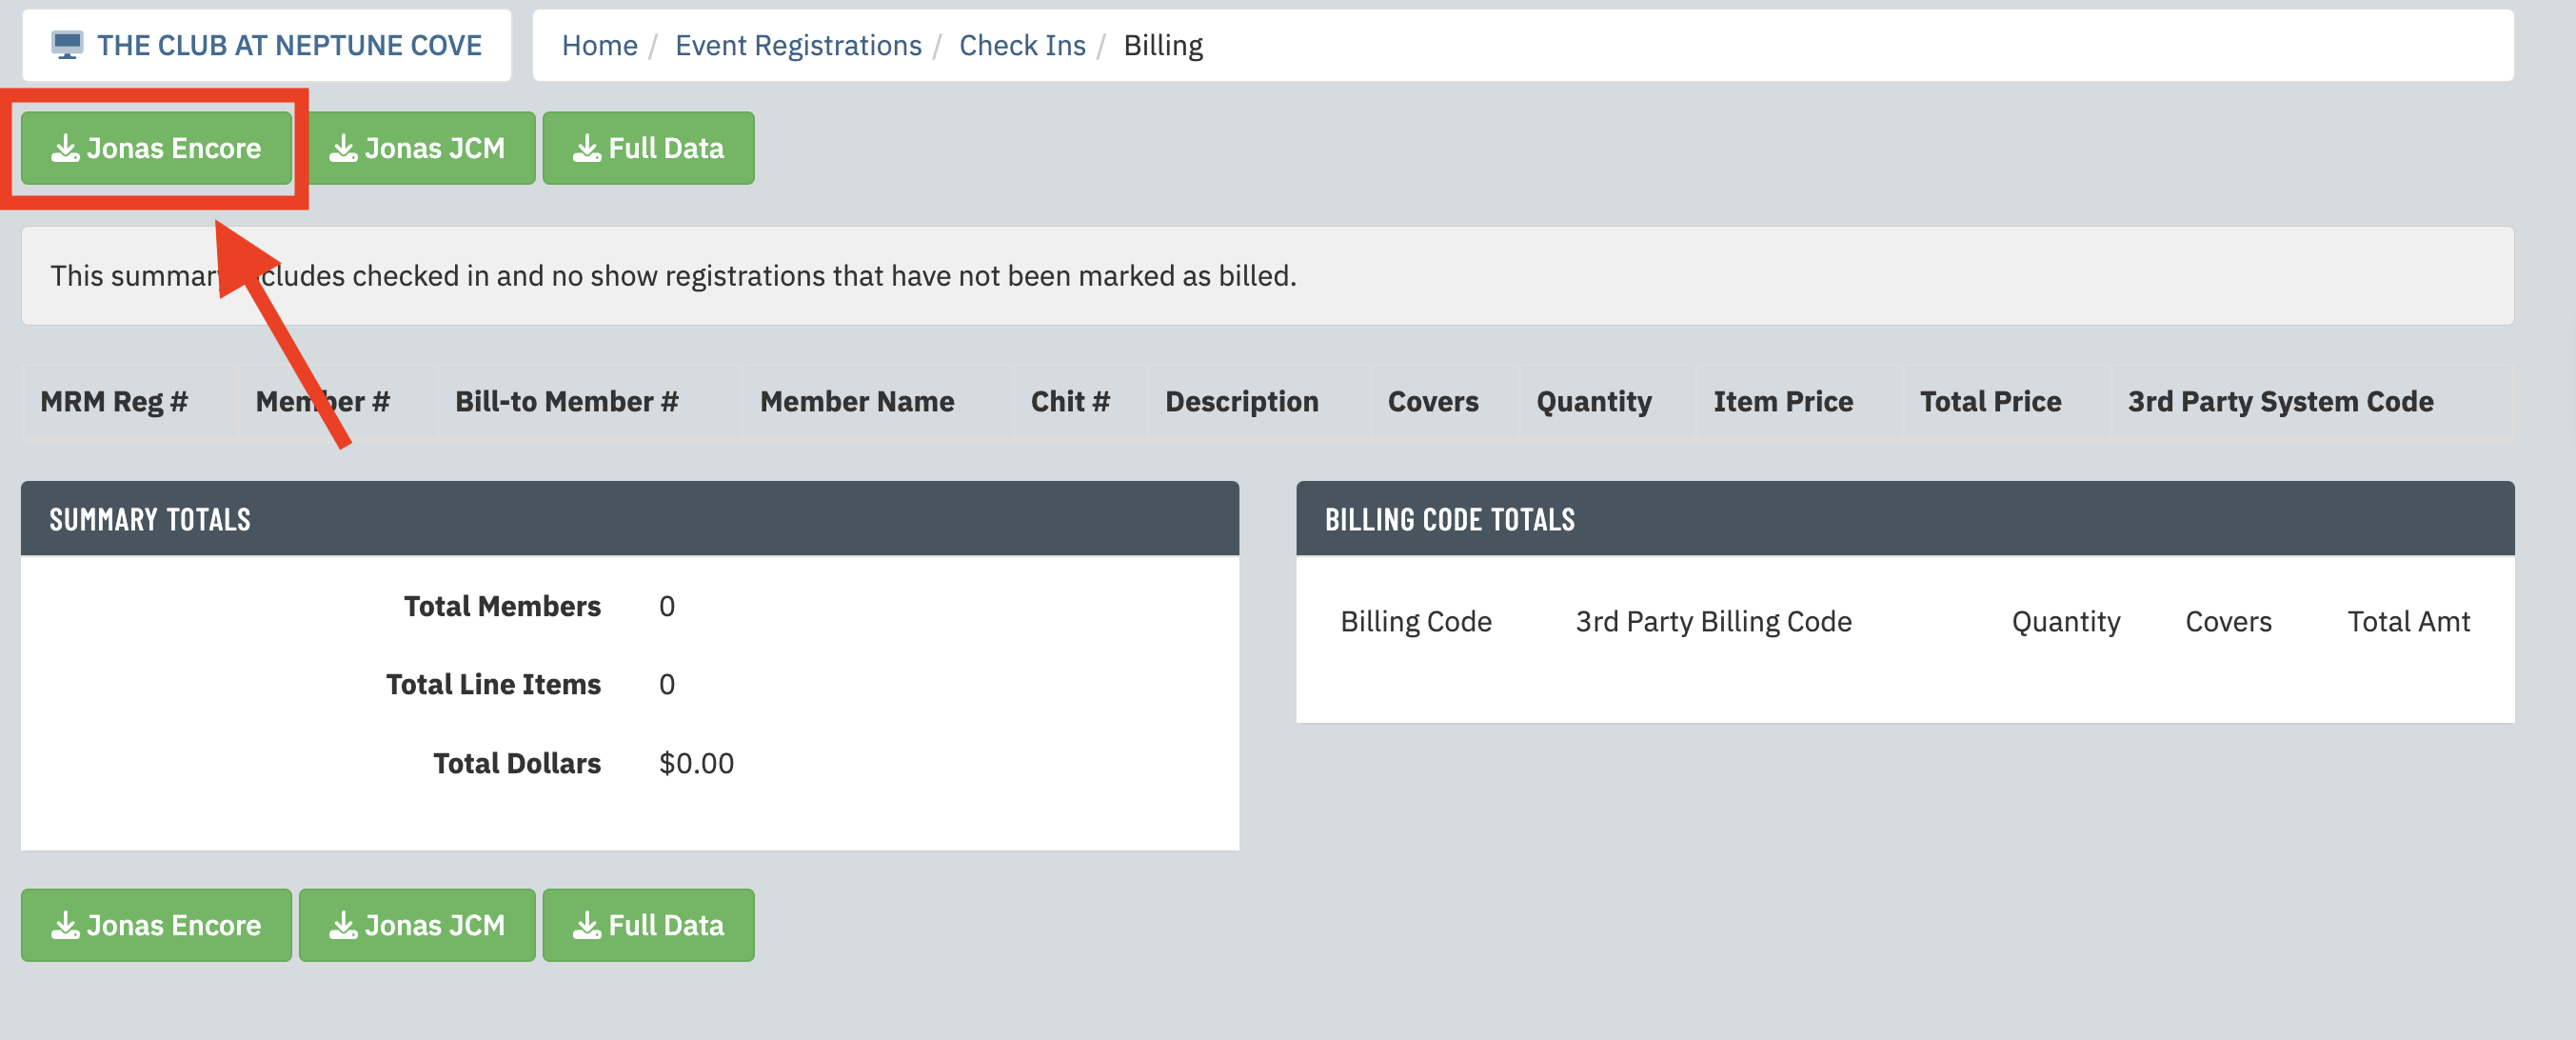 |
This is the fifth article in a series on how to set up billing for your events. To continue to the next article, click here for Jonas Encore » or click here for Jonas JCM »