Junior/Summer Program Registration Training Guide
How to Edit Existing Programs/SessionYou may need to edit the Program Name or Program Description. |
|
| Log into the Admin homepage. |  |
| Go to Applications>>Programs>>Programs Maintenance. | 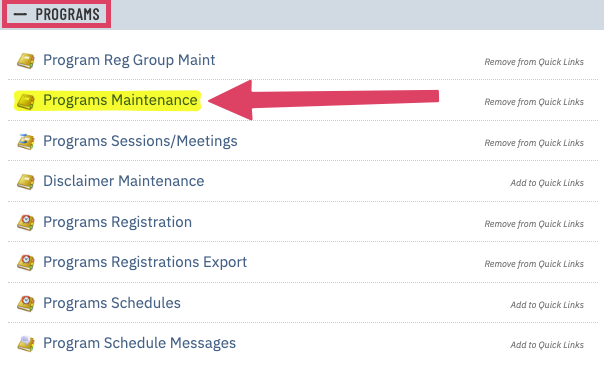 |
| Click Show All and click on the Program you need to edit. | 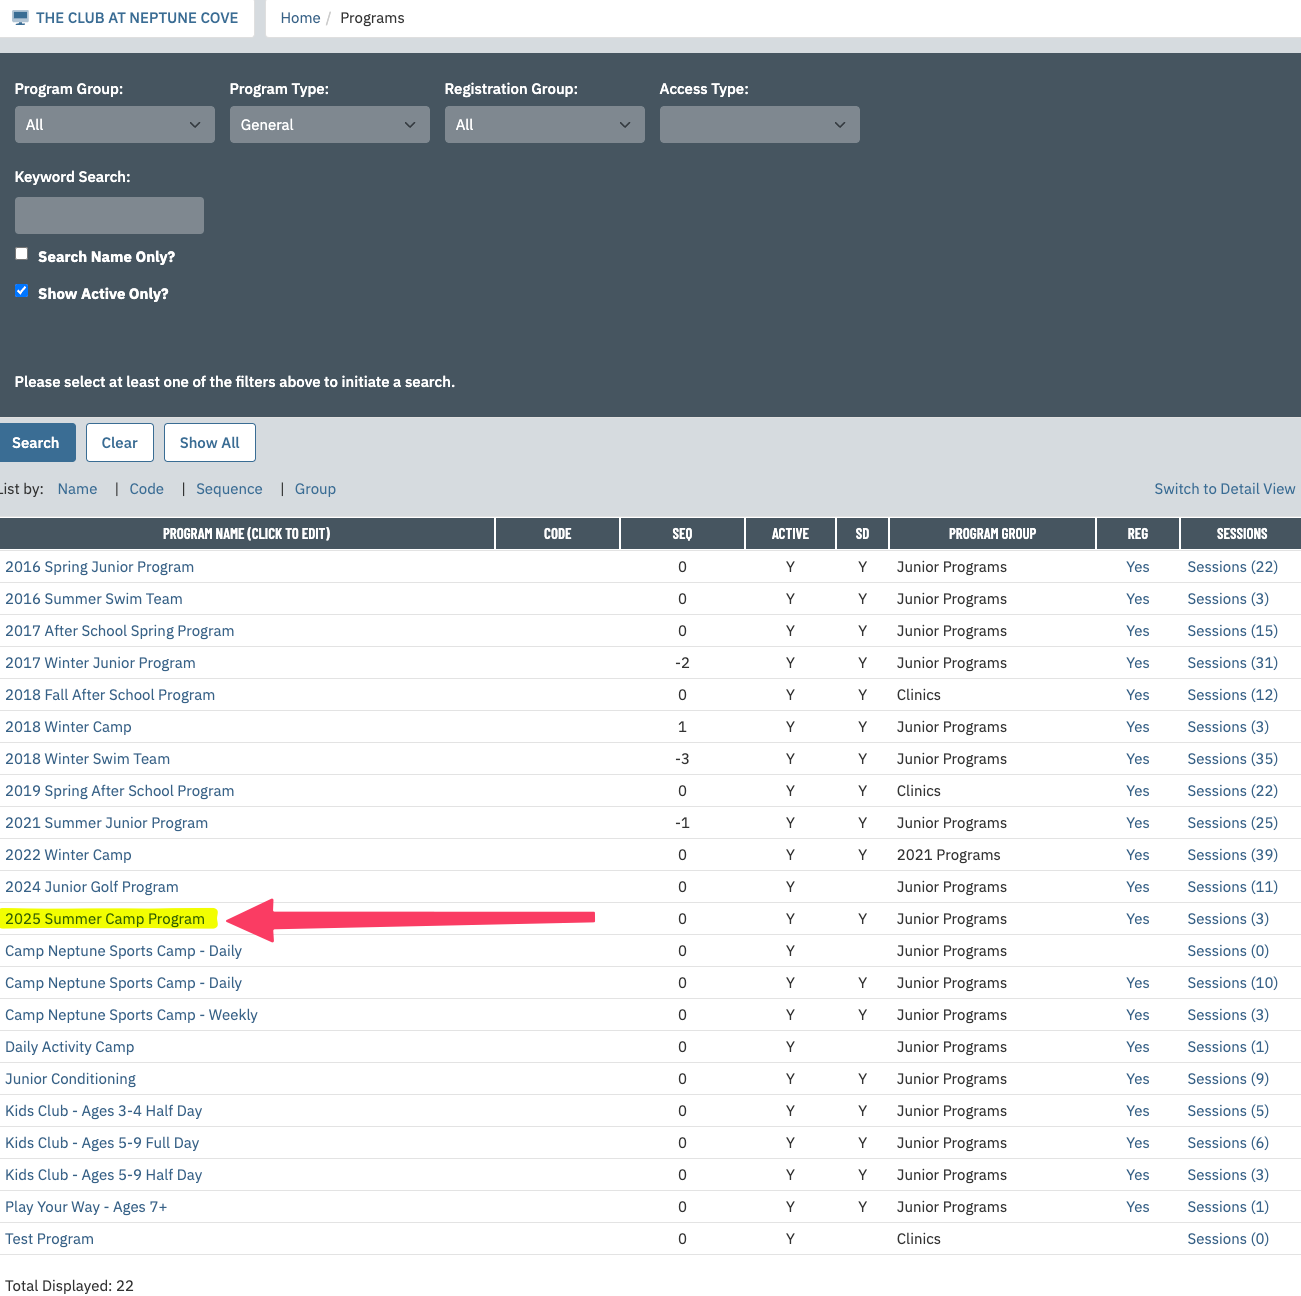 |
| Under the General tab, make the requested changes and then click Save at the top of the page. | 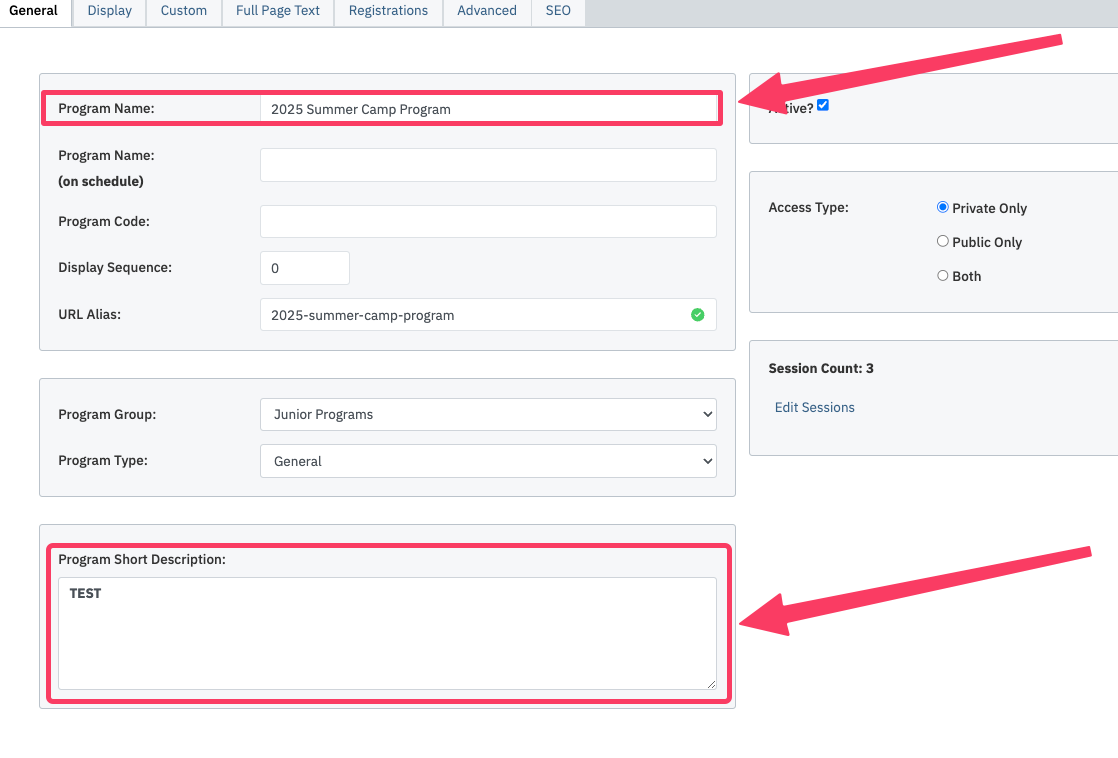 |
| You may need to edit the Session Details (Session Description, Period [Session Start Date & Session End Date], & Member Cost). In the list of Programs, click the link for Sessions in the right column. | 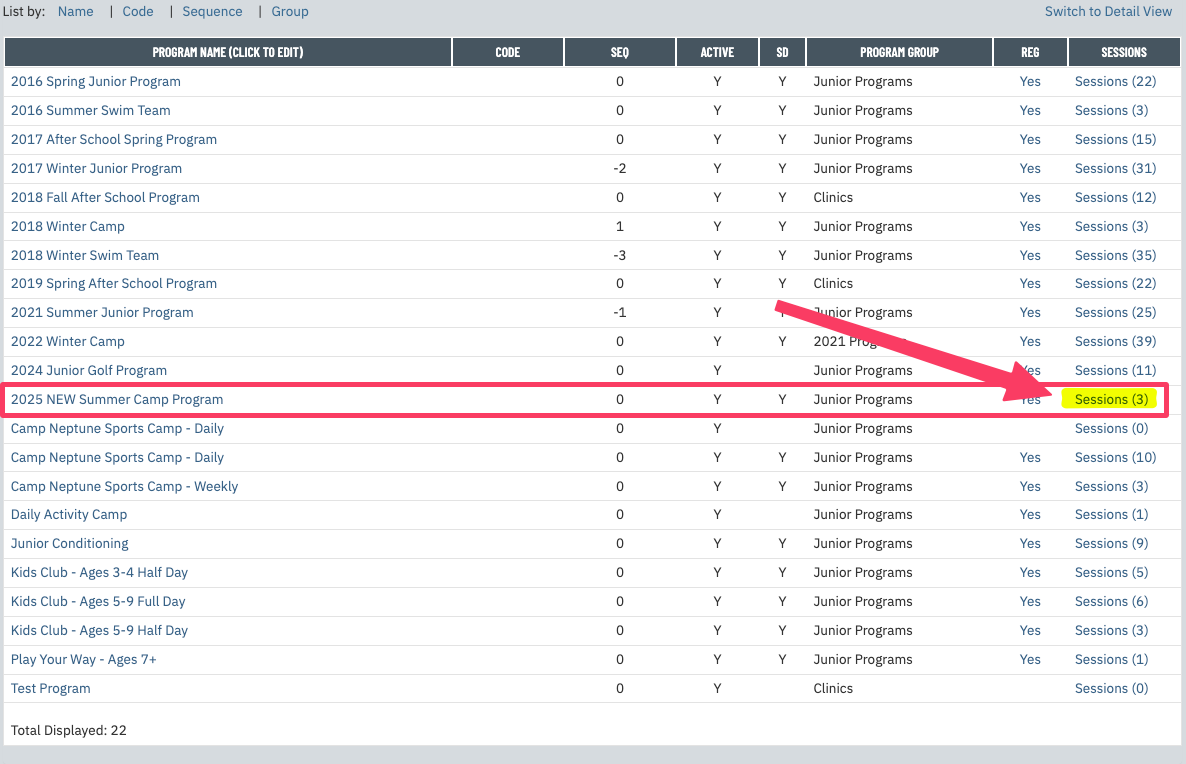 |
| Once in the Session list, click on the Name of the session you would like to edit. | 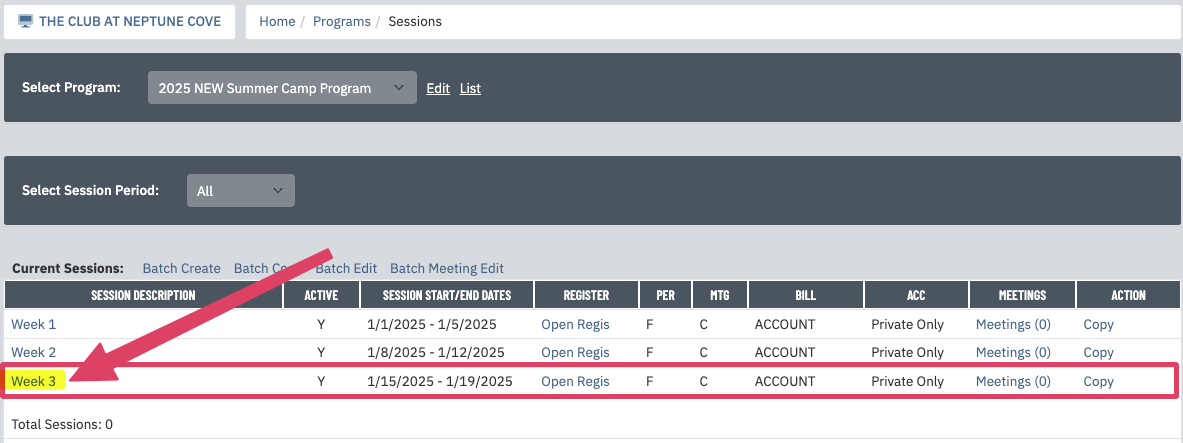 |
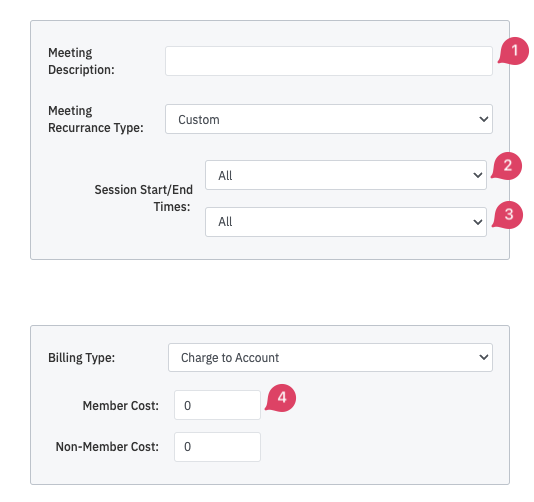
| You may need to edit the Session Details (Session Description, Period [Session Start Date & Session End Date], & Member Cost). In the list of Programs, click the link for Sessions in the right column. | |
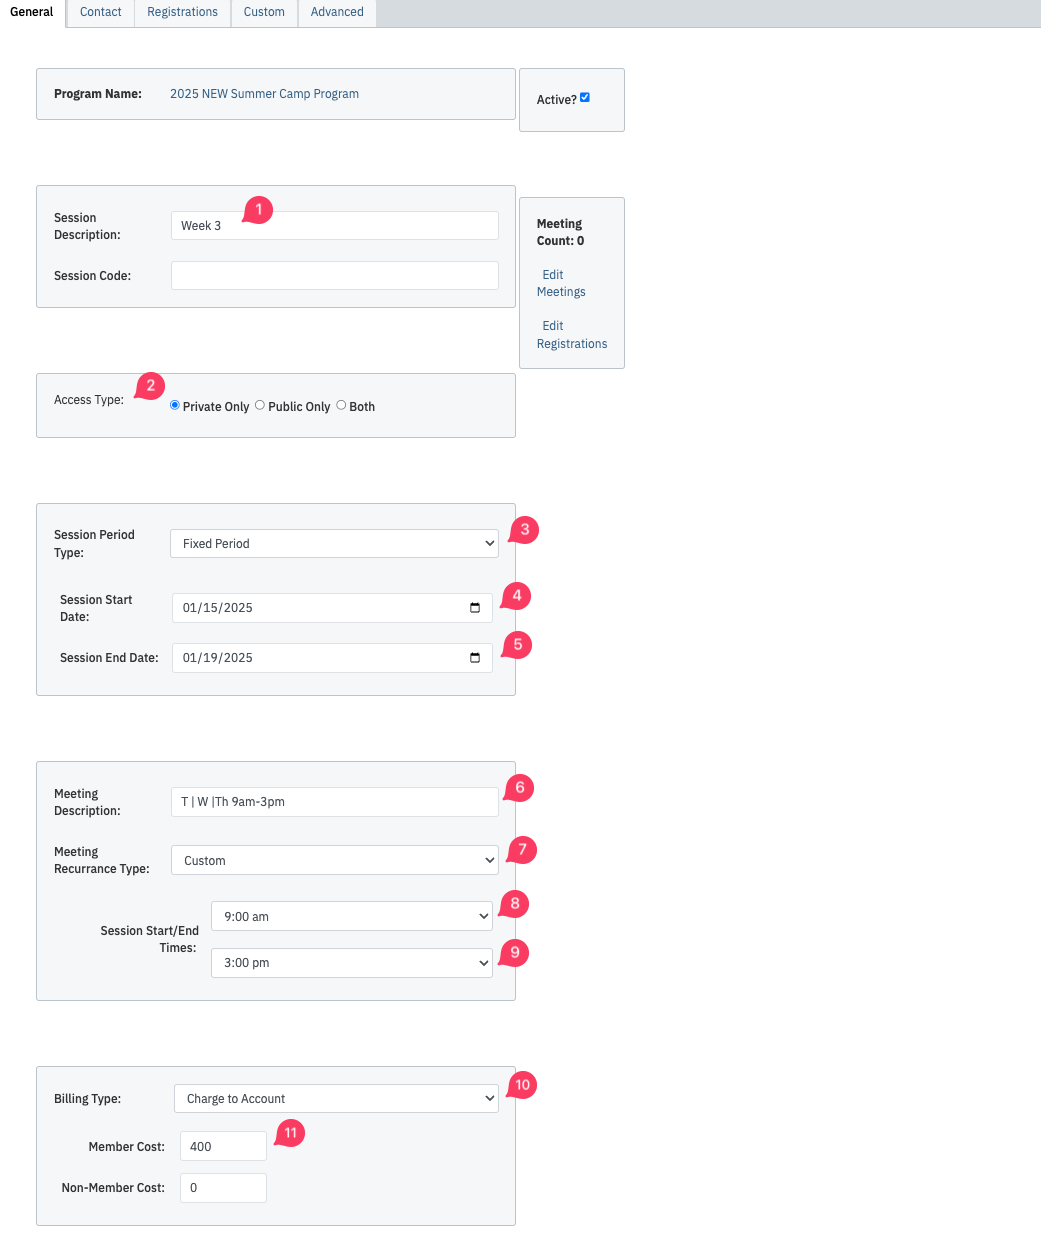
The following fields are editable:
|
 |
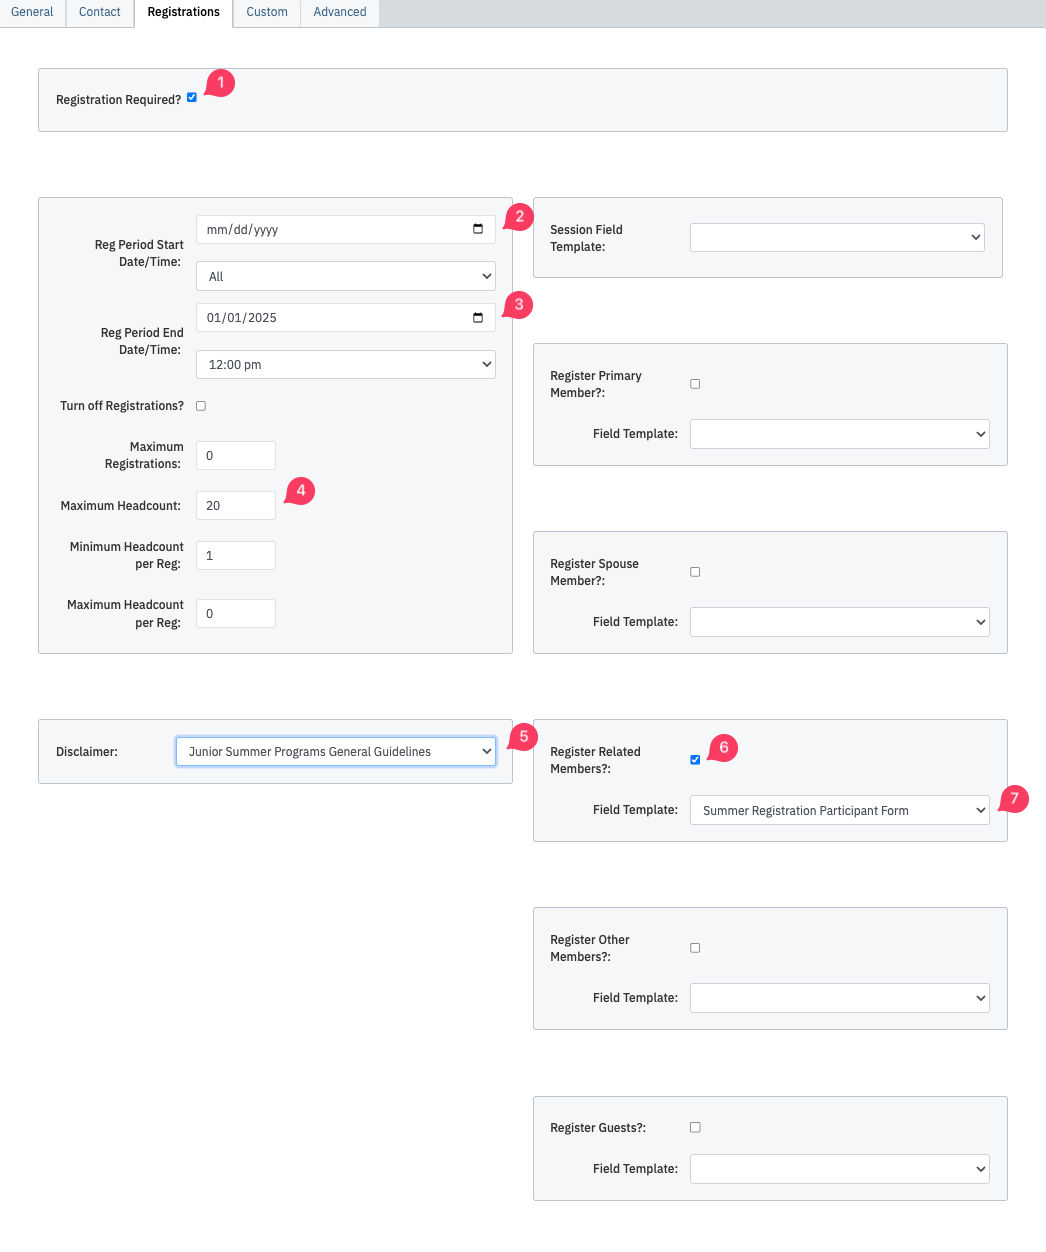
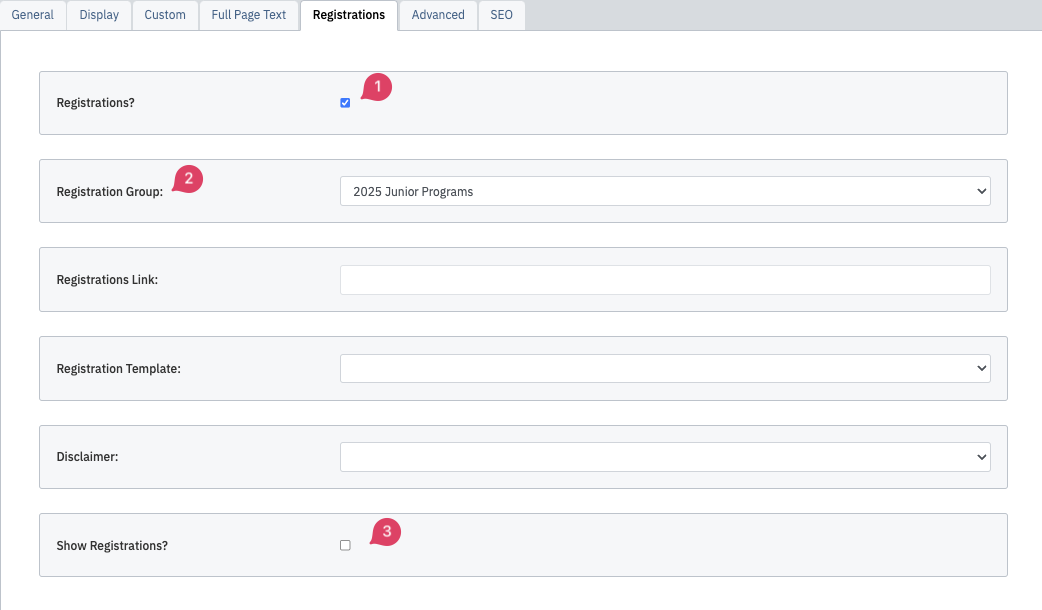
| The Registrations tab controls when if Registration is required, and if so, when Registration opens, closes, the maximum number of participants, which Disclaimer the club wants to use, who can be signing up for programs (Members signing up their children is the most common), and which Field Template (registration information form) you want to require members to fill out. When you are finished making changes, click Save at the top of the screen. | 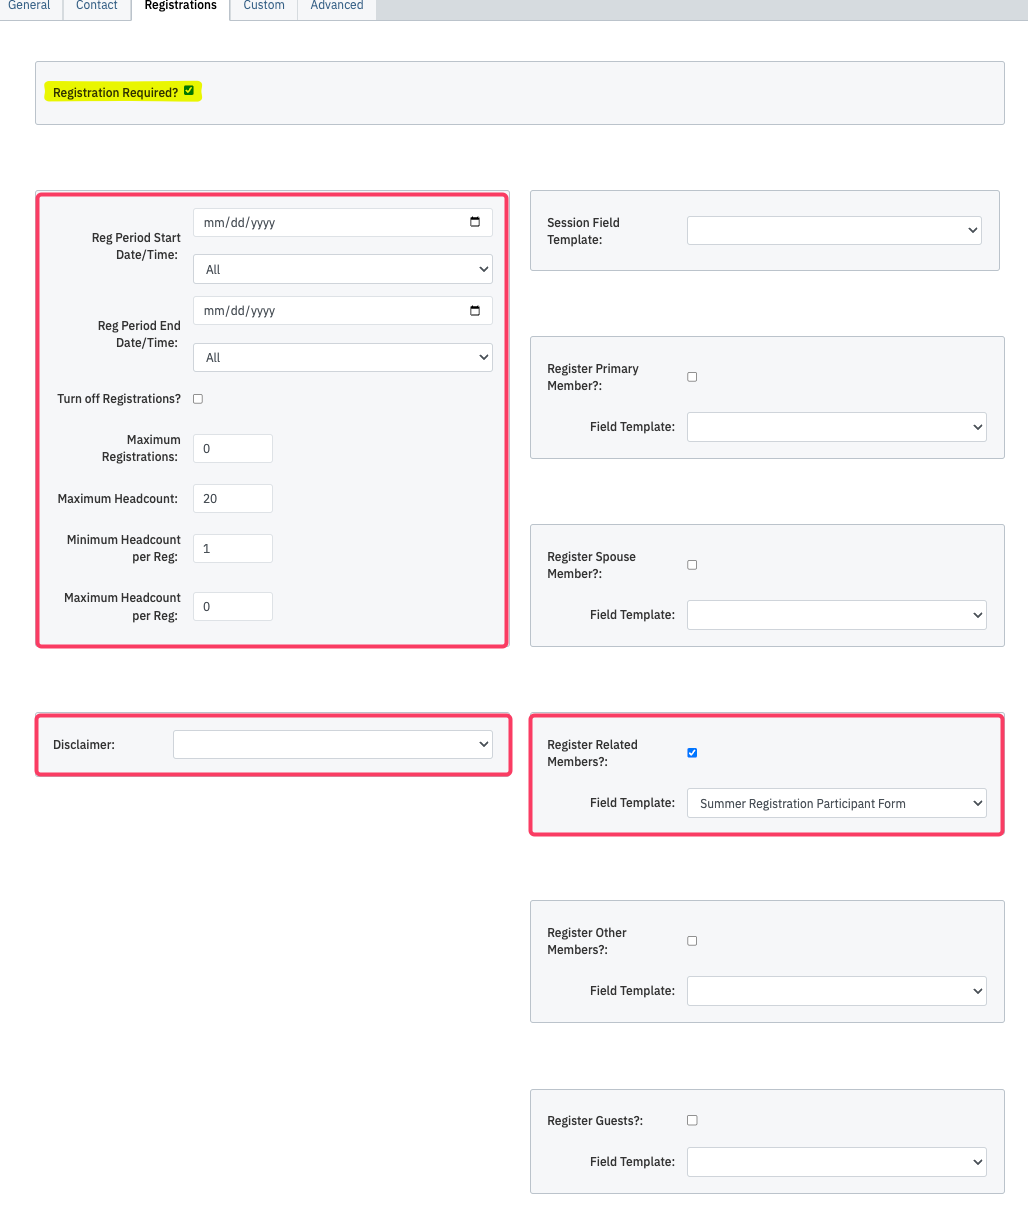 |
How to Add a New Session to an Existing Program Follow these steps (you'll be filling in the information reviewed above in the Sessions area).
|
 |
Under the General tab, fill our these additional fields:
|
 |
Under the Registrations tab, fill out these fields:
|
 |
Adding a New Program
|
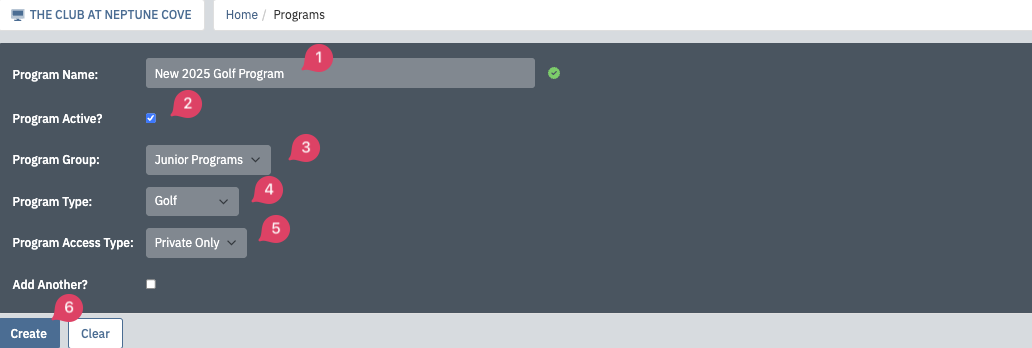 |
| Under the General tab, enter the Program Short Description. This is the description that will appear on the first page of the registration process. | 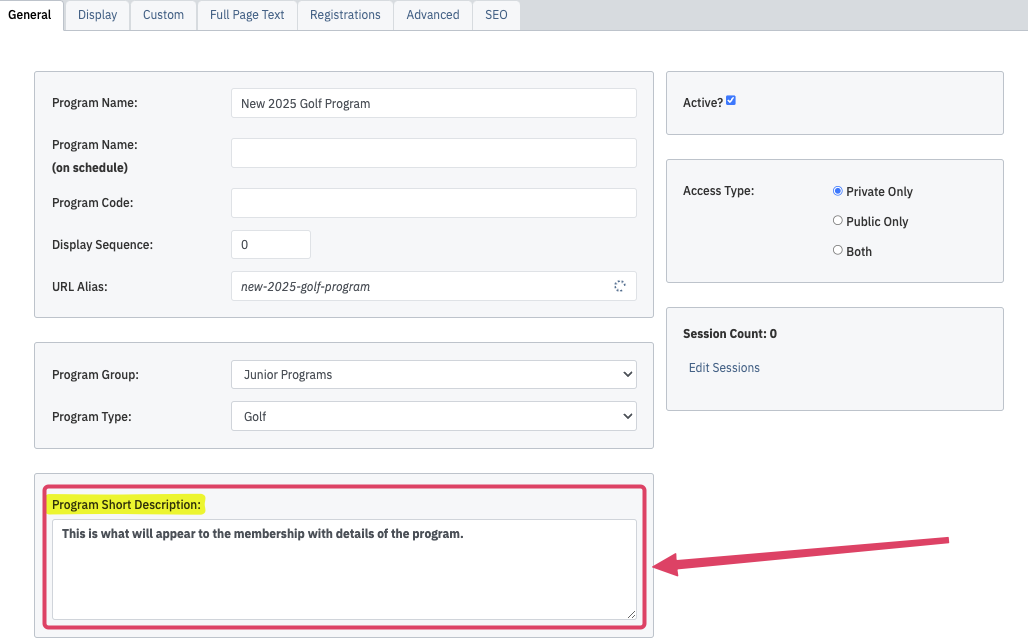 |
Under the Registrations tab, fill out these fields:
|
 |
Creating a Registration as an Admin for a Member
|
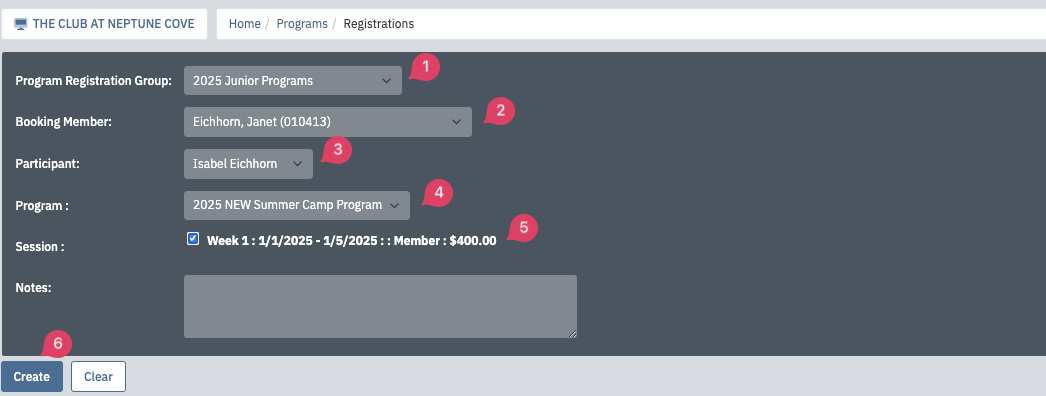 |
| In the next screen, fill in the Form fields by clicking Edit next to the Form's title. Select the choices and click Save at the bottom. You have the option of sending a Registration Email to the member by clicking the link for Send Registration Email at the top of the fields. | 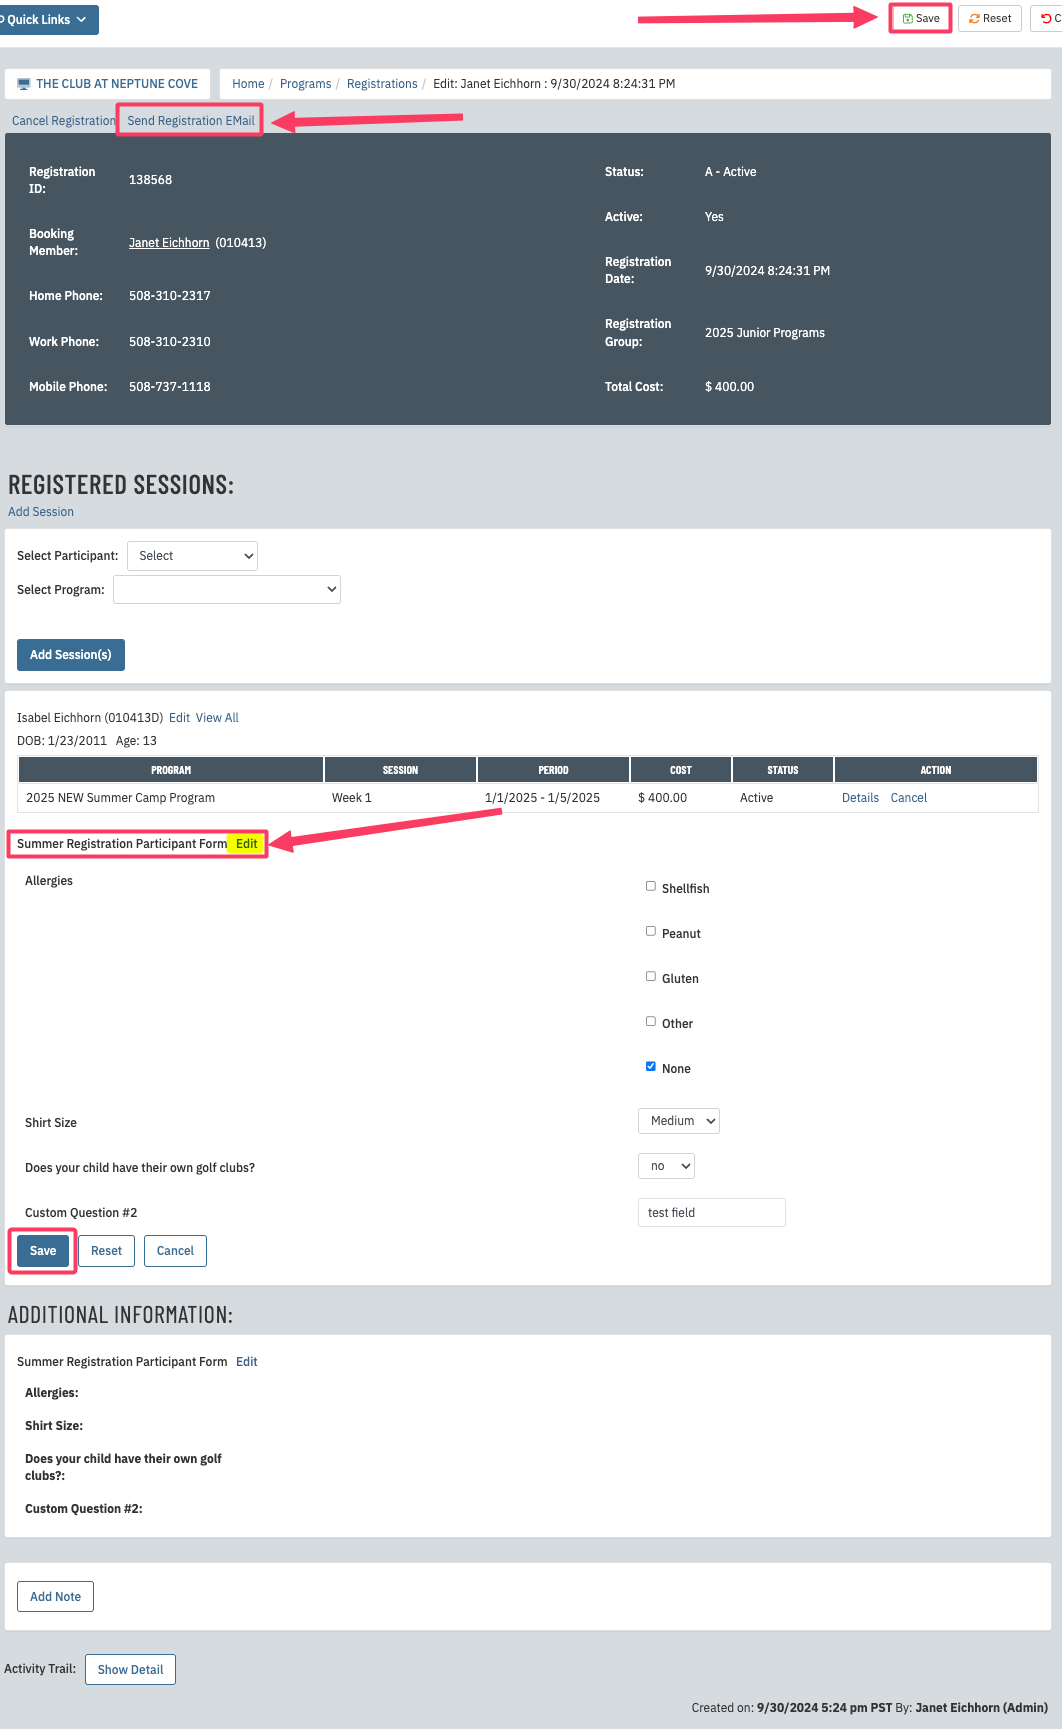 |
| You can Edit, Cancel or Add to an existing Registration by going into the Registrations area and using the Search fields to find an existing Registration and change it as needed. |  |
Running Registration ReportsOn the Admin homepage, go to Programs>>Related>>Programs Registrations Export. Use the Search Filters to pull the information you need.
|
|
| The screen will refresh and a new column will appear to the right. It will indcated how many registrations are attached to the criteria selected. Select the criteria for the report and click Export Regitrations. It will download a report and ask you where to save it on your hard drive or server as an Excel spreadsheet. | 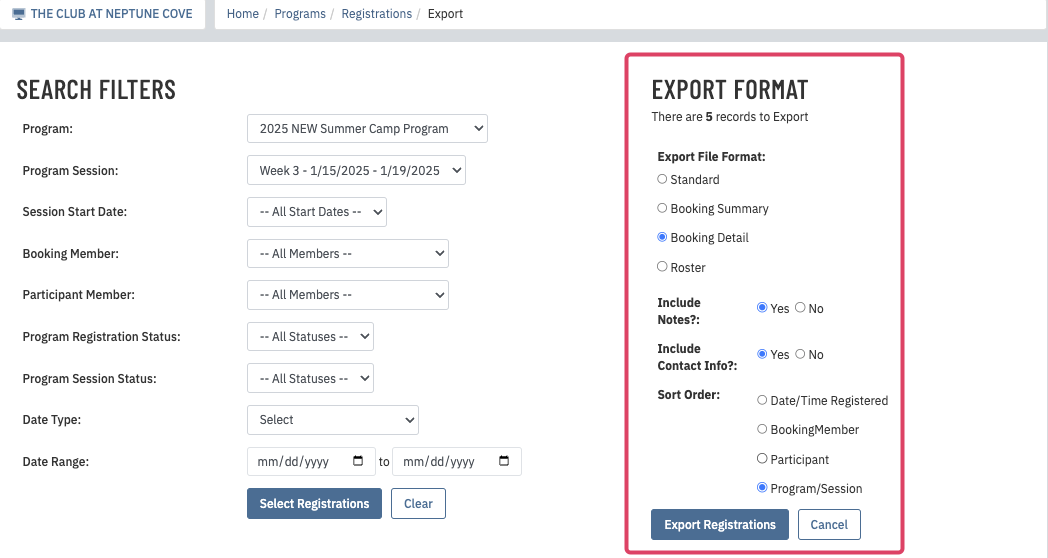 |
| While these instructions cover the basics of Programs Setup and Registratons on the Admin side, there will be additional articles related to forms, contact information and disclaimers. Watch this space for additional resources coming soon! |