How to Create Dining Venues
Dining Venues allow you to define a space that is available for online dining reservations.
| Log into Admin Home on your web site. |  |
| Click on Dining in the Applications box, then click on Dining Venues. |  |
| Click New. | 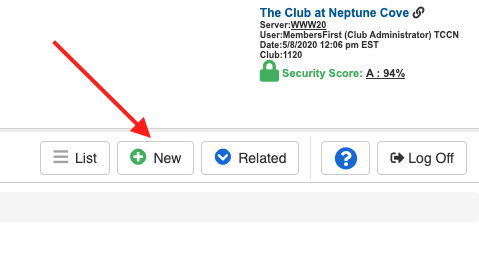 |
| Enter a Facility Name. Facility names must be unique. If you wish to create a modified version of an existing venue, you need to adjust the name accordingly e.g. Catalina Steakhouse (Social Distancing). |
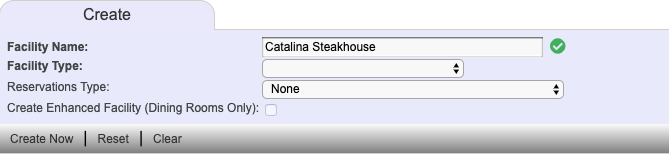 |
| For Facility Type, select Dining Room. | 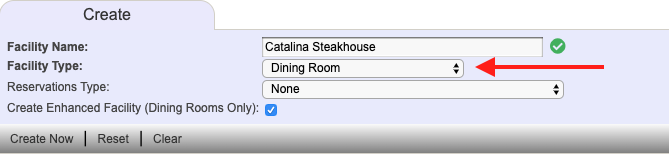 |
| For Reservation Type, select Facility Reservations. | 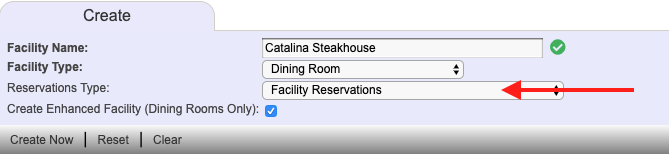 |
| Flag the Enhanced Facility check box. | 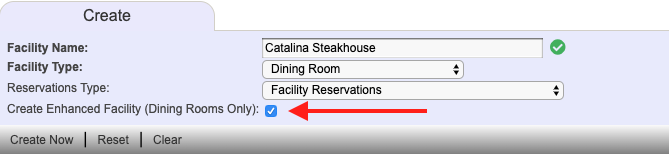 |
| Click Create Now. | 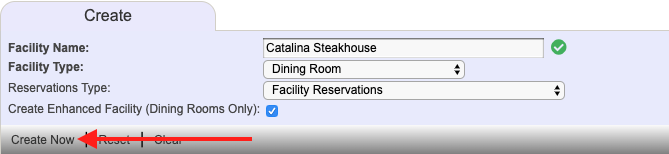 |
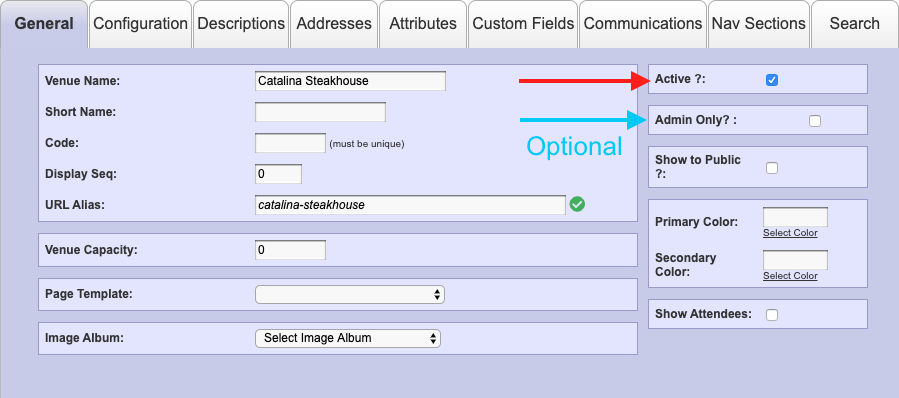
| On the General tab, flag the Active check box to make the venue available for reservations. If you only want club staff to make reservations, flag the Admin Only check box. This will make the venue unavailable for member booking, but allows personnel to make reservations on their behalf on the admin side. |
 |
| On the Congifuration tab, enter the maximum number of parties you can seat in a day into the Select the maximum number of reservations you allow per day field. | 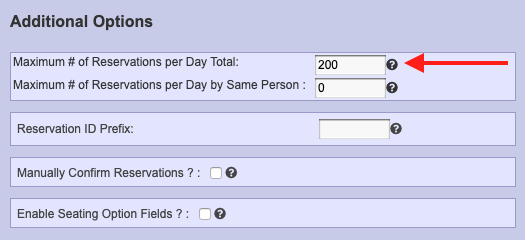 |
| Enter the number of reservations each member is allowed to make per day into the Select the maximum number of reservations per day by the same person field. | 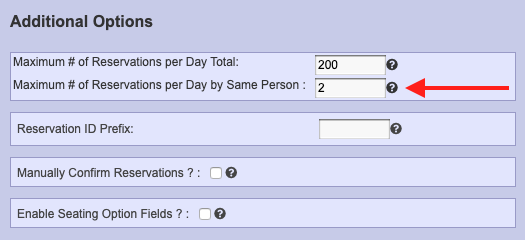 |
| If you wish to confirm reservations before they are approved, flag the Manually Confirm Reservations check box. If checked, reservations will appear as "requested" until they are manually confirmed by a staff member. Left unchecked, reservations will be automatically confirmed upon reservation. | 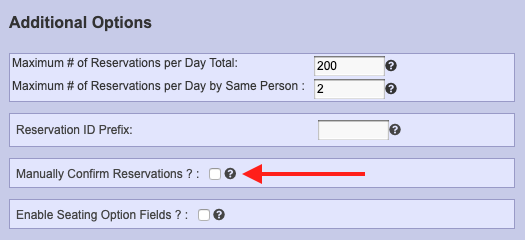 |
| Flag the Enable Seating Options Fields check box if you wish to track high chair or booster seat usage on a per registrant basis. | 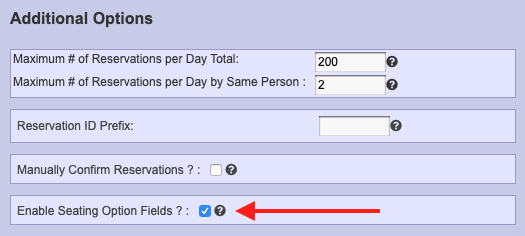 |
| Use Messaging Options if you wish to display a message to members who try to book a reservation that exceeds the maximum party size. | 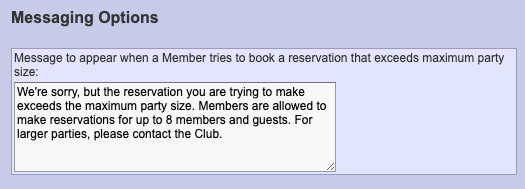 |
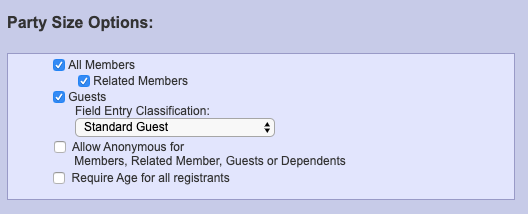
Use Party Size Options to determine who can make reservations and whether you will accept other members or guests on a reservation.
|
  |
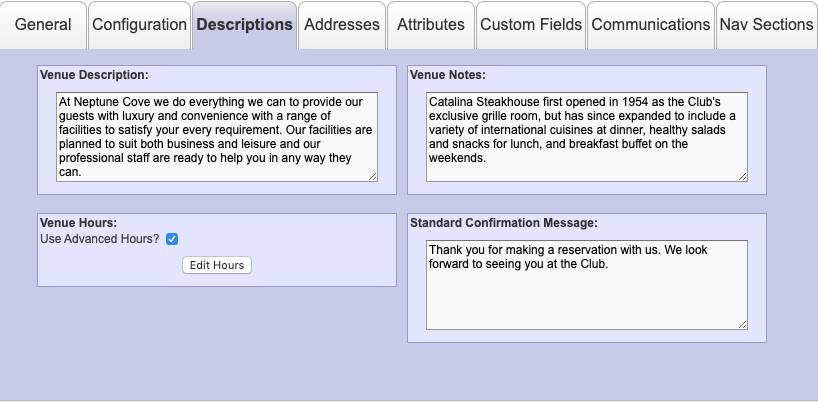
| On the Descriptions tab, add the venue's description, notes, hours, and a standard confirmation message. Venue Hours allows you to create specific hours the venue is open, taking reservations, time intervals, etc. Checking this box will prompt a button to appear for Edit Hours. Clicking here allows you to set up hours in the Venue Hours area. We will return to this at the end of this guide. |
 |
| On the Addresses tab, enter the venue's physical address if it differs from Club's main address. If no location is provided, the Club's main address will be used by default. | 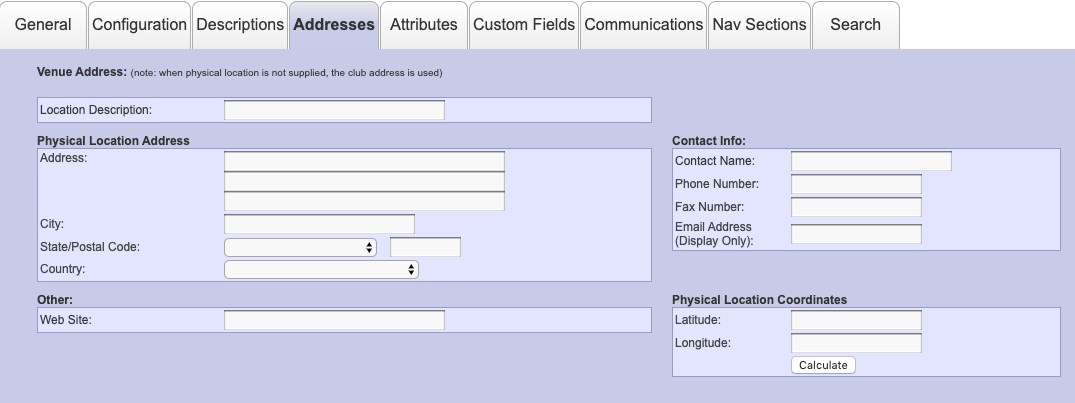 |
| On the Attributes tab, select the attributes to appear on the venue's about page. Attributes should describe the venue's food or atmosphere. If a desired attribute is not yet listed, enter the name into the New Attribute field and click Add. |  |
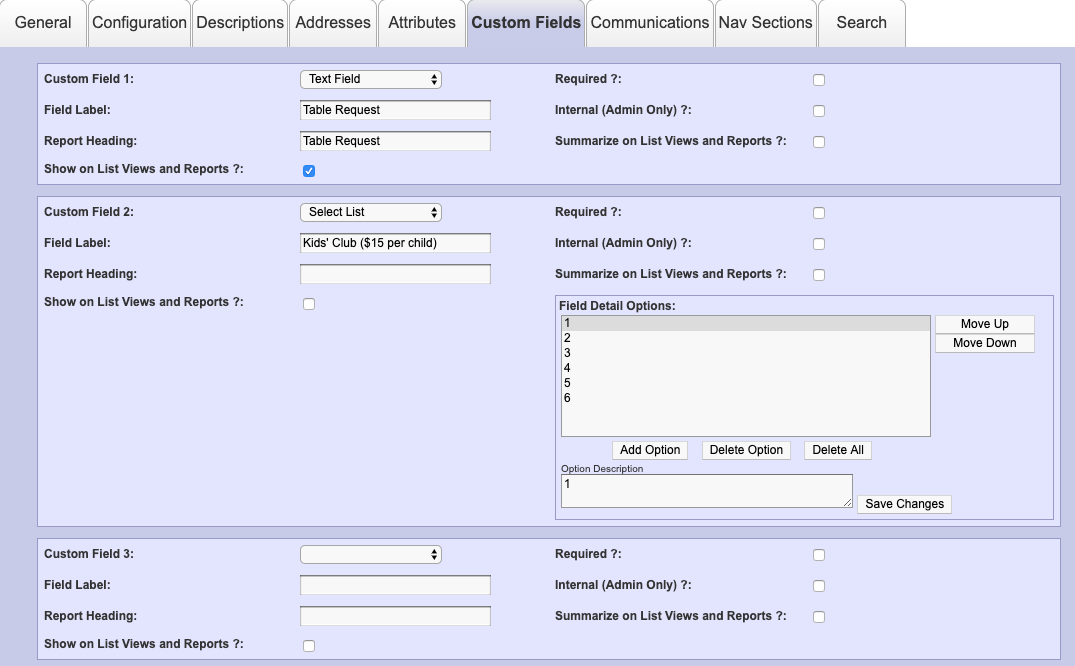
| On the Custom Fields tab, enter any questions you wish to ask members on the reservation form. You may select from a variety of question types (e.g. text, check box, select list) and make the fields optional or required. You can also choose to display these fields on dining lists and reports. Examples include: requests for a specific table (with table number), number of kids for a night that babysitting is offered by the club or a specific number of food items (how many lobsters for lobster night). |
 |
| On the Communications tab, enter the email address(es) to recieve reservation notifications into the Reservations Email field. Use a semi-colon to separate multiple email addresses. | 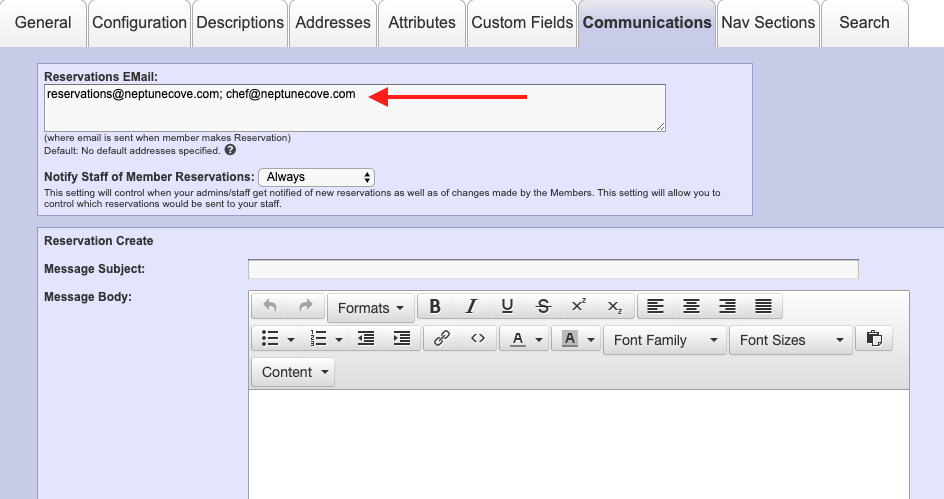 |
| Use the Notify Staff of Member Reservations field to control the frequency with which your staff is notified of new reservations, changes, and cancellations. | 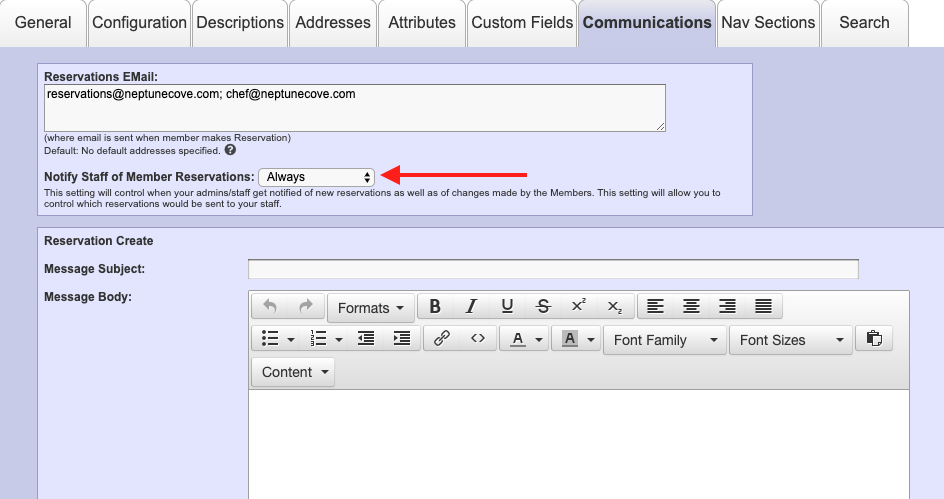 |
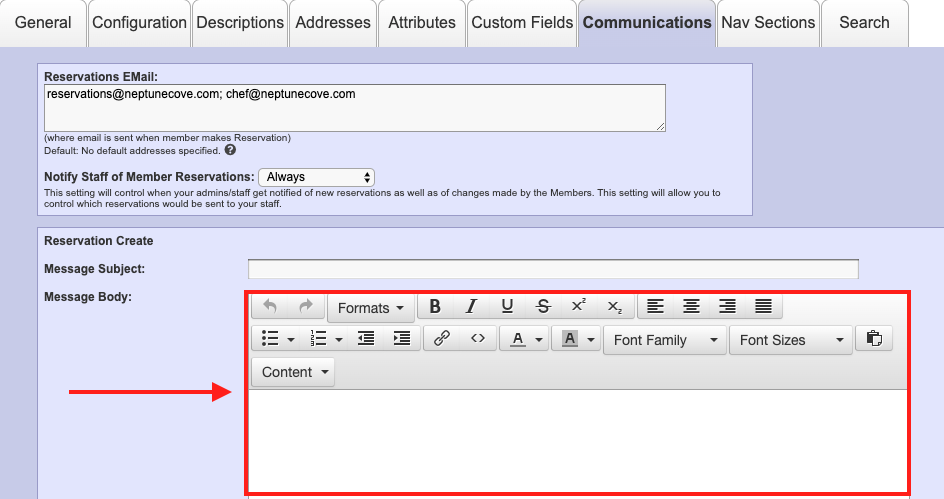
Use Email Templates to create custom messages for the following:
|
 |
| On the Nav Sections tab, select the navigation sections under which you would like the venue and its associated reservations to appear. | 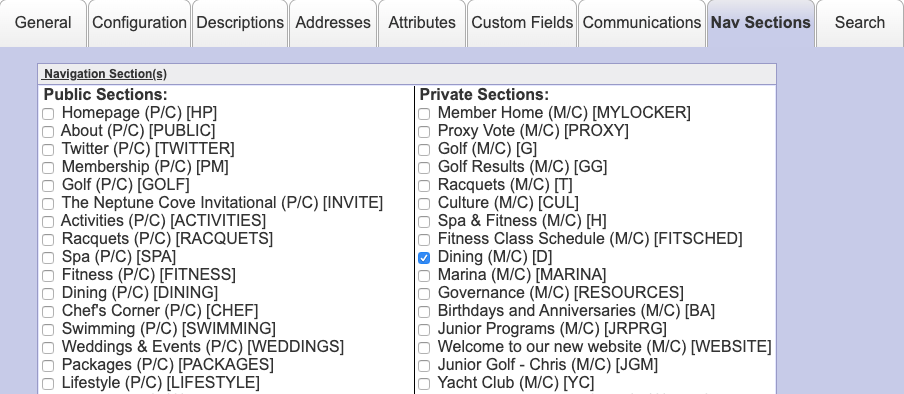 |
| When you have finished configuring your venue, click Save and Close. | 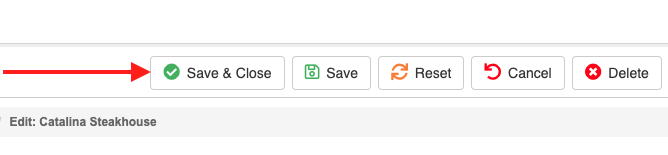 |
| If you selected Use Advance Hours on the Descriptions tab, you will be prompted to setup your hours. Click OK and proceed to this guide. | 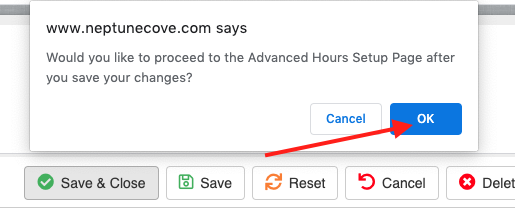 |