How to Import Chits into JCM
This tutorial reviews the process on how to charge chits associated with multiple tee times' in JCM. It can be used to process an entire day's worth of chits or in smaller batches associated with tournaments. Once all players are checked in and you've exported the billing file from the tee sheet, you're ready to import into Jonas JCM.
Things to consider using this form of 'Full Day Chit' processing:
- The Jonas JCM Billing report will only pull in tee times that have SKU items associated with the chit (i.e green fee and cart fee) and the tee times are checked-in.
- When generating the Jonas JCM Billing report you have the option to mark all tee times as paid. If elect to not mark as paid at this point, you can do so manually after you have completed the full process in JCM.
- Once the process is completed in JCM, the chits associated with the tee times in the tee sheet are not locked as they would be if you processed each tee time individually.
Open Jonas JCM. Go to Point of Sale System > Event Management > Setup/Edit Event |
 |
| After selecting an Area for the event, click **Add Another Event** at the top of the list of events. | 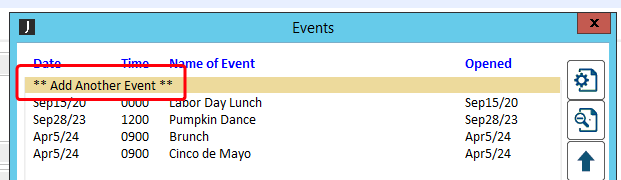 |
Enter a date (MMDDYYYY), time (24 hour format), and an Event Name. If it is not related to an event or tournament, and you are charging the entire day's worth of chits, add a descriptor in Name of Event field that highlights this, like 'Tee Times - Current Date'. | 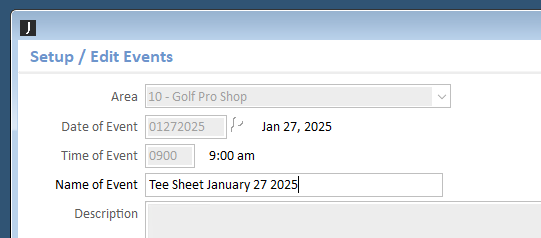 |
Click the Import Members link. |
 |
From here, choose Update to files, then use the Filename field to locate the billing file exported from the tee sheet. To export the billing file from the tee sheet, go to Tools > Stats, then select Jonas JCM Billing. Once the file is selected, you'll need to double click row 2 to identify it as the starting row because the first row of the export provides the header names and this should be omitted. Click OK | 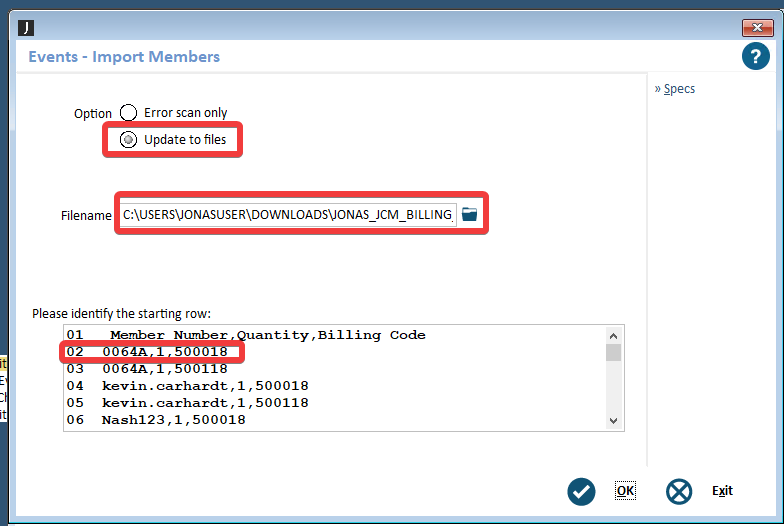 |
You may be presented with an interface to view the results of the import. View/Print this as desired. Select Exit if you don't wish to View/Print the results. | 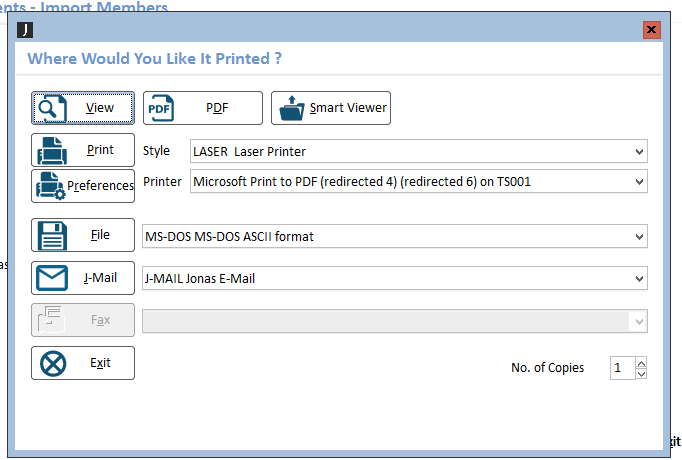 |
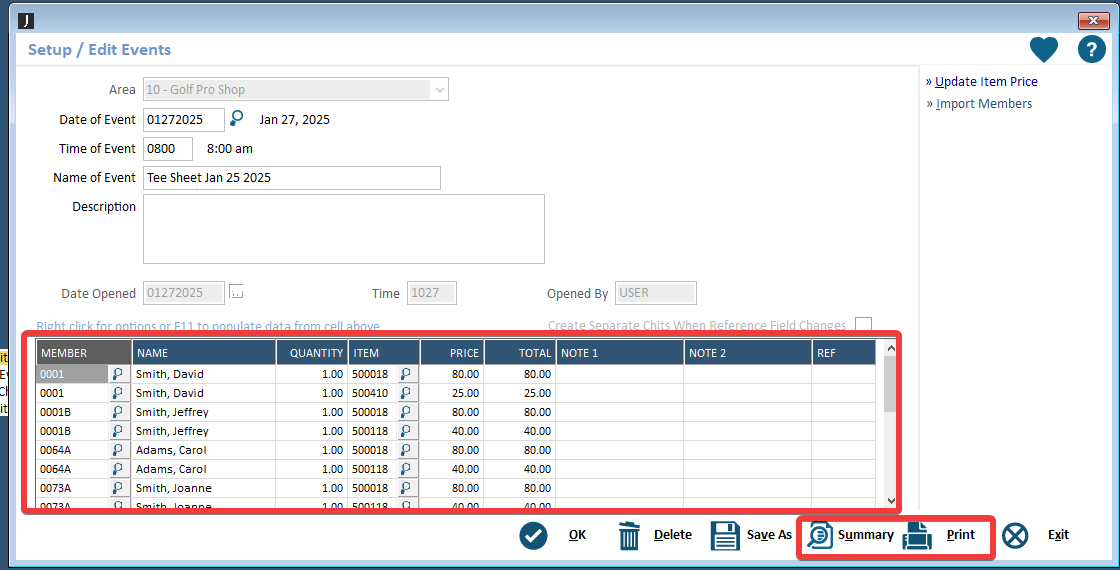
Click back into the Event just created to see the members now loaded in. This is a great chance to view a summary or print the incoming billing data for review. |
|
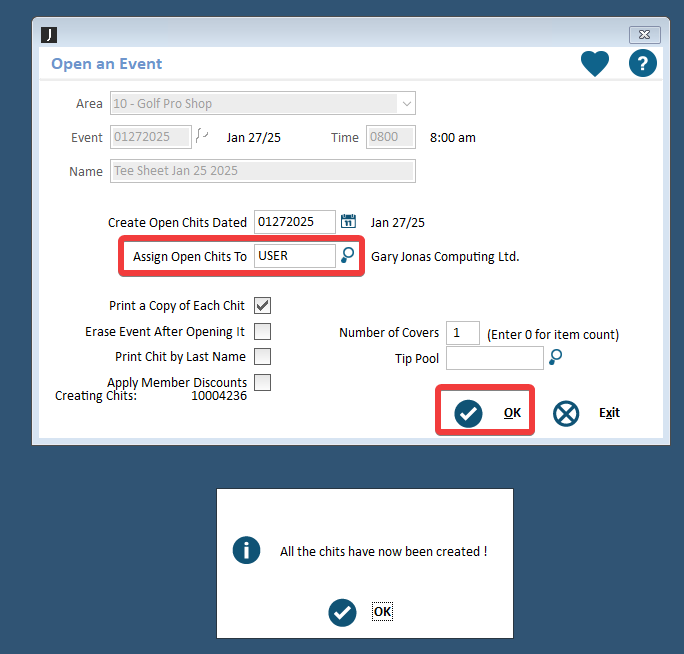
To create chits from this billing data, we need to open the event. Go to Point of Sale System > Event Management > Open an Event. | 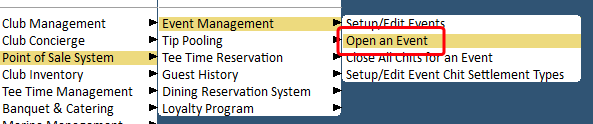 |
Select the Area to open the list of events tied to that area. Double click the event from the list. For the Create Open Chits Date field, use the current date. Then select a user in the system to assign the incoming chits too. This could be a golf staff member, for instance. Click OK and your chits should be created. | |
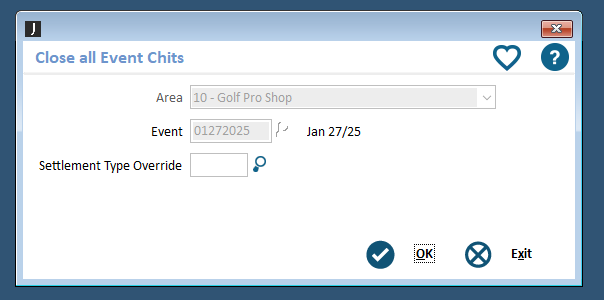
At this point, you have the option to post the chits all at once if you don't need to leave them open to continue working with them. To do this, go to Point of Sale System > Event Management > Close All Chits for an Event. Find your event to continue to closing the chits. |
|
If you wish to leave the chits open to continue using and assign on to someone else, you'll find the chits in Point of Sale System > Chit Processing > Open Chits | 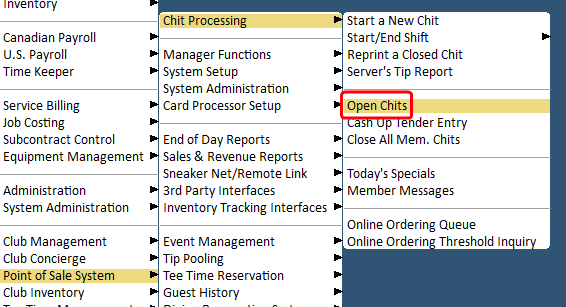 |
| The chits will be assigned to the user selected when the event was opened, ready to be assigned to a someone else or closed out as desired. | 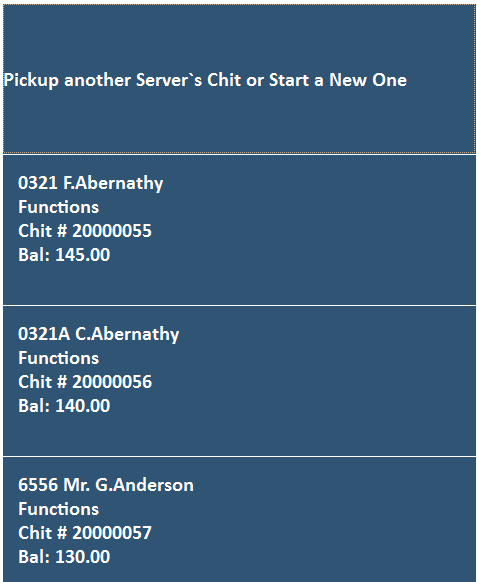 |
| At this point, you have the option to go back to the tee sheet to mark the tee times or individual players as "Marked As Paid" for tracking purposes. |  |