Use EBuilder Saved Rows to Save Time
Make use of EBuilder saved rows to save yourself time in creating lengthy emails. For example you can save your Social Media row to save yourself time from having to recreate all the links in the future:
Why you should use them…
To save time! Don't recreate anything you don't have to!
Use cases…
- Footer with club contact information and unsubscribe link
- "View this Email on the Web" link
- Club logo with proper colors/styles
- Member Spotlight
- Featured Event
- Social Media links
- Dining Specials
- Call-to-actions
| After editing a row like the footer you may want to save it for easy reusability in the future. To do so click into the white space on the side of the row to get the row buttons to appear. |  |
| Use the save button from the row to begin the process of saving it. | 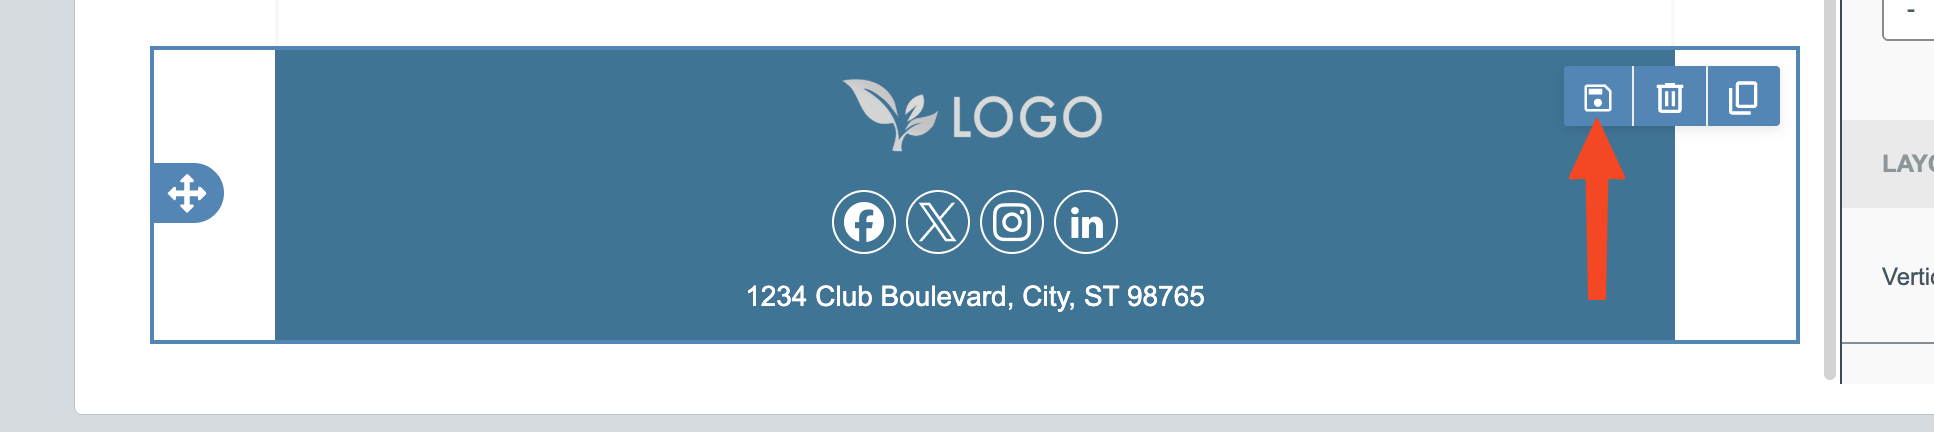 |
| Choose a category for the row (How to Add Categories is listed below this tutorial) and name the row. Then press the save button. | 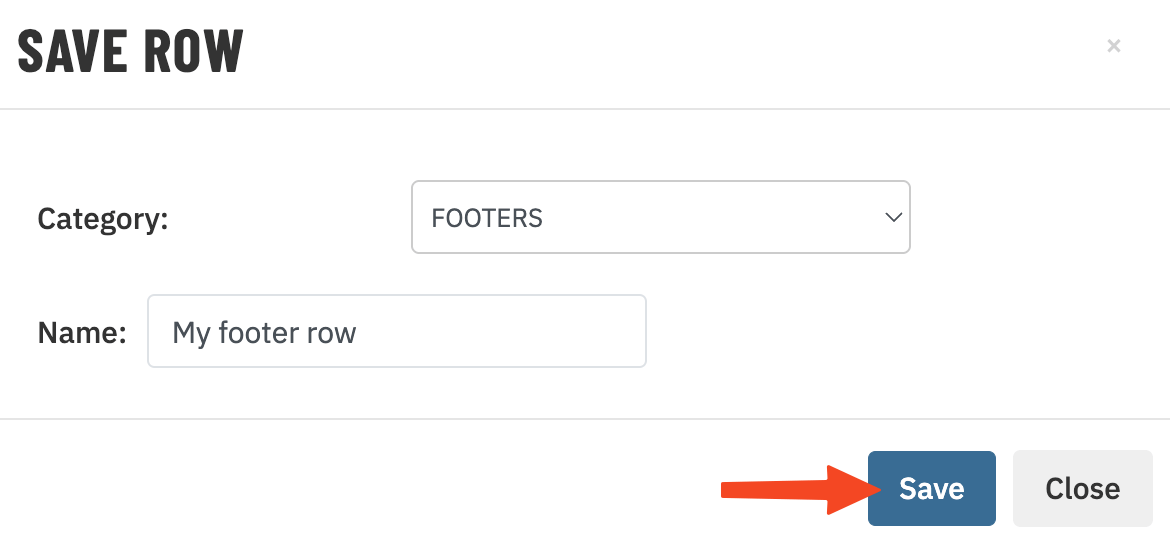 |
| Press ok on the popup alert that appears | 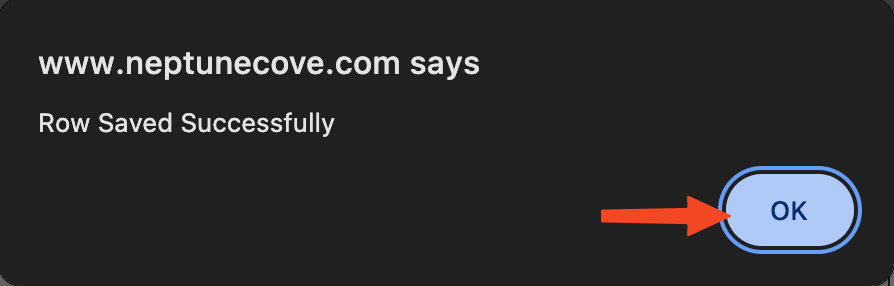 |
| To add the row into an email you can click on the "Rows" tab on the top right of the EBuilder. Then select the category from the dropdown menu to see all your saved rows. | 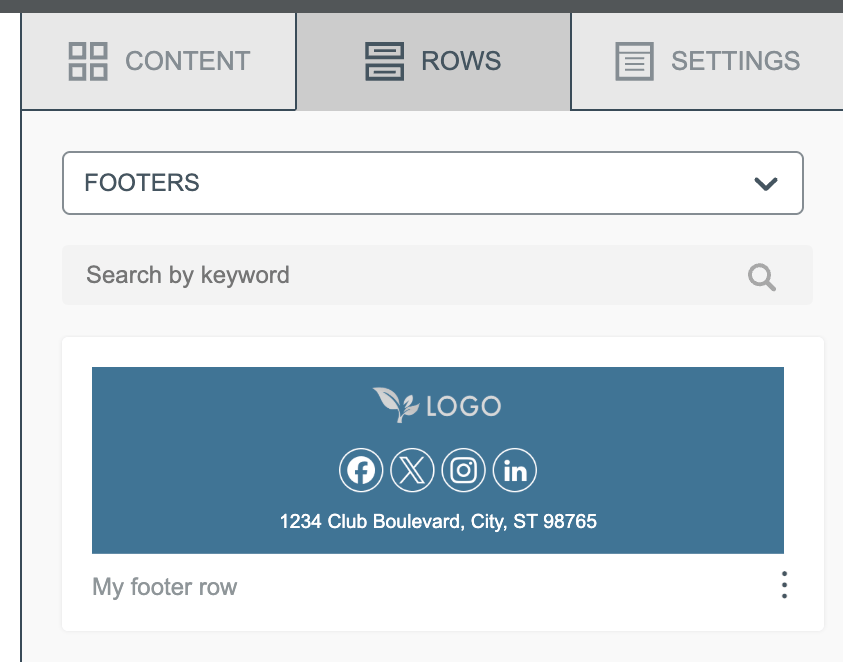 |
| Drag the saved row on to the email canvas on the left. | 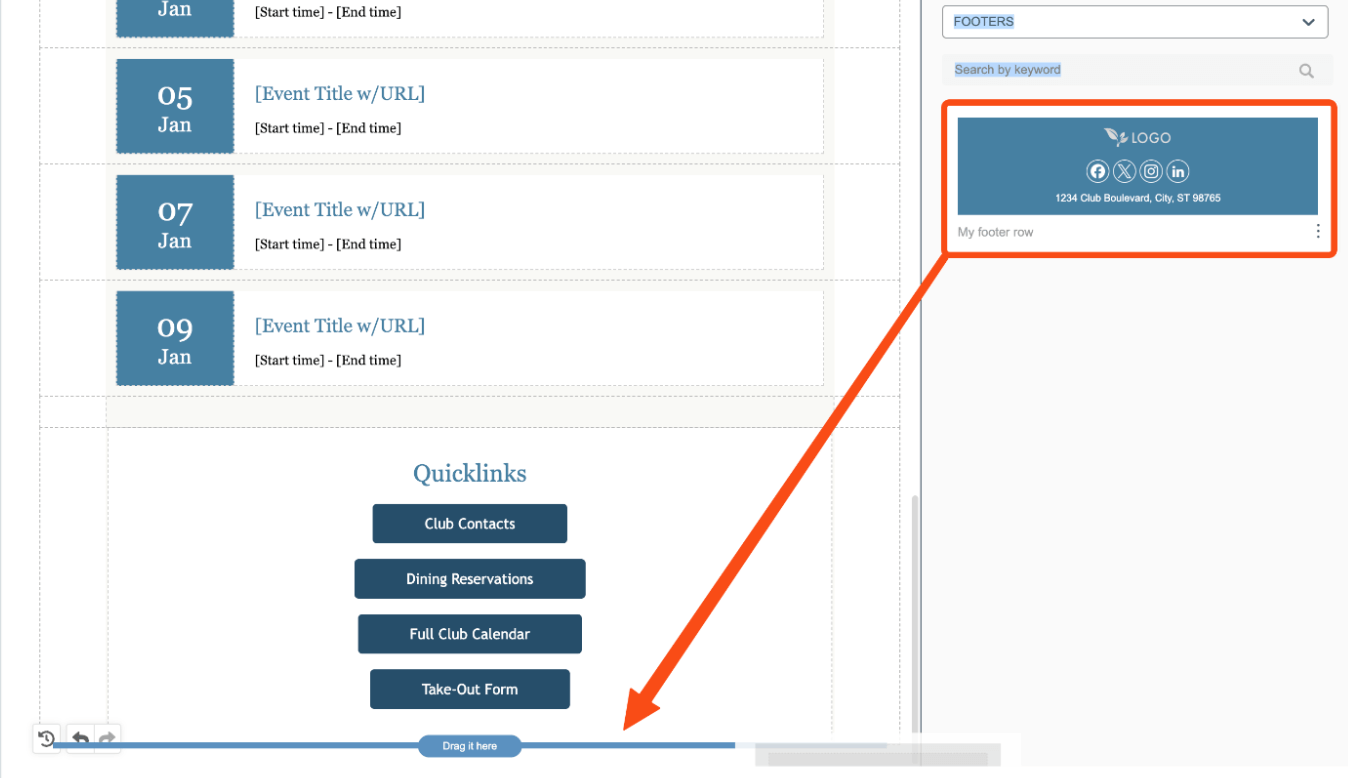 |
| Now the fully configured row has been added to your email and saved you the hassle of having to recreate it again. | 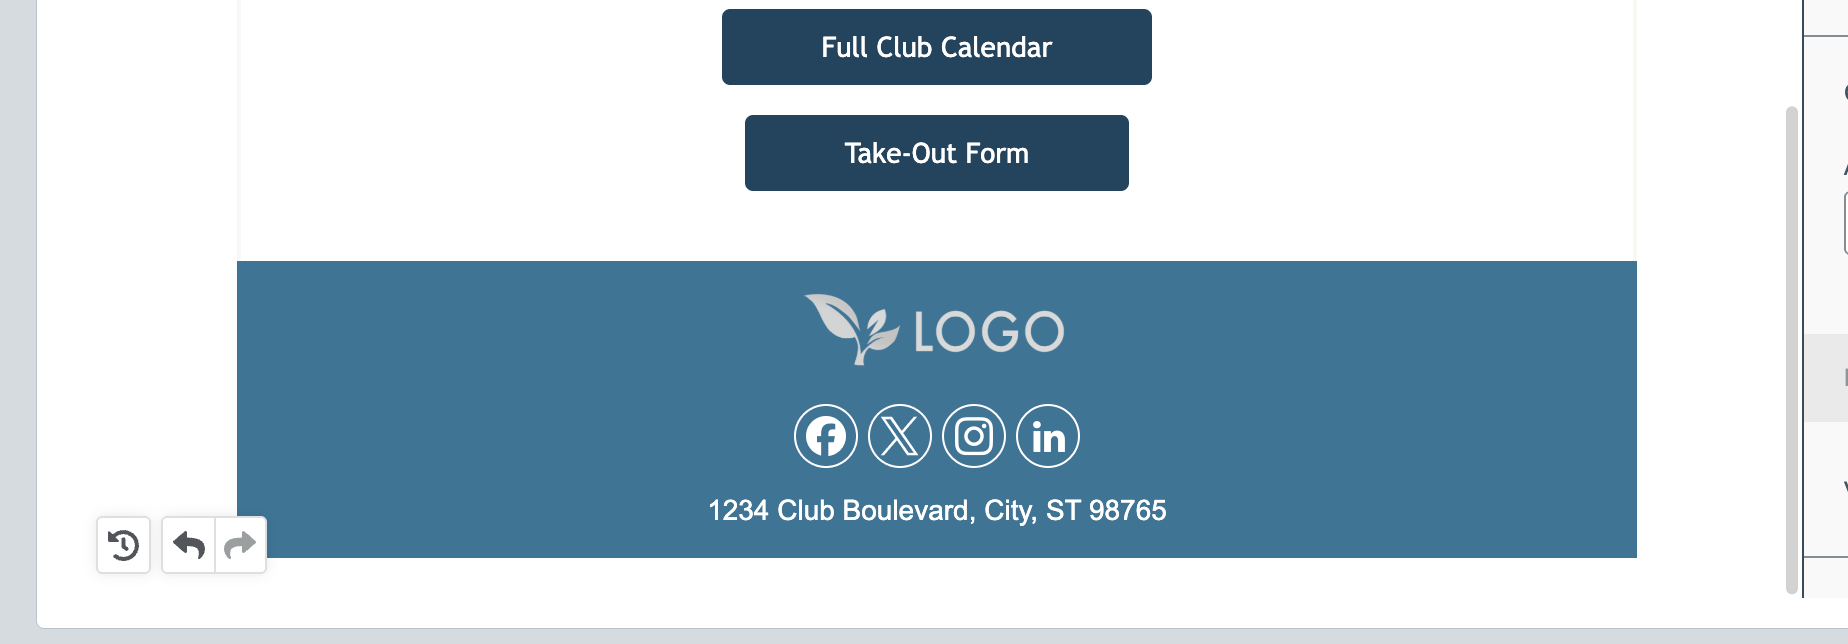 |
How to add Saved Row Categories
| Navigate to the Admin Homepage of your MembersFirst site. Use the Applications box on the bottom left and search for "codes", then click on the "Codes Maintenance" application. | 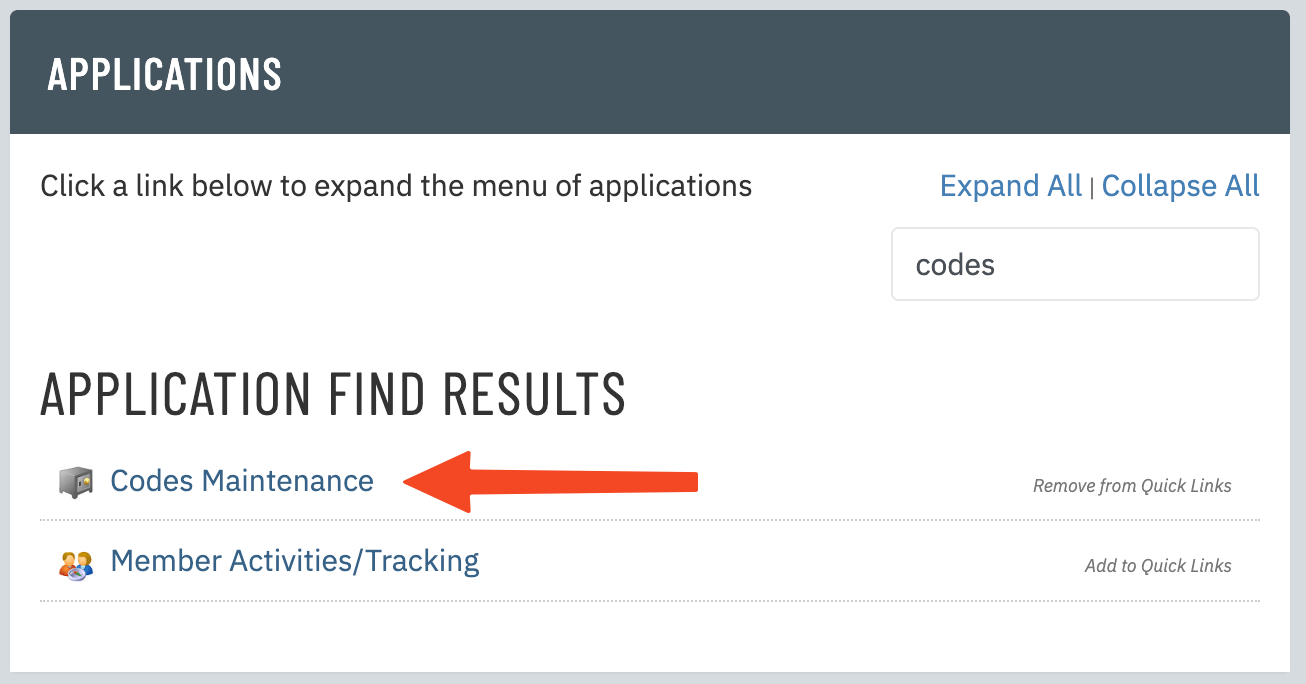 |
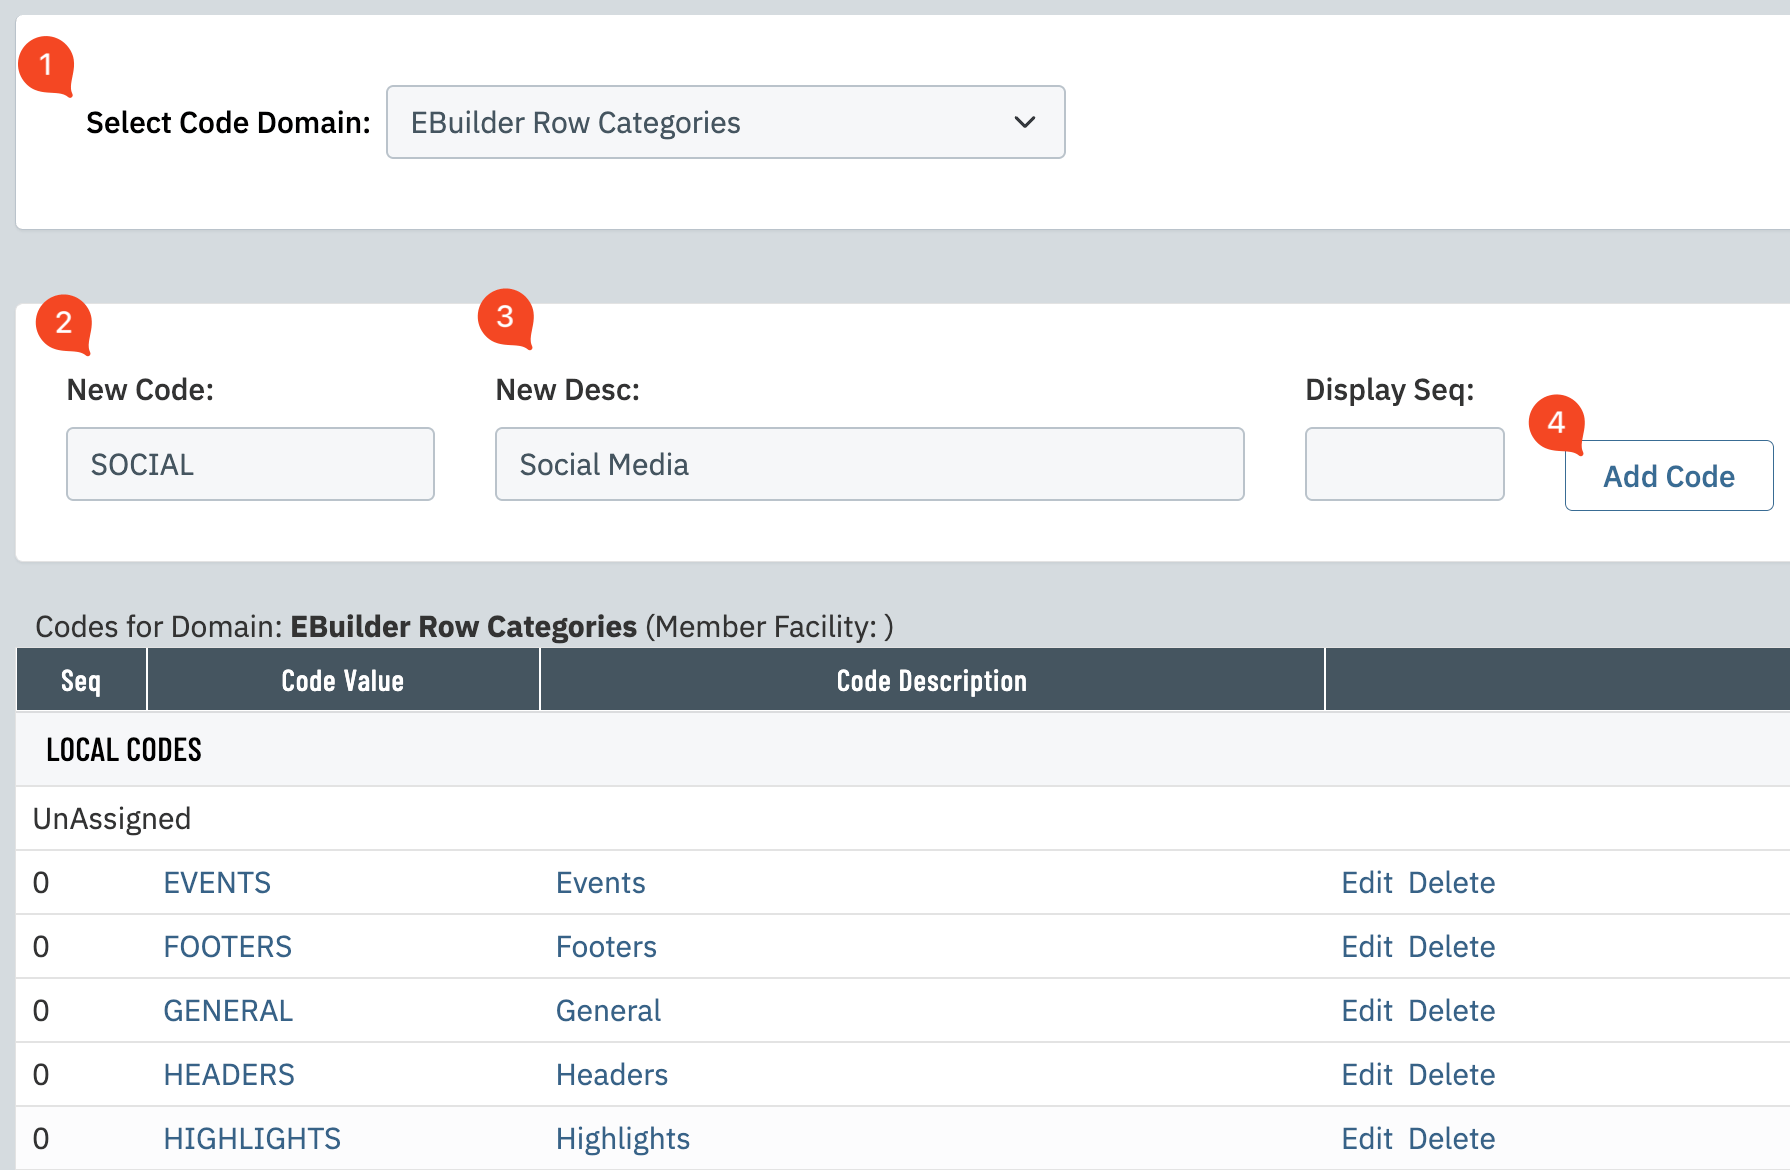
Your new saved row category is now ready for use! |
 |