Custom Forms is where you create the questionnaire for parents of the participants in your club's Junior Programs module. Depending on the complexity of your offerings, you can choose to have multiple forms for each type of camp asking specific questions related to the program or choose to create one form with all information needed. You can make questions optional or required. The system will automatically pull over information such as the booking member, dependent, and a date and time stamp of when the registration was created.
Common questions include birthdates, emergency contact information, allergies, apparel sizes and skill levels for specific sports.
These forms can replace paper information forms and provide better tracking and easier collection of information, especially with the use of required questions. Custom Form fields can be exported in the Registrations reports.
Continue to use the steps to add all of the information fields that a registrant will need to fill out.
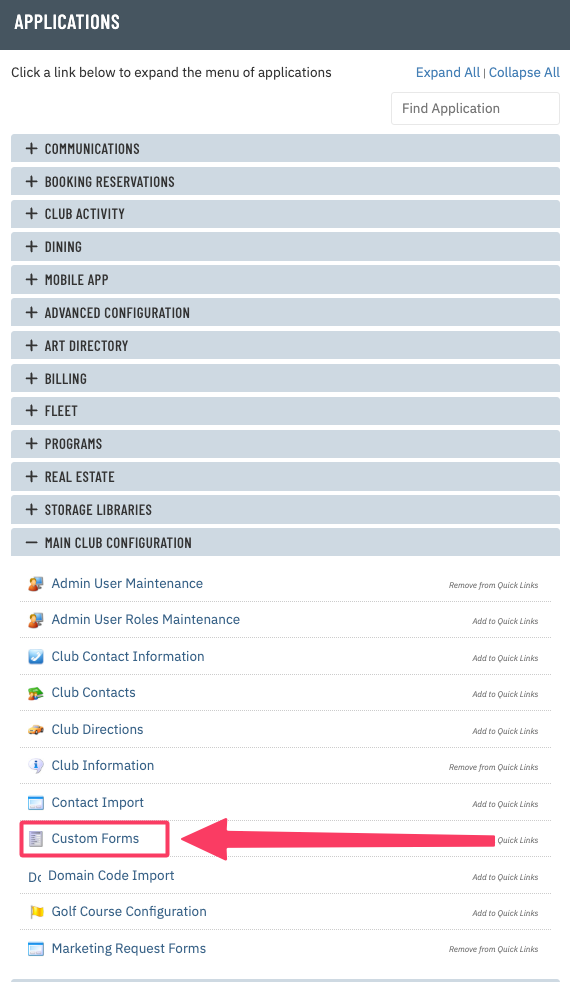
Log into the admin side of the website. If you do not have Custom Forms in your Quick Links, do the following:
- Go to the Applications area.
- Click on Main Club Configuration.
- Click on Custom Forms. You can choose to add this to your Quick Links for easier access in the future.
Please note: the Custom Forms are only used for Programs' Registration. |
 |
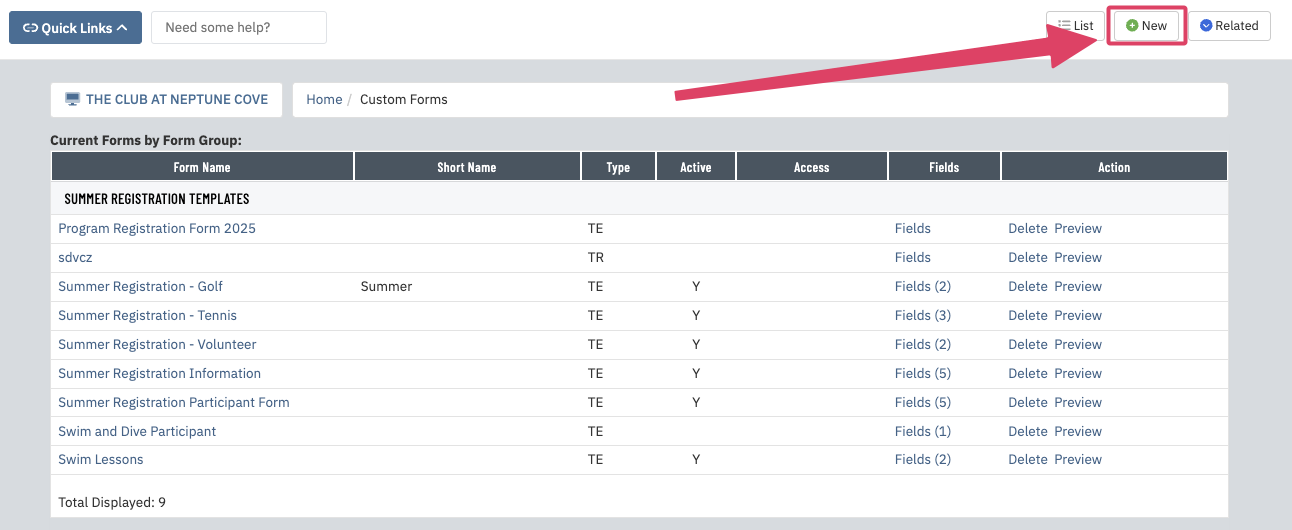
- A list of forms previously created will appear.
- To create a New form, click New at the top of the page.
|
 |
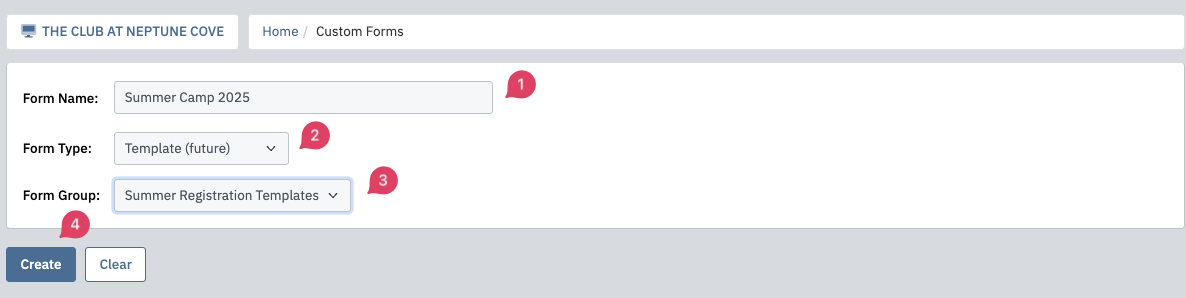
- Give your form a name, keeping in mind this is the title the member will see when registering their dependent.
- Select Template (future) from the Form Type dropdown.
- Select Summer Registration forms from the Form Group dropdown.
- Click Create.
|
 |
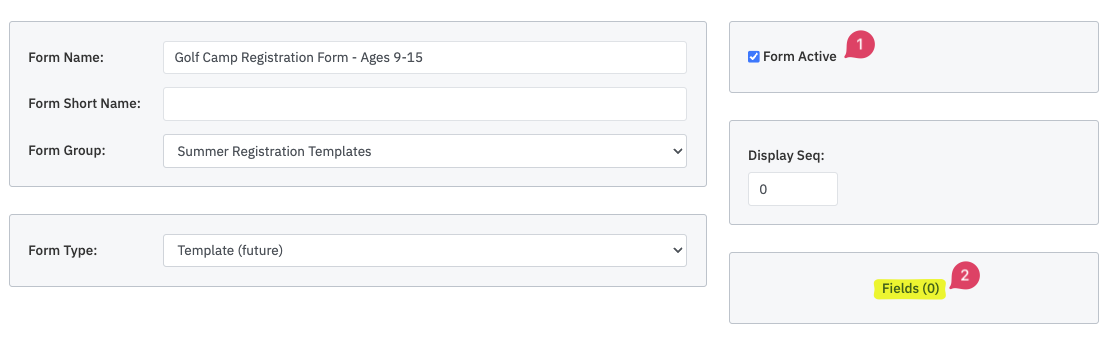
- To make the form active for assignment to a program, check the box next to Form Active?. You can use the Display Order setting to adjust what order those forms appear in on the admin side of the site.
- To add questions, click the hyperlink for Fields (0). The number in parentheses indicates how many fields are on a form. New forms will always have a zero until questions are added.
If you are familiar with our Marketing Request Forms, configuration of these fields will be familiar. **It's important to note that Custom Forms relate to the Programs module only; all other forms for the site are created using the Marketing Request Forms.** |
 |
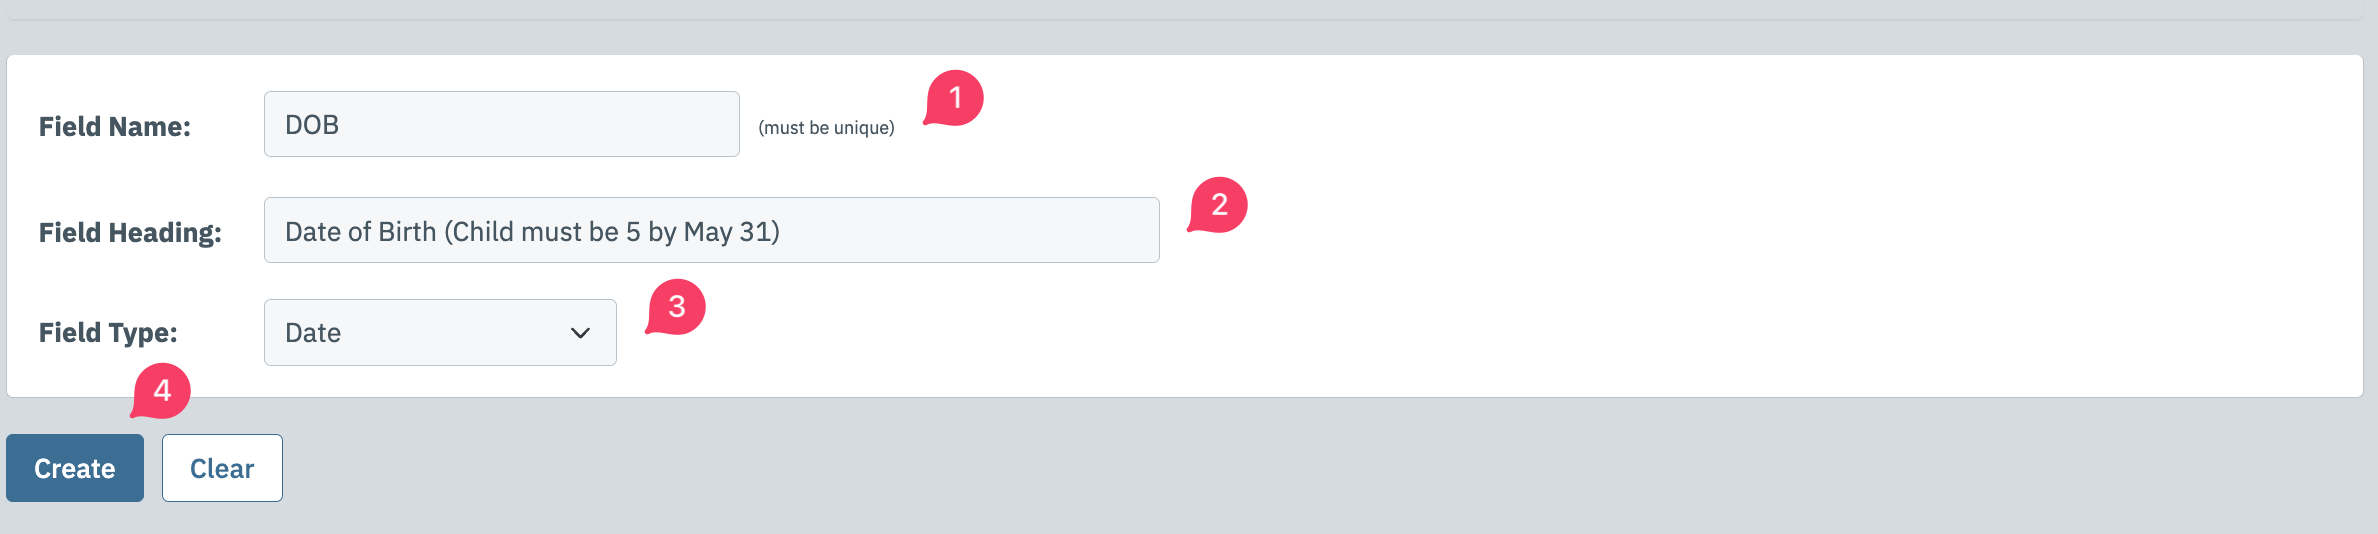
To add a field, click New in the top right corner. Fill in the following information:
- Field Name: this is internal only; it will also appear as the column heading when including the Custom Forms fields as part of the registrations report.
- Field Heading: this is what the member will see. *For example, you could use DOB above as an abbreviation for Date of Birth, which you'll enter here as what the member sees.
- Field Type: this is the type of information the member will enter.
- Select a Field Type. In our example, we're using Date, which will force the registrant to enter month/day/year for the child they're registering.
- Click Create once this information is filled in.
|
 |
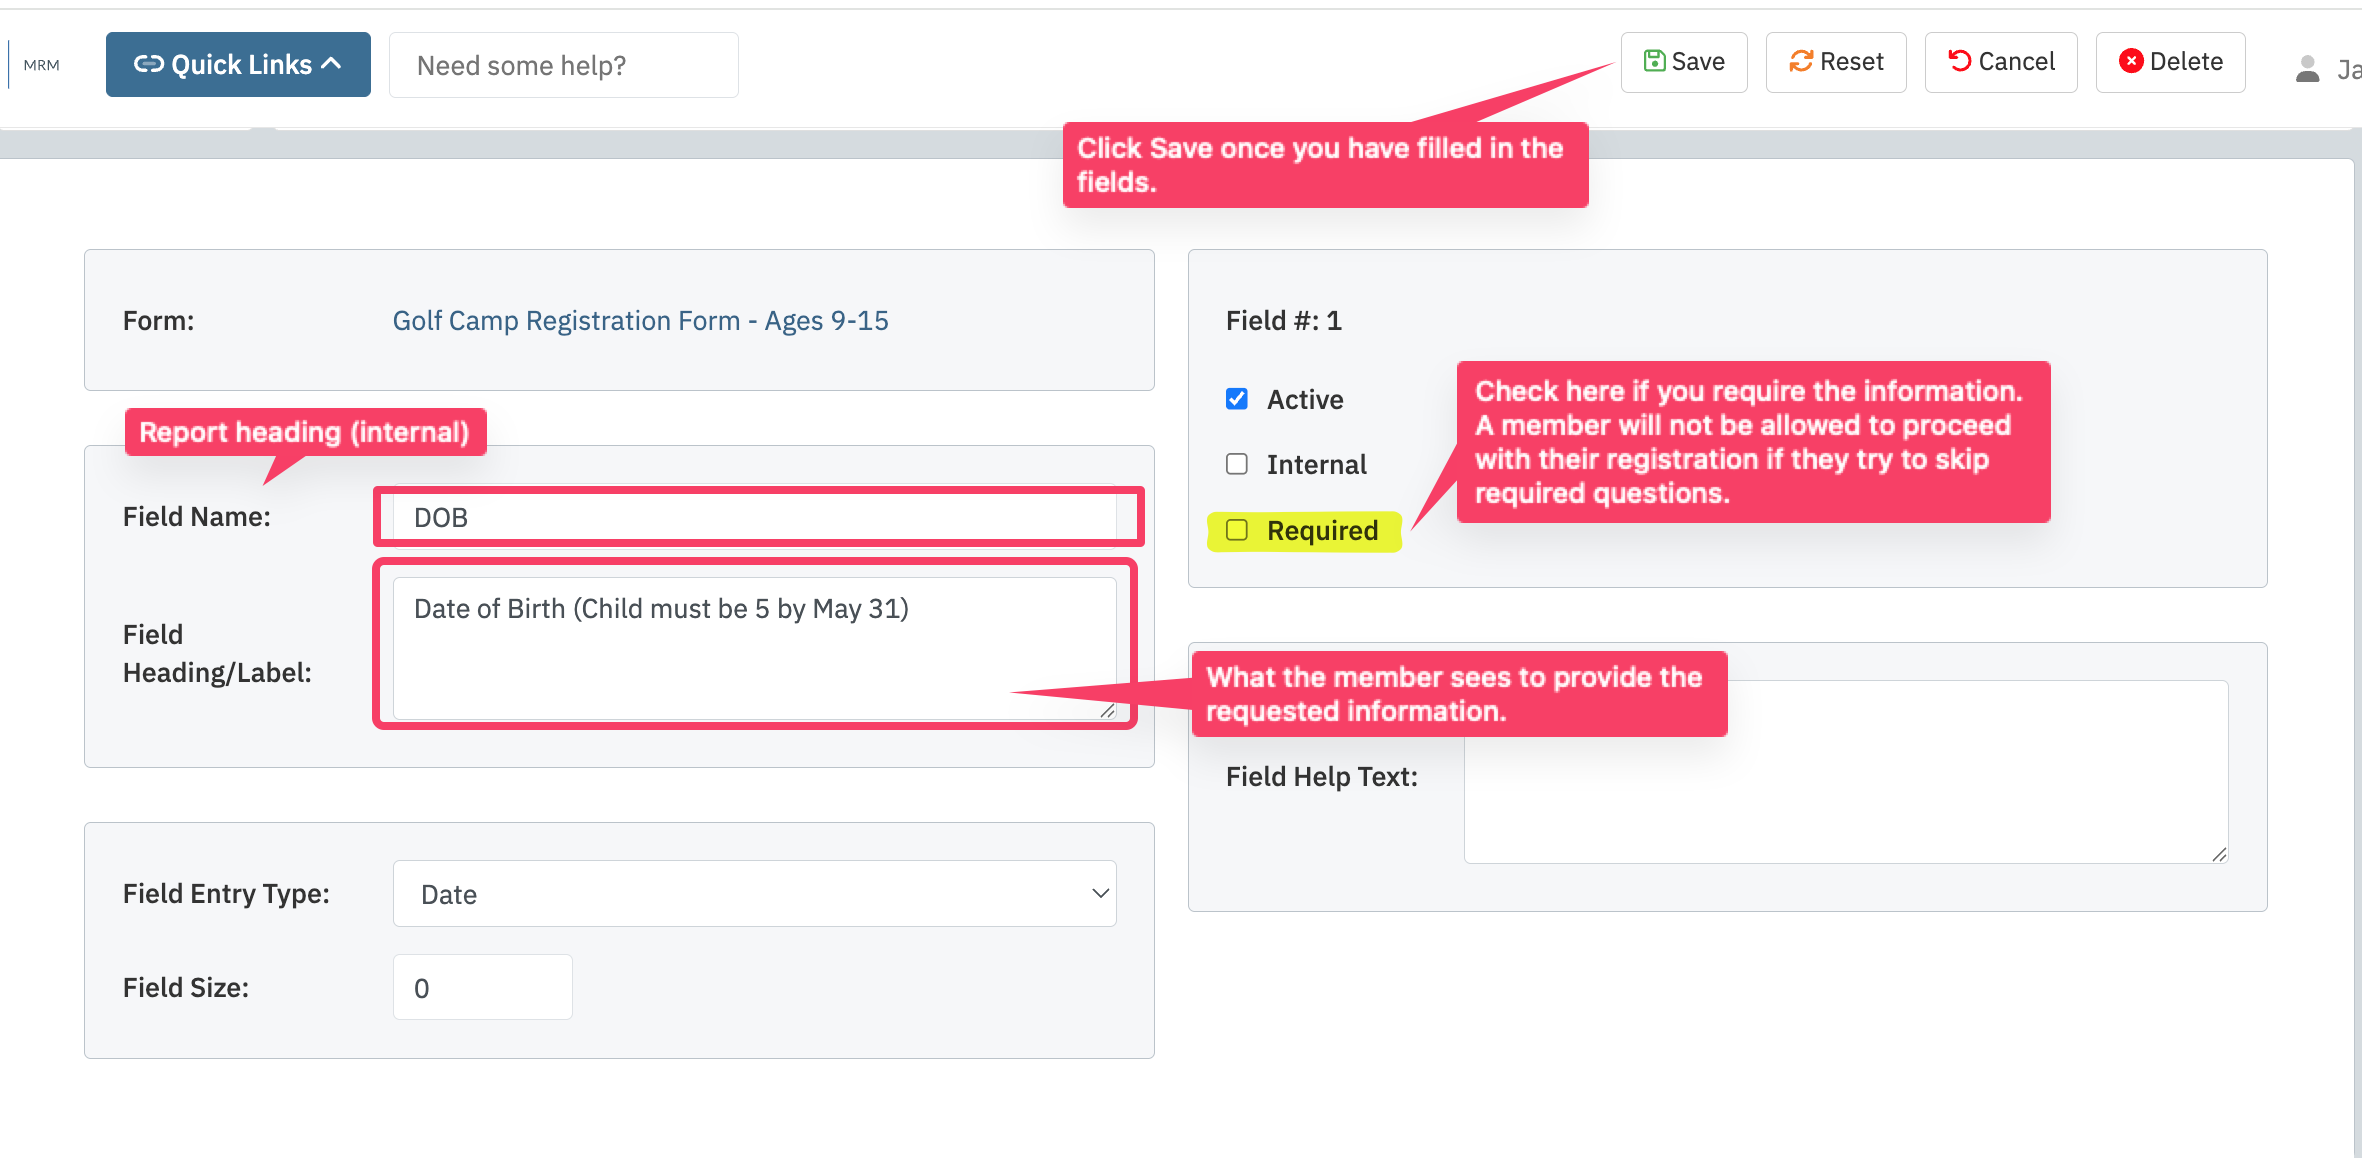
To complete the field's information, do the following:
- Field must be checked active to appear.
- The Field Name is what appears in reports on the admin side.
- The Field Heading/Label is what appears on the member side.
- If you want to Require the member to fill in the information, check the box there.
- Once you have filled in all of the information, click Save.
|
 |
|
Here are the types of questions available: |
- Boolean: Checkbox asking a member to confirm a statement.
- Checkboxes: Checkboxes allowing multiple selection.
- Date: Full date with month, day and year.
- Date: Month and year only.
- Heading (type 1): Text only field for instructions/explanations
- Heading (type 2): Text only field for instructions/explanations
- Image Only: Field has been depcreicated and is no longer in use.
- Number: This can be limited by number of characters allowed.
- Option Buttons (Radio).
- Select List
- Select List Multiple
- Separator
- Spacer
- Special
- Text Area: Accommodates up to 3,000 characters.
- Text Field: Can be used to limit the number of characters to enter. For example, if you wanted to limit explainations in the area.
|
Once you have completed the form, you'll need to assign it to a Program or Session. If you assign it to a specific program, it will appear for all sessions in the program. The recommendation is to add the form to the sessions it applies to. Otherwise, the member may be forced to fill out the information multiple times. If the member is booking several difference camps for their child which each have unique forms, the member will be forced to fill out each one for the different sessions (For example, the golf form may ask about whether they have their own clubs, while a tennis form might ask if they have a rating.)
| This is an example of what the member will see when registering for the program (This form will need to be filled out for each child if you are registering multiple family members.): |
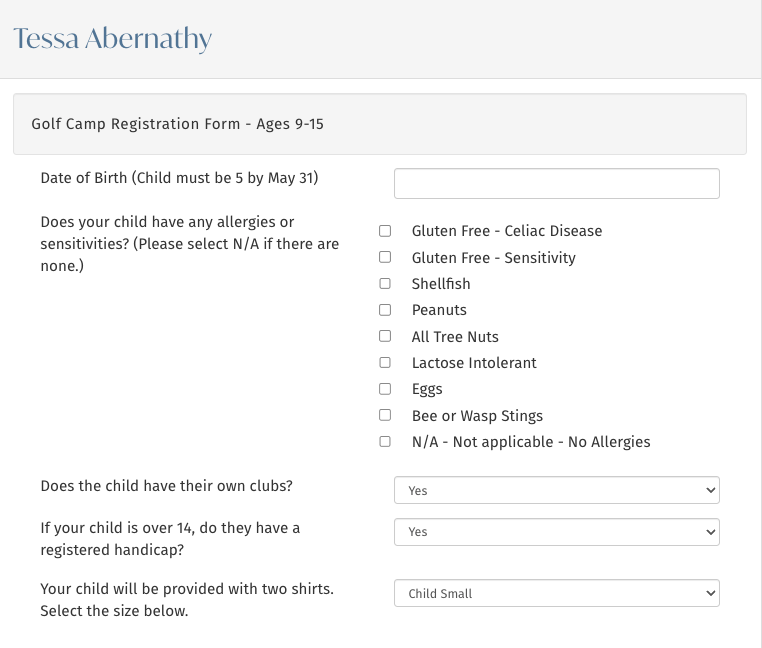 |