�How to Enable Guest Registrations
|
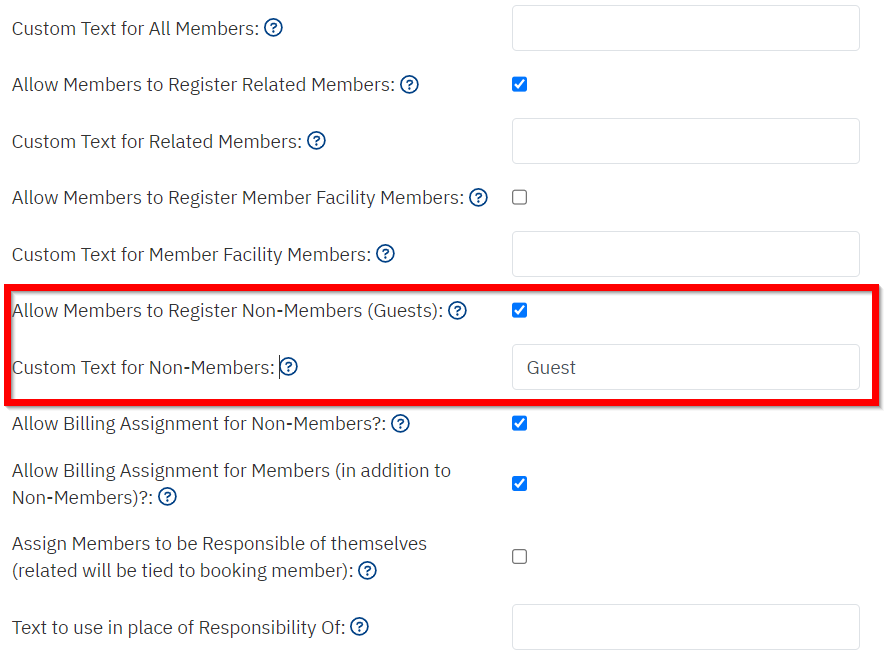
General Site Config Non-Member or “Guest” can be turned on and off in the General Site Config > Event Registration Please note the default heading is Non-Member. The administrator can change that heading by entering text in the Custom Text for Non-Members. |
 |
|
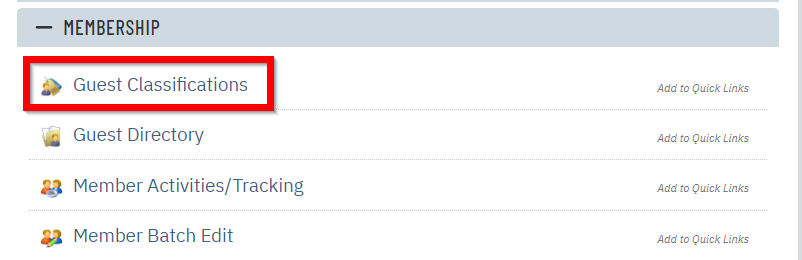
Next the administrator needs to set up the Guest Classifications. The role of the Guest Classification allows for the administrator to determine what information the member must fill out when registering a guest. Classifications must be configured prior to enabled Guest Registrations as events cannot be saved unless a classification is selection. To create a new Guest Classification, scroll to the Membership application and select Guest Classification |
 |
|
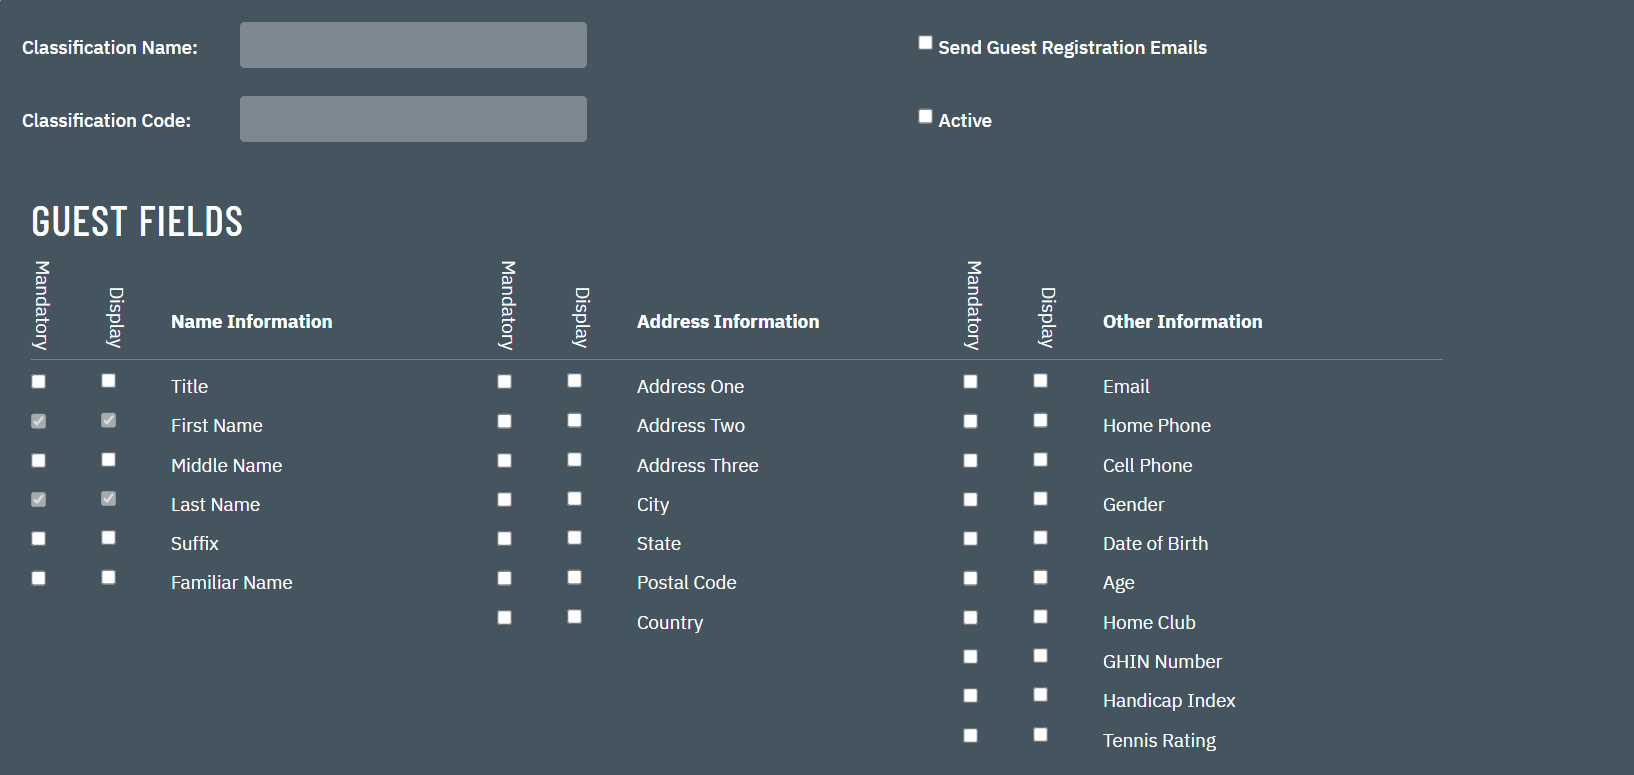
Click New to add a classification. |
 |
|
The following page is where the administrator will select which fields the member can / must fill out when registering the guest. Any classification requires a First and Last Name. |
 |
|
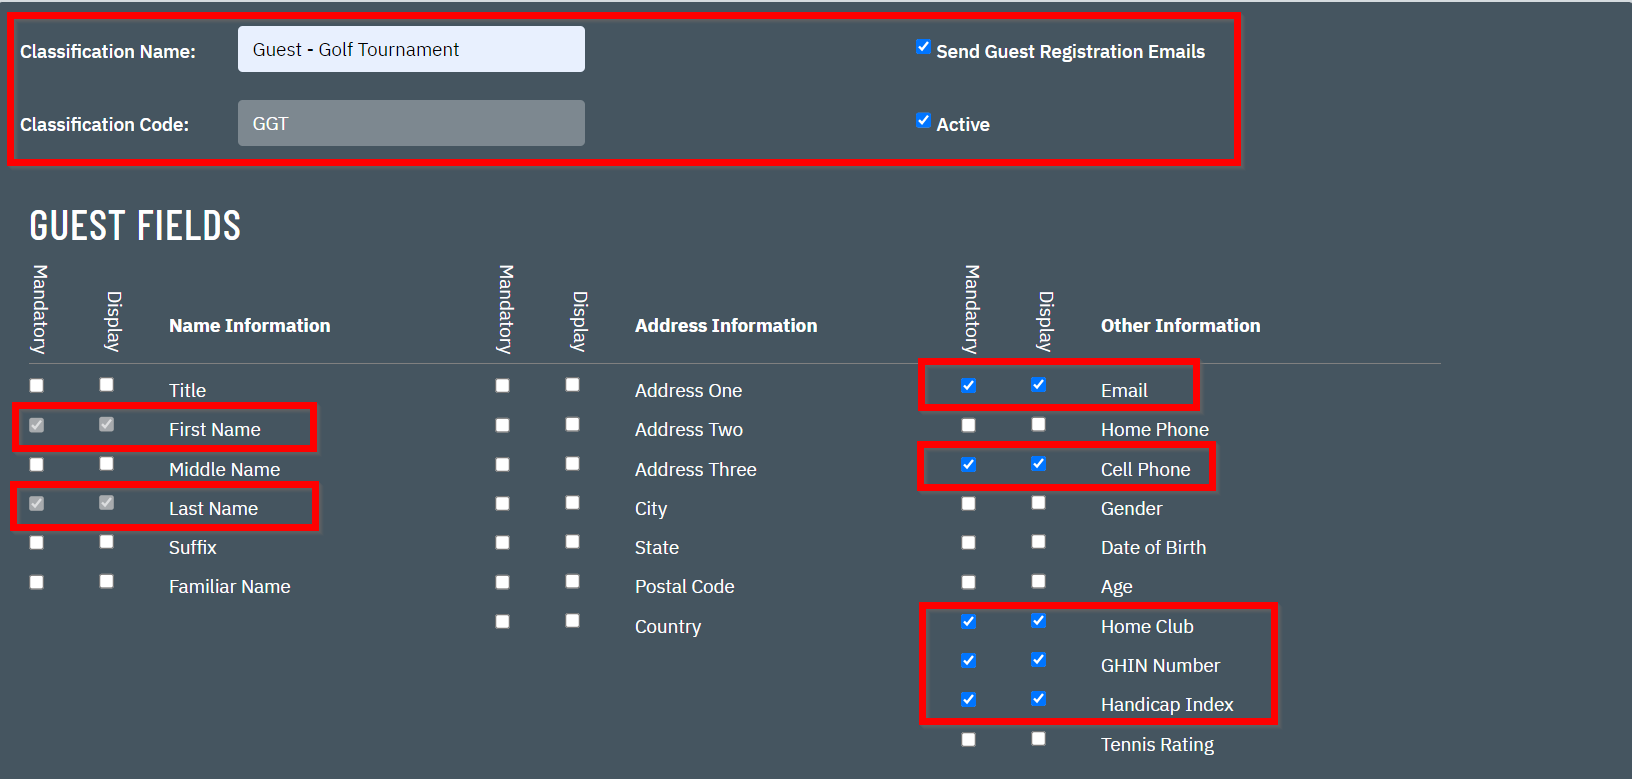
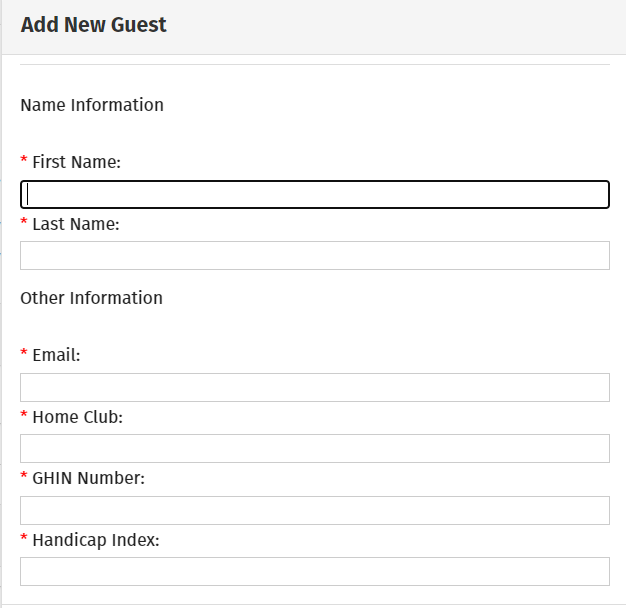
In this example, the administrator created a new classification for a Guest - Golf Tournament. Beginning from the top down, the note the following: Classification Name: Guest - Golf Tournament Classification Code: GGT Send Guests Registration Emails: YES Active: YES Guest Fields: First Name & Last Name (both required), Email, Cell Phone, Home Club, GHIN Number, and Handicap Index |
 |
|
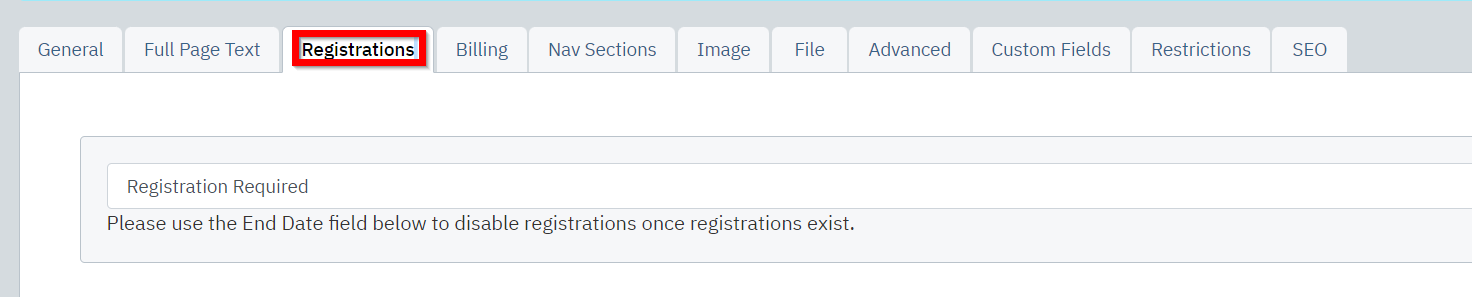
Guest Classification is the key variable needed when Non-Members can be registered for an event. Administrators can create an unlimited amount of classifications as each event may have different registration criteria. Once finished, select the event in the Club Calendar. Choose the Registration tab |
 |
|
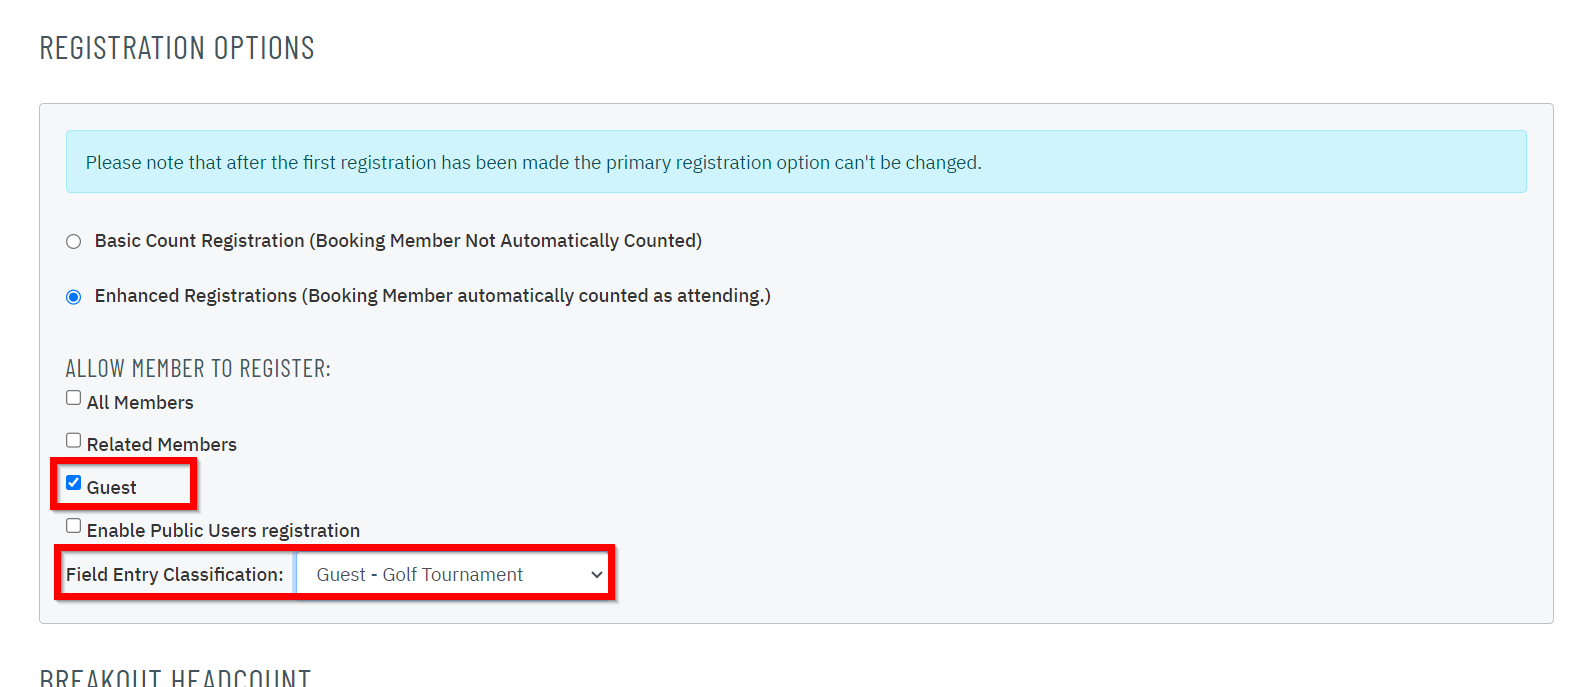
Under the Registration Options, make sure that Enhanced Registrations is selected. Then choose Non-Members. When Non-Members is selected, the administrator must also select the Field Entry Classification as this is the “form” the member will fill out when registering. |
 |
|
After selecting Non-Members, two new fields will appear.
When finished, click Save. The event has been updated to allow for Member and Non-Member registrations. |
 |
|
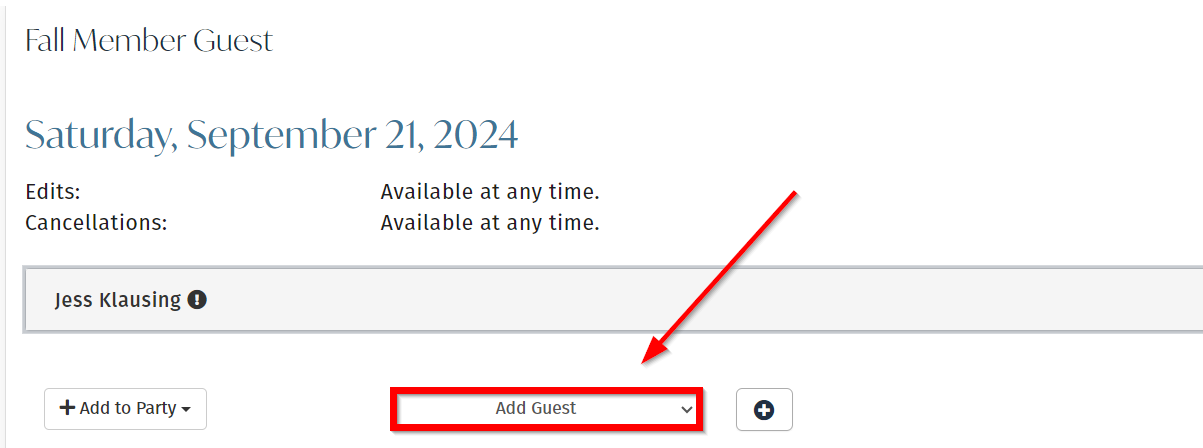
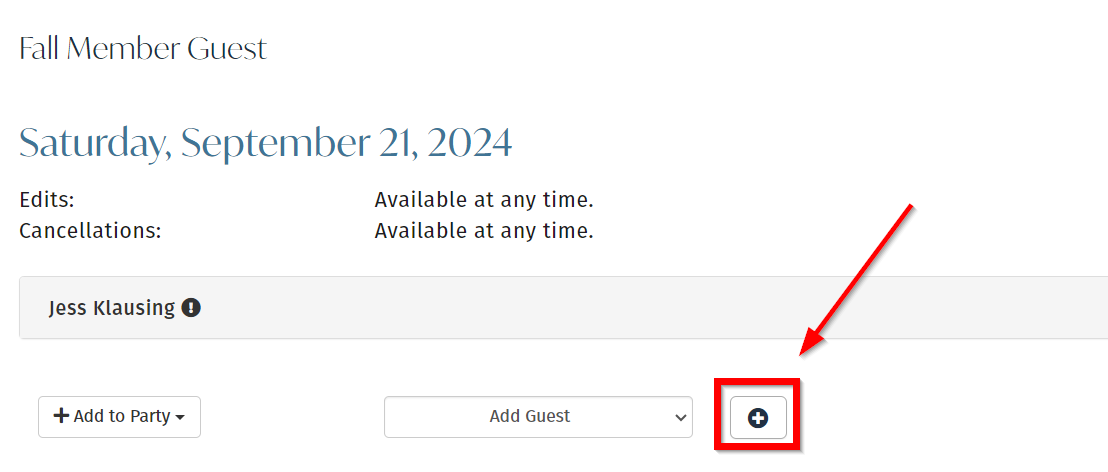
Member Registration View To view what the member will see, login to the website and select the event from the Club Calendar. Since Enhanced Registrations is setup, there is a drop down beneath the Booking Member |
 |
|
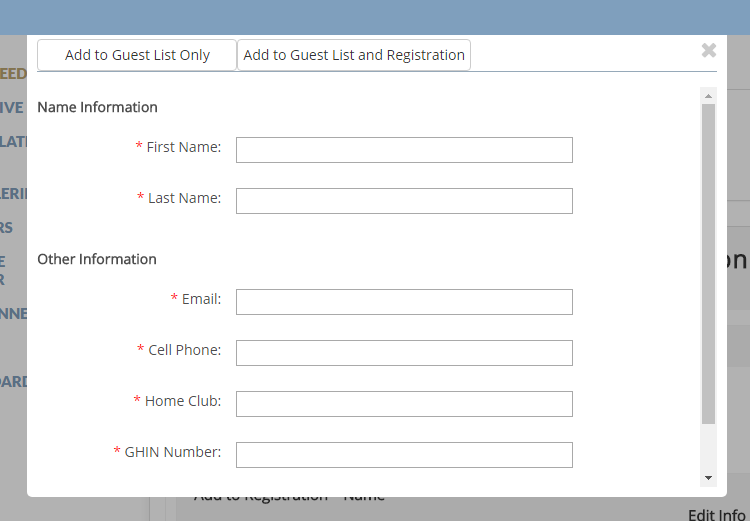
When Non-Member is selected, the member will be prompted a window to add a New Non-Member. To add a new Non-Member, click the + icon. |
 |
|
A lightbox window will open up whereby the member will enter in all the Non-Member details. |
 |
|
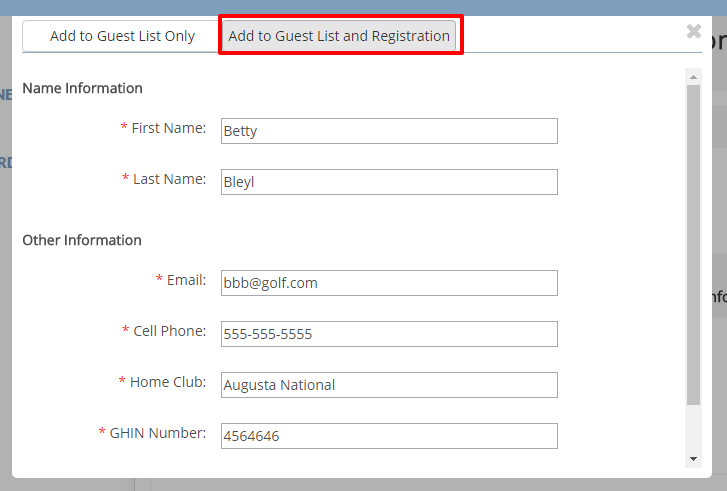
When finished entering in the details, click Add to Guest List and Registration. |
 |
|
The Non-Member can also be added to the Guest List Only as and NOT the registration as well. |
 |
|
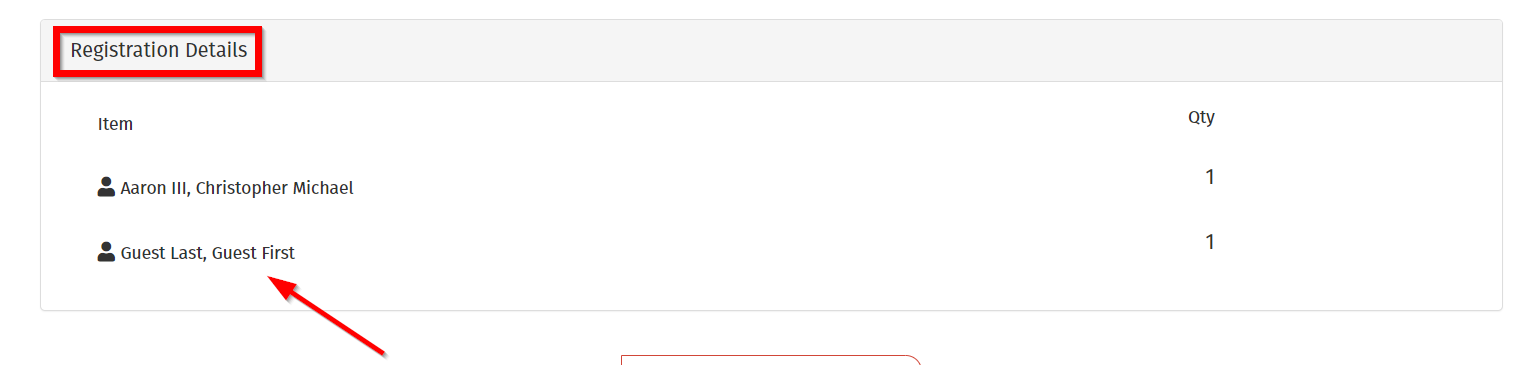
Once added, the Non-Member will appear below the Booking Member in Registration Details. |
|
|
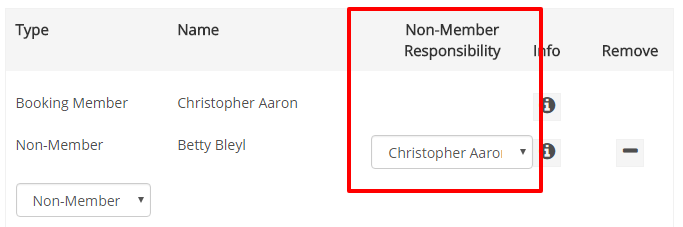
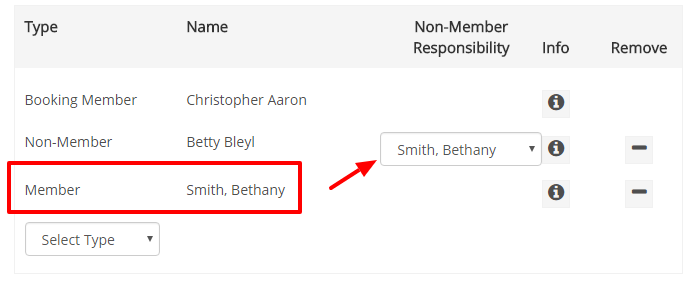
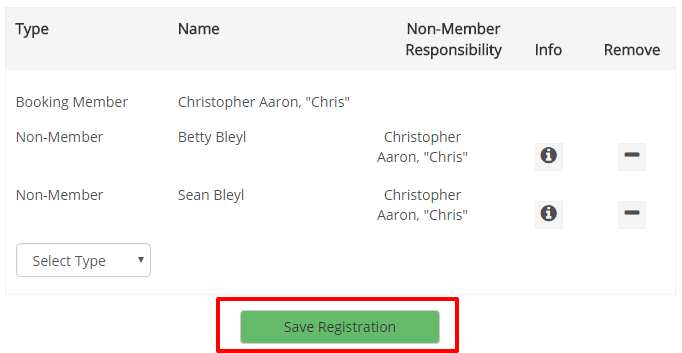
Depending on the event setup, the Booking Member may register both Members and Non-Members. When registering both types, the Booking Member can associate Booked Members with Non-Members, primarily for billing purposes. To enable, check the flag for Allow Assignment of Guest Responsibility in the event setup. If this feature is disabled, the Non-Member Responsibility field is read-only. |
 |
|
For example, Member Bethany Smith was added to the registration. Once added, she can be selected from the Non-Member Responsibility drop-down, thus Bethany is responsible for any event-related guest charges for Betty Bleyl. |
 |
|
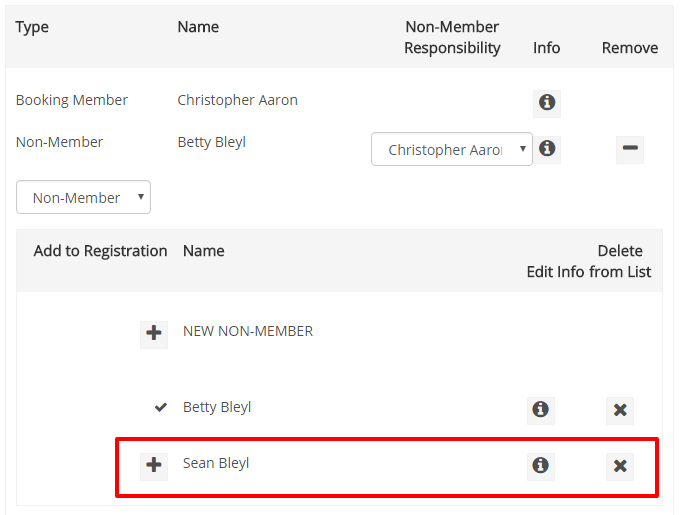
Should the member need to register an existing Non-Member, select Non-Member and then choose the existing Non-Member, e.g. Sean Bleyl. |
 |
|
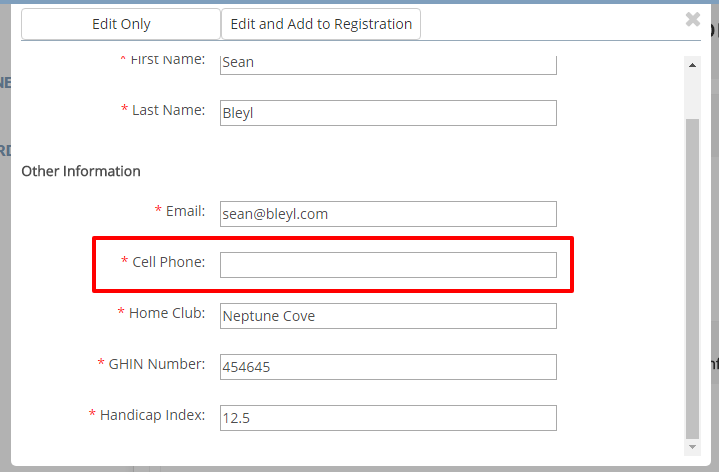
When Sean Bleyl is added to the registration, if his profile is missing any of the required fields necessary for the registration, the following window will open, prompting the member to update the required fields. |
 |
|
A few other items to note….
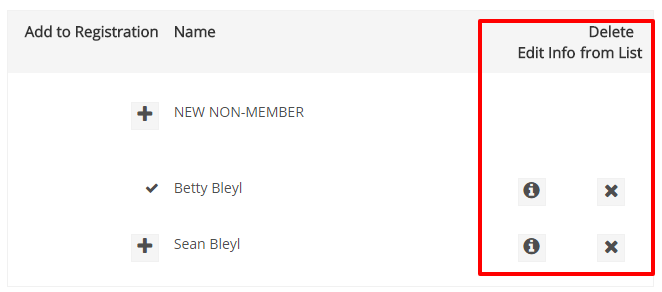
Clicking on the INFO (i) icon will allow the member to edit / update the profile details for the Non-Member.
Clicking on the X icon will remove the Non-Member from the member’s list, however that will not remove the Non-Member from the Guest Directory, instead the Non-Member will be rendered inactive (note section below for Guest Directory). When finished, click Edit Only or Edit and Add to Registration. |
 |
|
Once all Non-Members have been added to the registration, click Save Registration. |
 |
|
Since email addresses were required as part of the Non-Member registration, the Non-Member will receive the same notifications that are sent to the member, provided the email notifications are enabled for both members and guests. |
 |
|
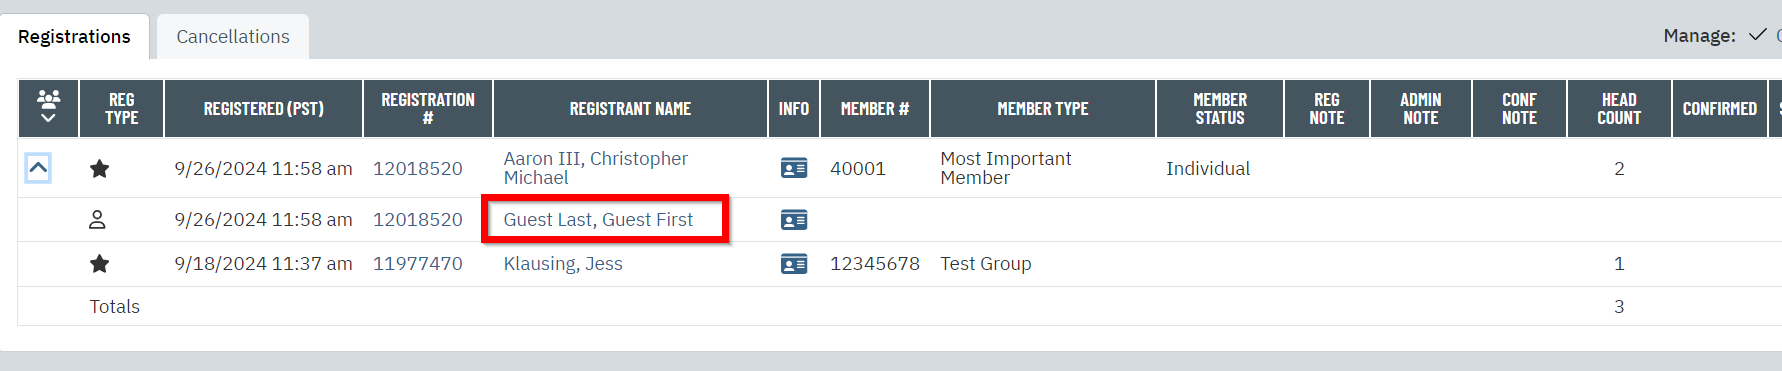
Managing Event Registrations through the admin side remains the same as with Basic and Enhanced. Non-Members are identified under the Reg Name. To edit a registration, click the Booking Member’s name. |
 |
|
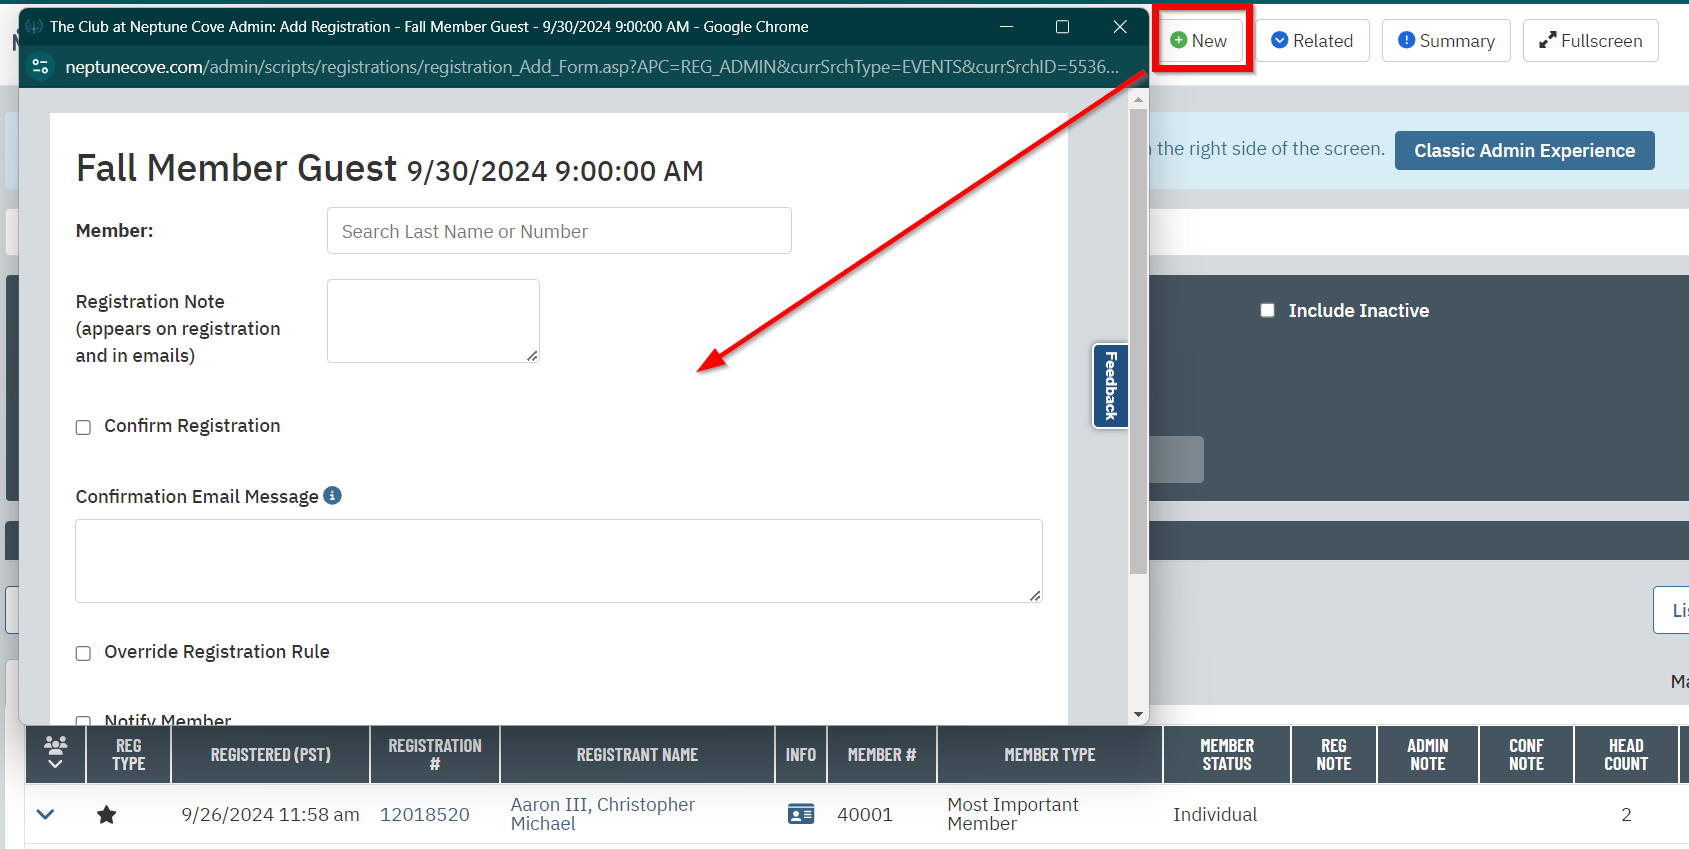
Members and Non-Members can be added by clicking on New and entering information in Registration popup window. |
 |
|
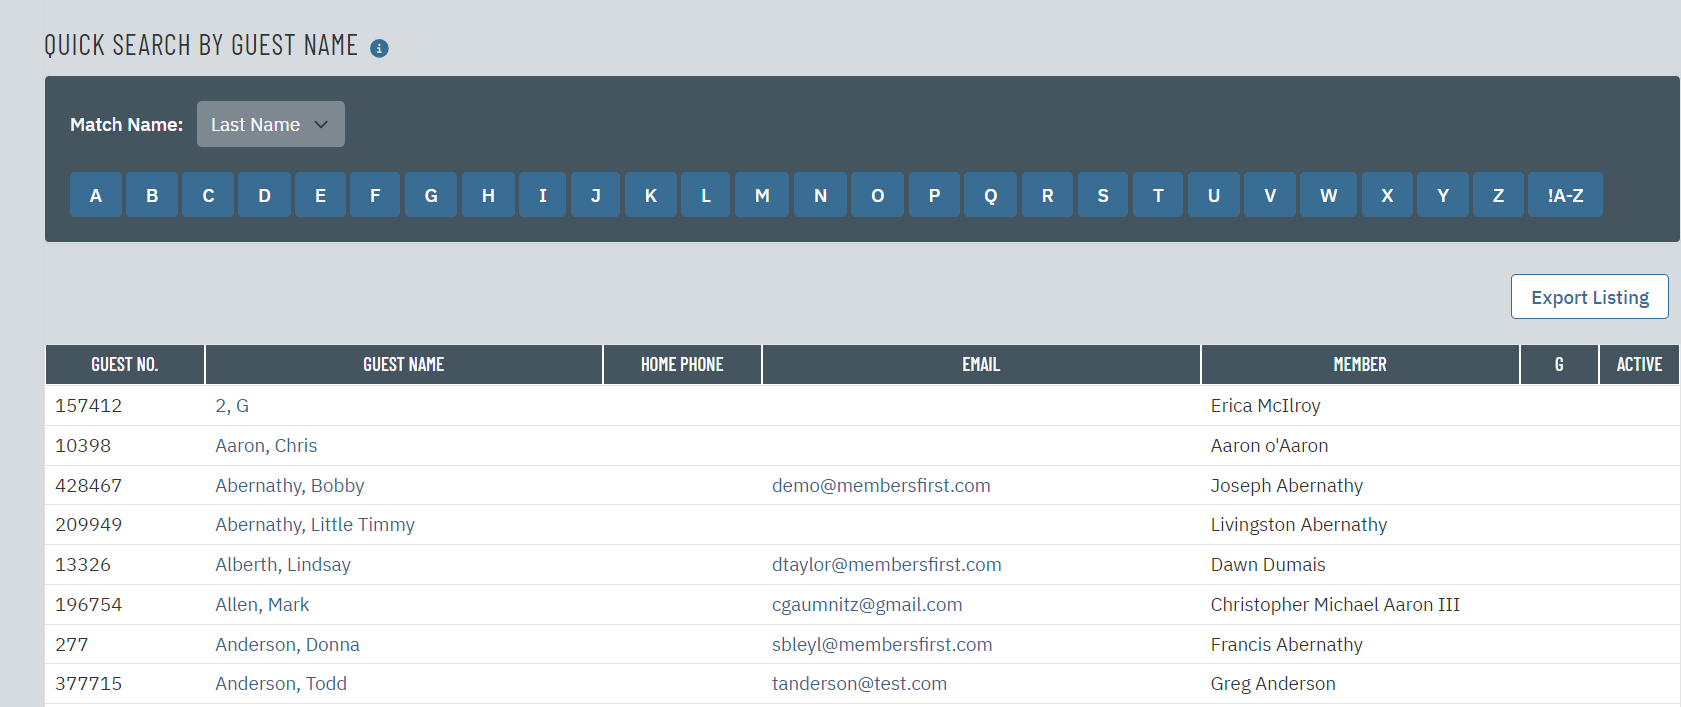
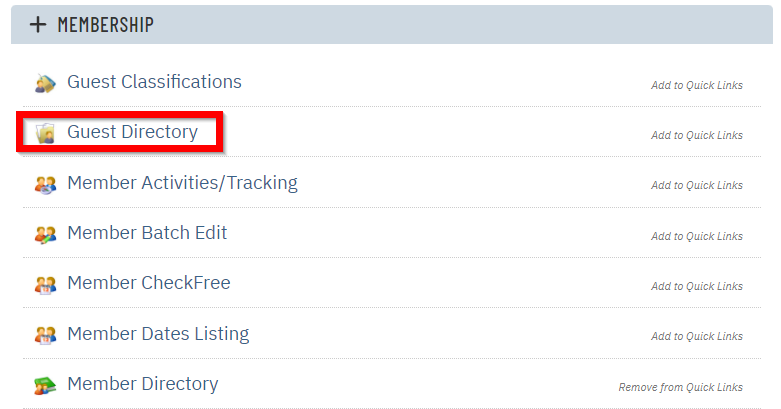
Guest Directory Every Non-Member added by a member of the club will be saved in the Guest Directory: |
 |
|
The directory can be filtered by a variety of ways as seen below in the screenshot:
|
|
|
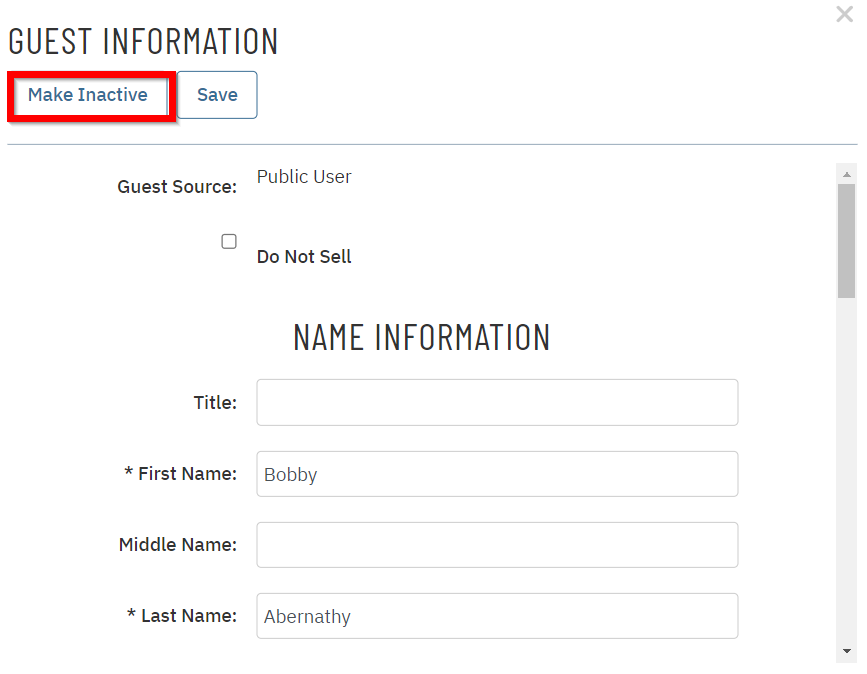
Clicking on any Non-Member name will allow the administrator to update all classification fields available. The administrator can also Make Inactive any profile as well. Please note that neither the member nor administrator can delete a Non-Member. |
 |
|
To add a new Non-Member, click New at the top. |
 |
|
Any Non-Member must be associated with a club member, therefore the admin must assign the Non-Member to the member’s profile. Then fill out all the corresponding details for that Non-Member. When finished, click Add Guest. |
 |