How to Create a New Image Album
| Log into Admin Home on your web site. |  |
| Click on Club Content in the Applications box, then click on Image Albums. | 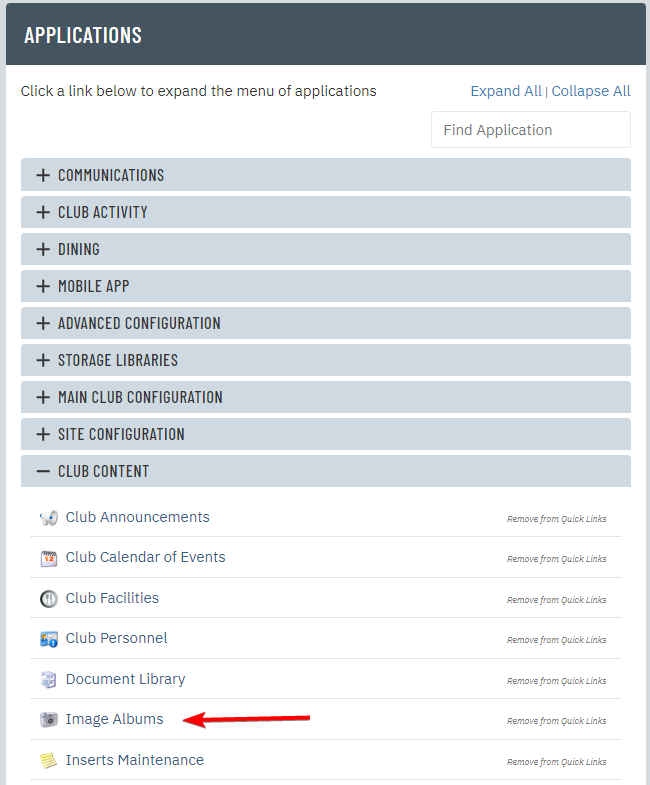 |
| Click New at the top of the page. |  |
| Enter an Album Title and select an Album Group if applicable. Click Create Now. |
 |
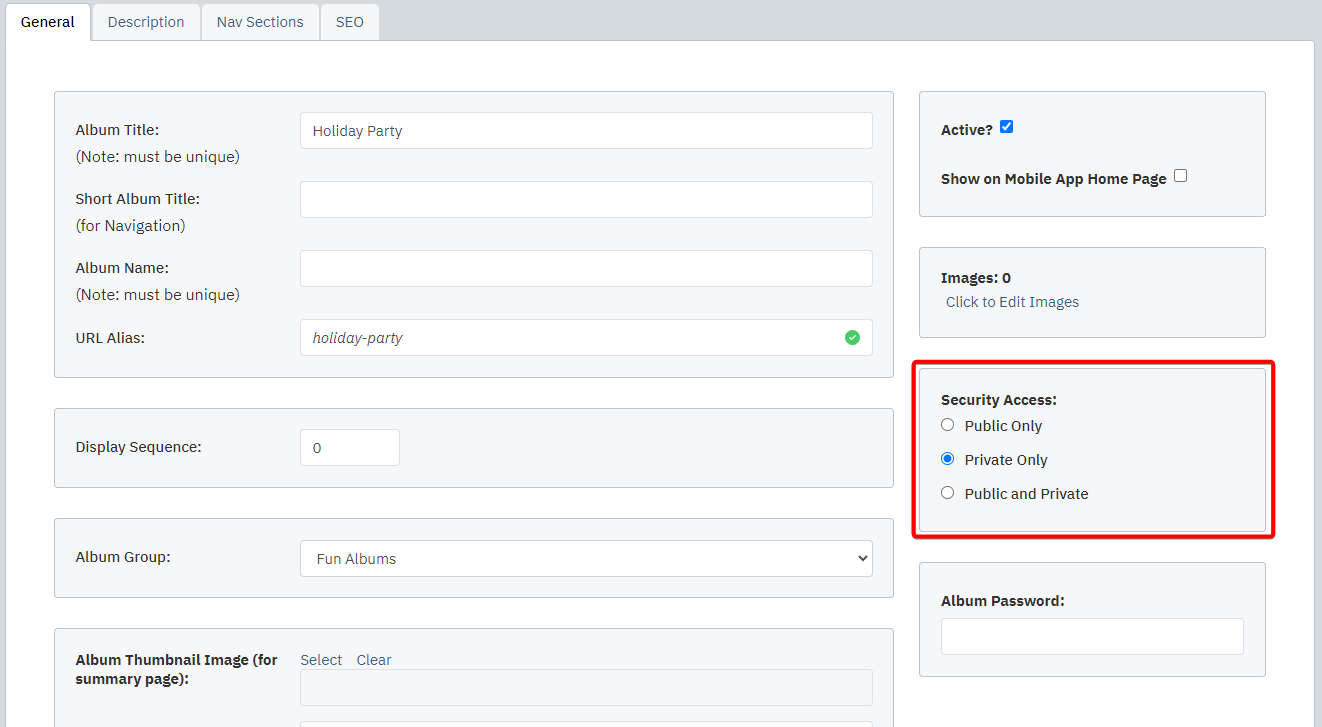
| You will now be on the General tab. Click the Active checkbox. If you have the mobile app, click the Show on Mobile App checkbox as well. Optional: Enter a number into the Display Sequence field to change the order of the albums. If you would like to have an album appear at the top of the list, then it should have the lowest Display Sequence number. (i.e. Display Seq -1 will appear before Display Seq 0) |
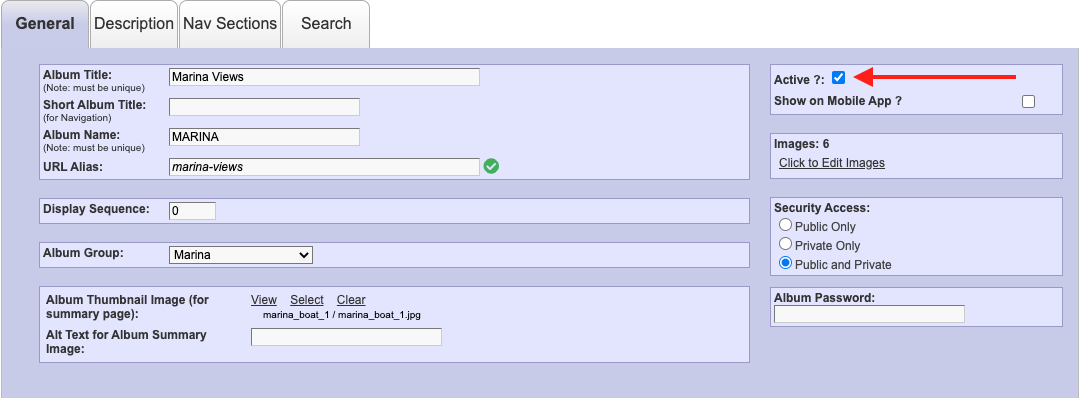 |
| Click the appropriate Security Access. Selecting Private Only will prevent the album from appearing on the public side of your site unless the user is logged in. Any direct link to the album will require the user to be logged in. Selecting Public Only will prevent the album from appearing the the member side of your site. Selecting Public and Private will make the album appear on both the public and private site of your site. A direct link to the album will not require login. |
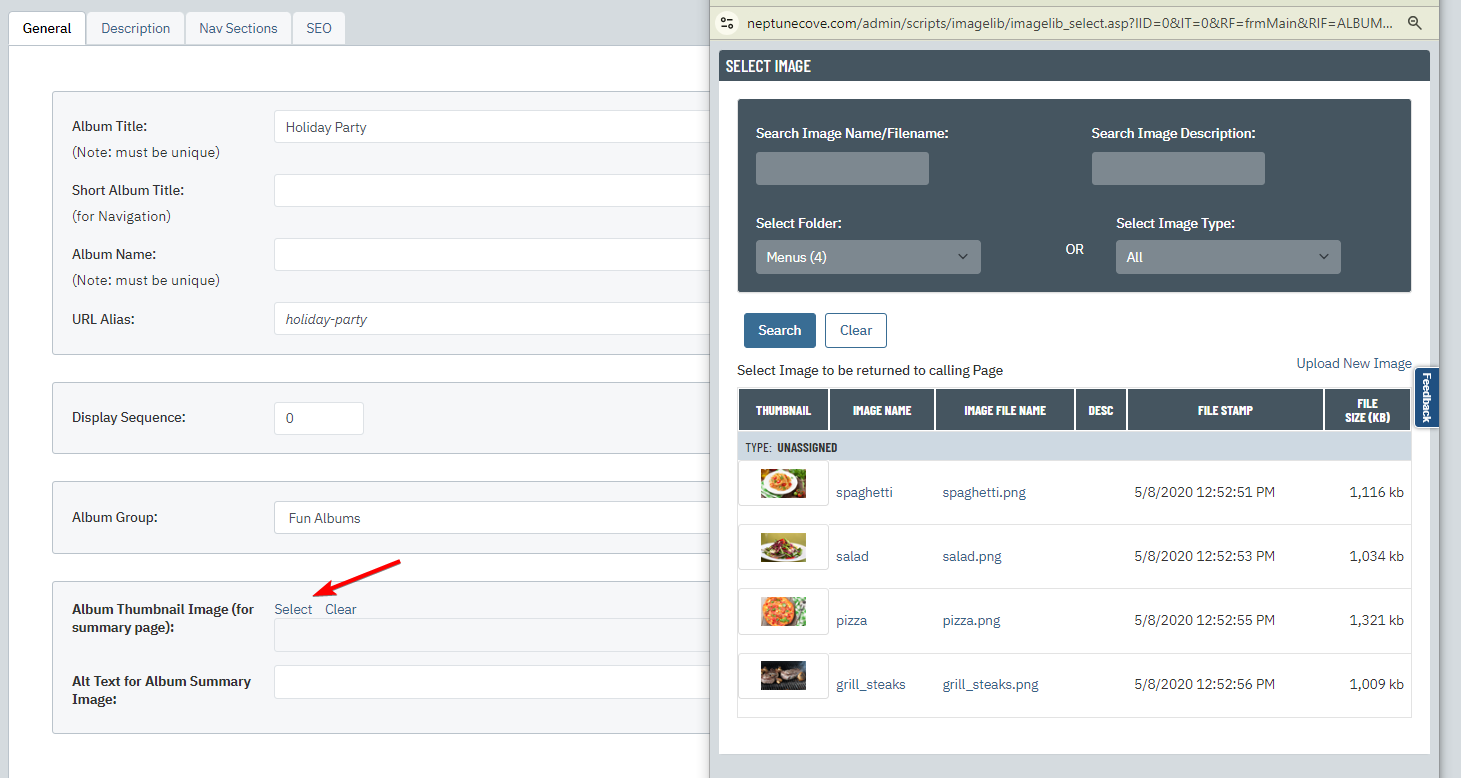 |
| Click Select to the right of Album Thumbnail Image (for summary page). A pop-up window will appear. The image you select will appear on the Image Albums list as a preview thumbnail for full album. |
 |
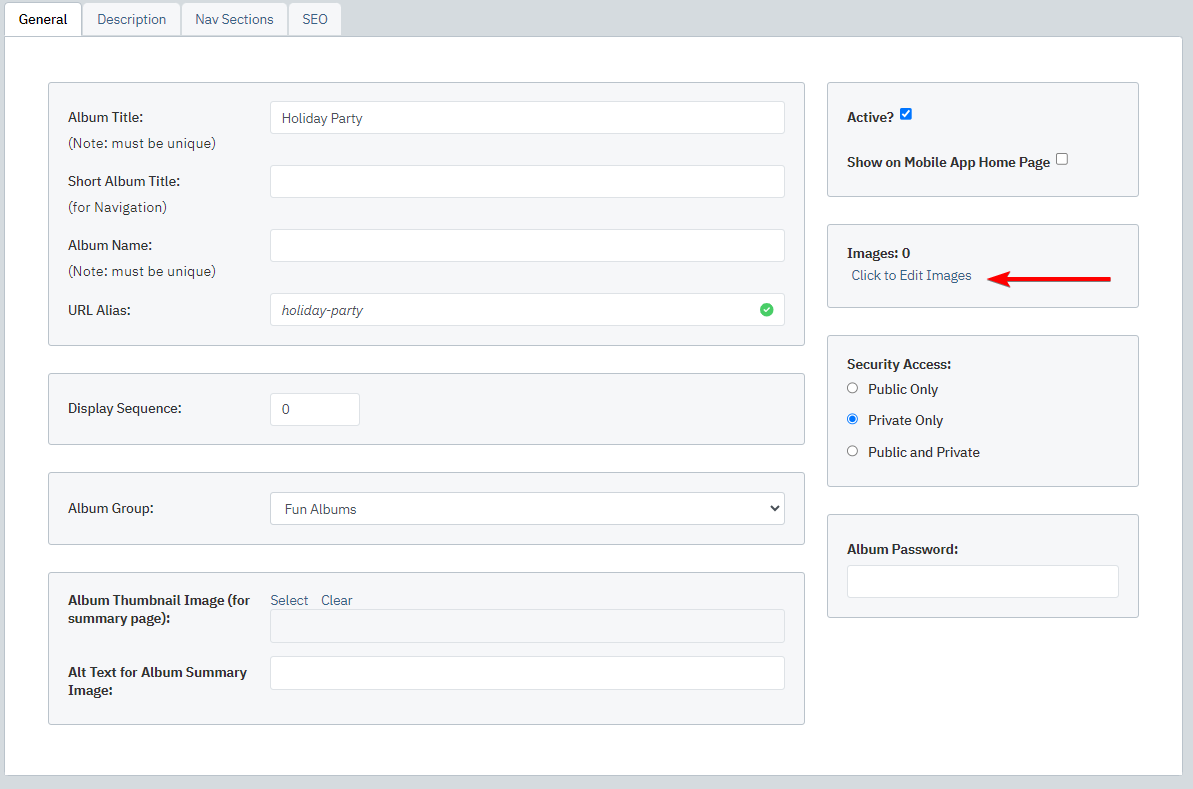
| Click Click to Edit Images. A message will appear asking if you are sure you want to save your progress Click OK. |
 |
| Under the Multiple Image Selection box, use the Select Image Folder drop-down to find the folder in the Image Library that has the photos you would like to use for the Image Album. Once the folder is selected, all images in that folder will appear in a list. |
 |
| You can either select individual images by checking the boxes to the left of image names or select all images by clicking the Select All button beneath the image list. | 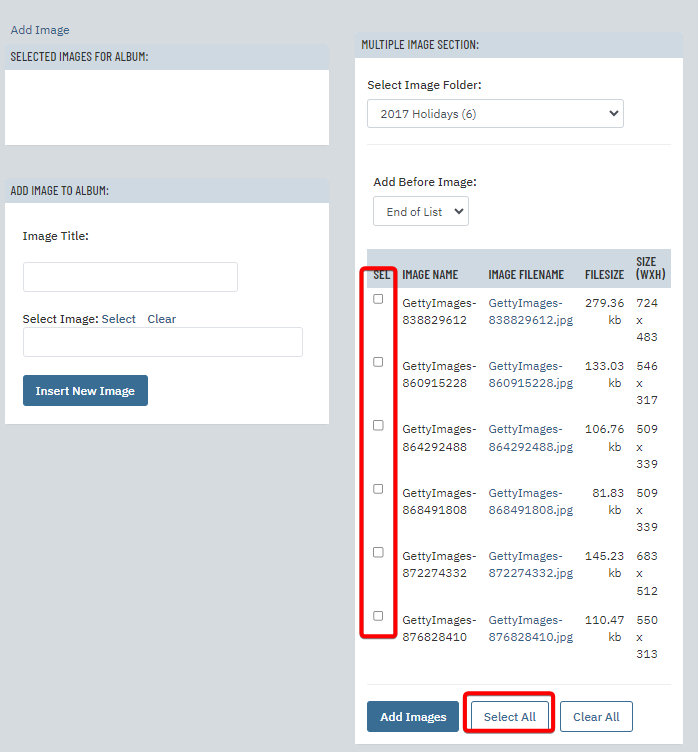 |
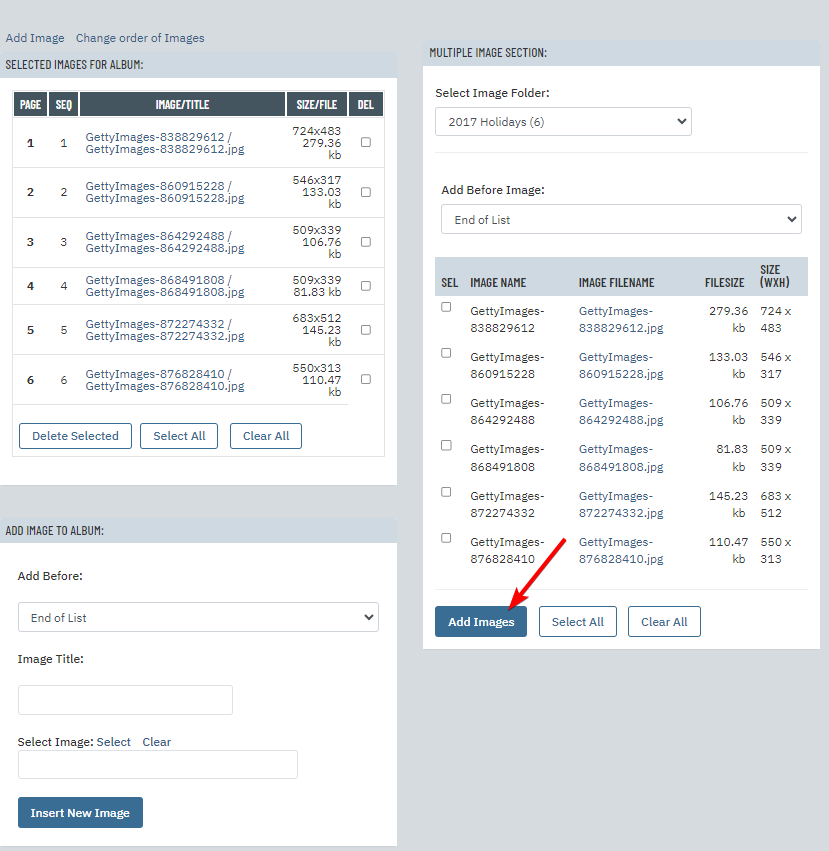
| Click Add Images to add all checked images to the Image Album. The Selected Images for Album list will populate on the left. Your work will automatically save and update on the website. If you decide to remove any images from this album, you can simply check the boxes to the right of the images and click the Delete Selected button at the bottom. |
 |