Setting Up a Basic Block
A block is a feature that allows admins to block off portions of the tee sheet for whatever purpose. Some of the more common reasons to create a block on a tee sheet are restricting tee times during a given period of time and announcing different tournaments/events/leagues. Initial creation of blocks will take some time, but once one is created it can be copied and used elsewhere throughout the tee sheet. Blocks can be set up in many ways which will be reviewed in separate Learning Center articles. The steps listed below describe the creation of a basic block.
| After logging into the admin site of tee times, click on + New Block button. | 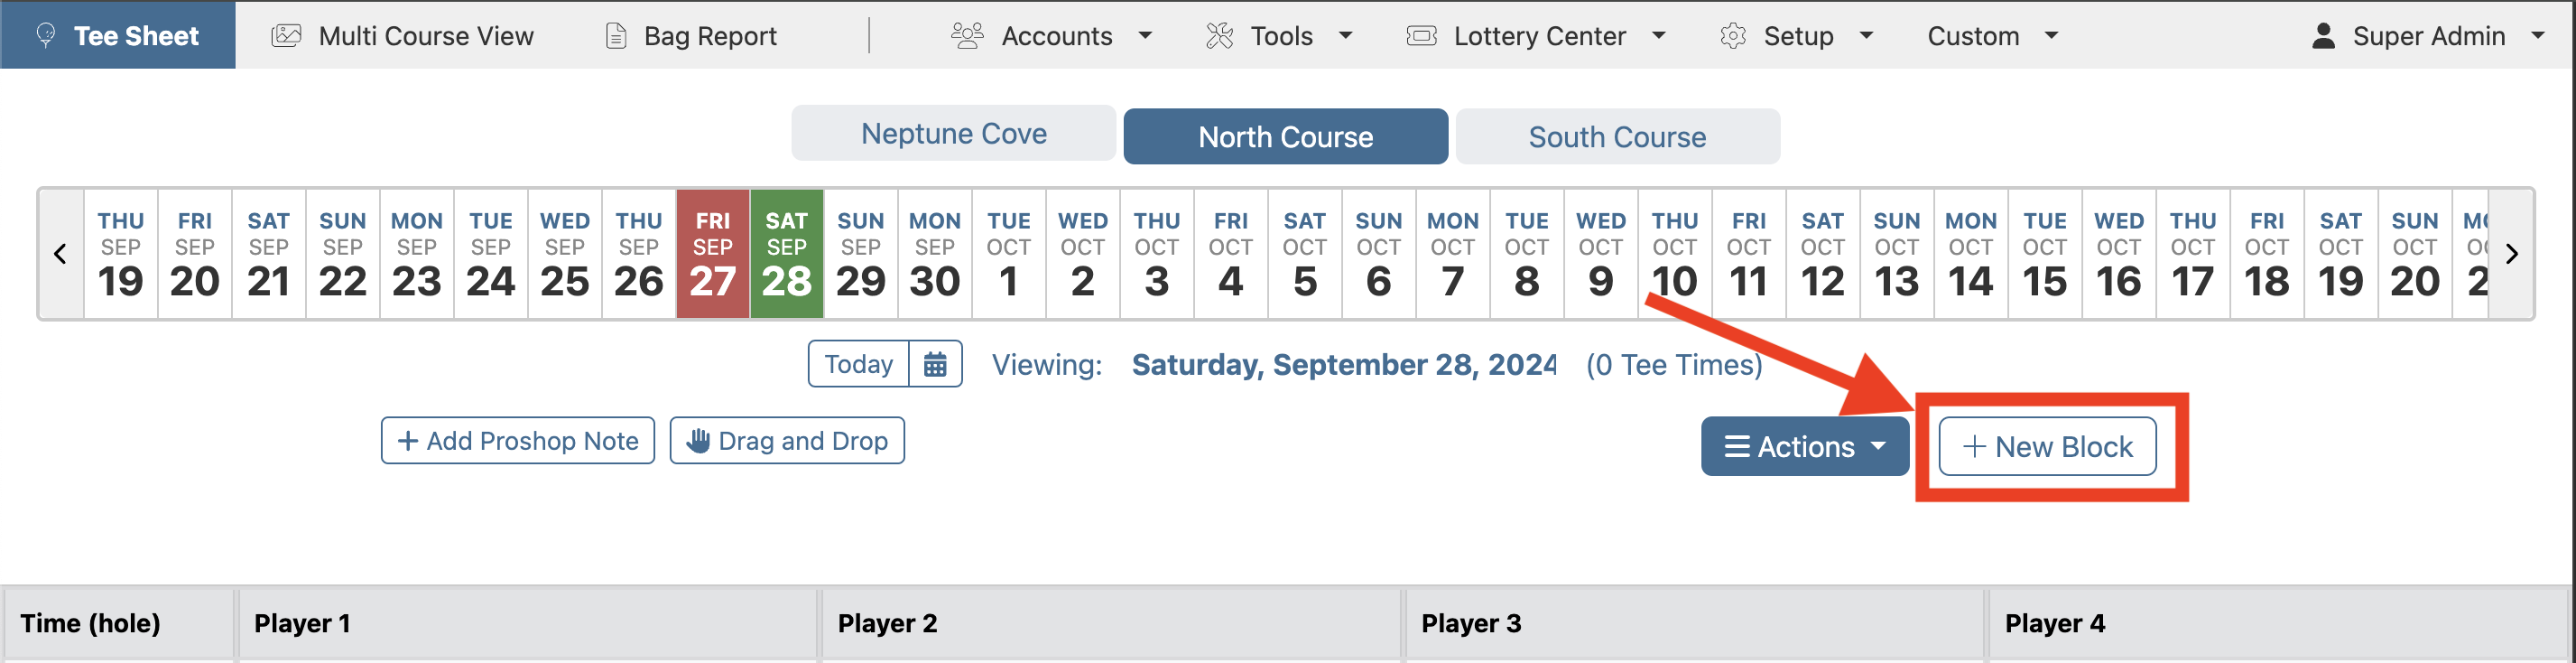 |
| Set the parameters of the block listed on left side. The Earliest Tee Time and Latest Tee Time are the times on the tee sheet that the block will be placed. Play Interval is the time between each tee time within the block. This will only be shown on the admin tee sheet. Set the # of Holes, 9 or 18, this block will affect and which hole to place the block, 1 or 10. If you have multiple courses at your club, be sure to check off which course(s) the block belongs to. On the bottom of the left side of the page, select the type of start that is associated with the block. | 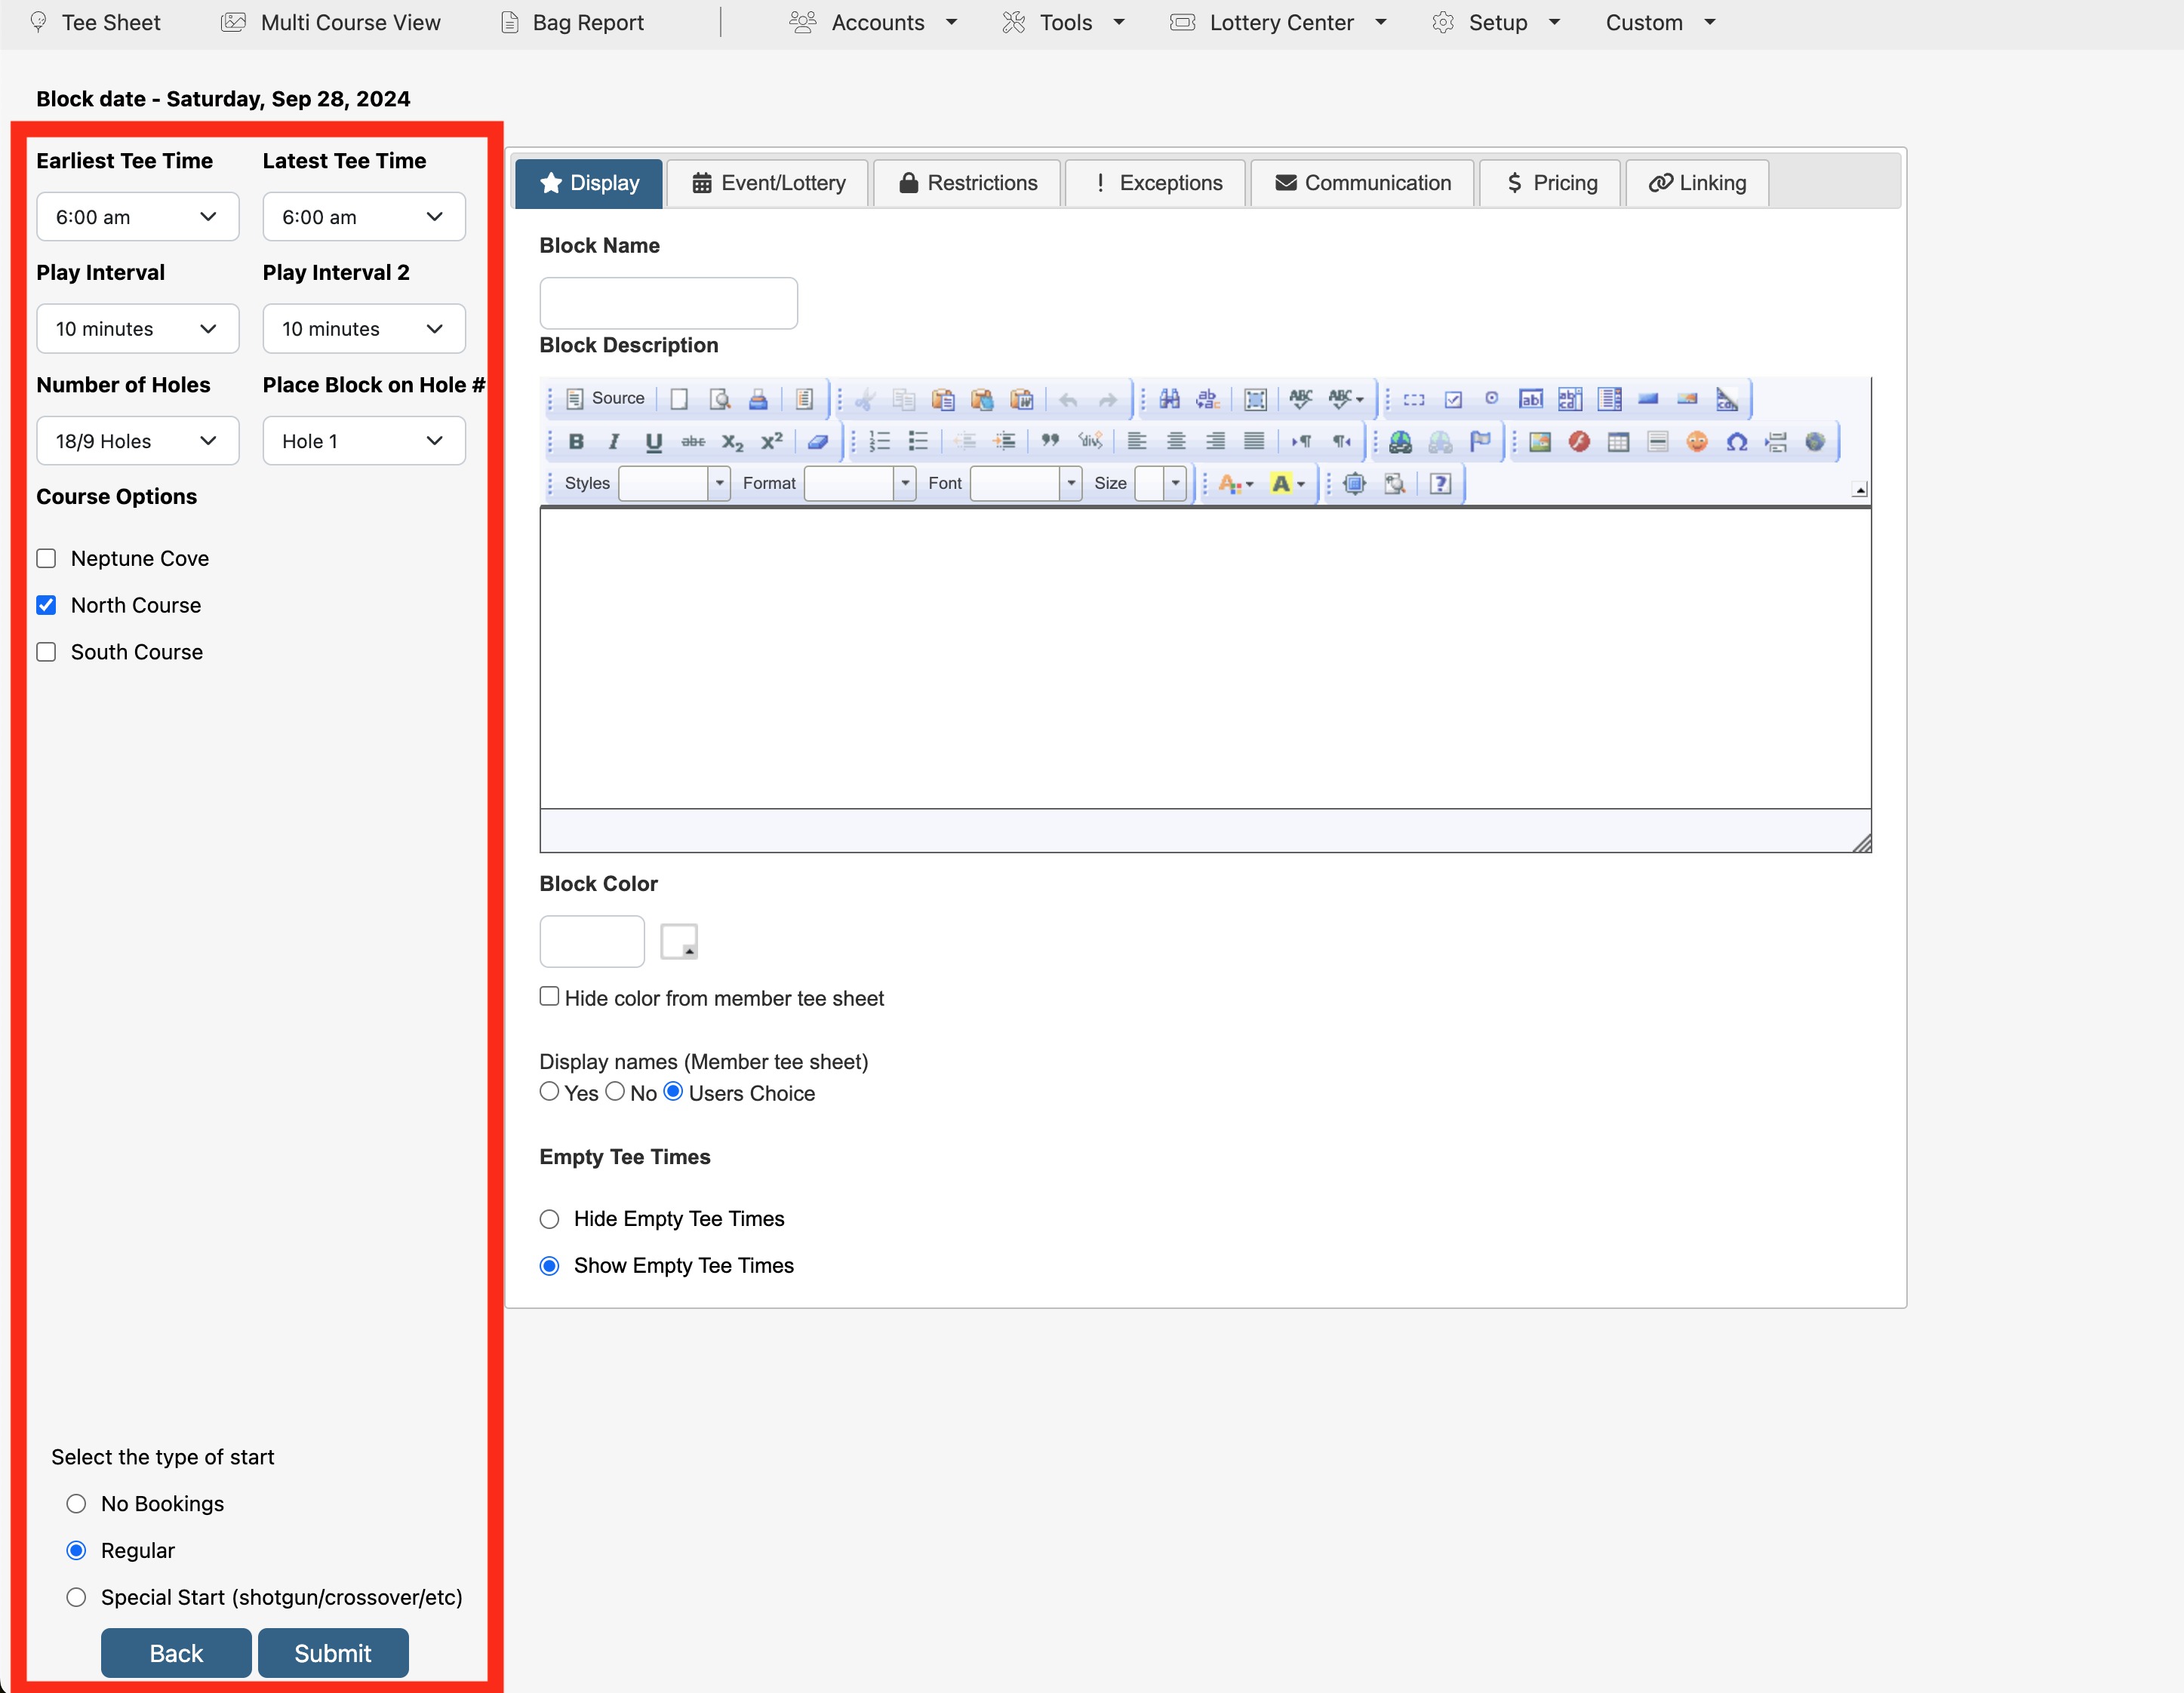 |
| In the middle of the page, you will see seven tabs: Display tab allows you to set the basic details of the block that the members will see on the tee sheet. Block Name is the title of the block that will display on the Tee Sheet. Add any details about the block in the Block Description. Use the editor to customize its appearance on the member tee sheet. Block Color allows you to color code blocks for quick reference, as well as make them distinct on the tee sheet if you have more than one listed. Empty Tee Timesallows you to hide or show empty tee times within the block on the admin tee sheet. |
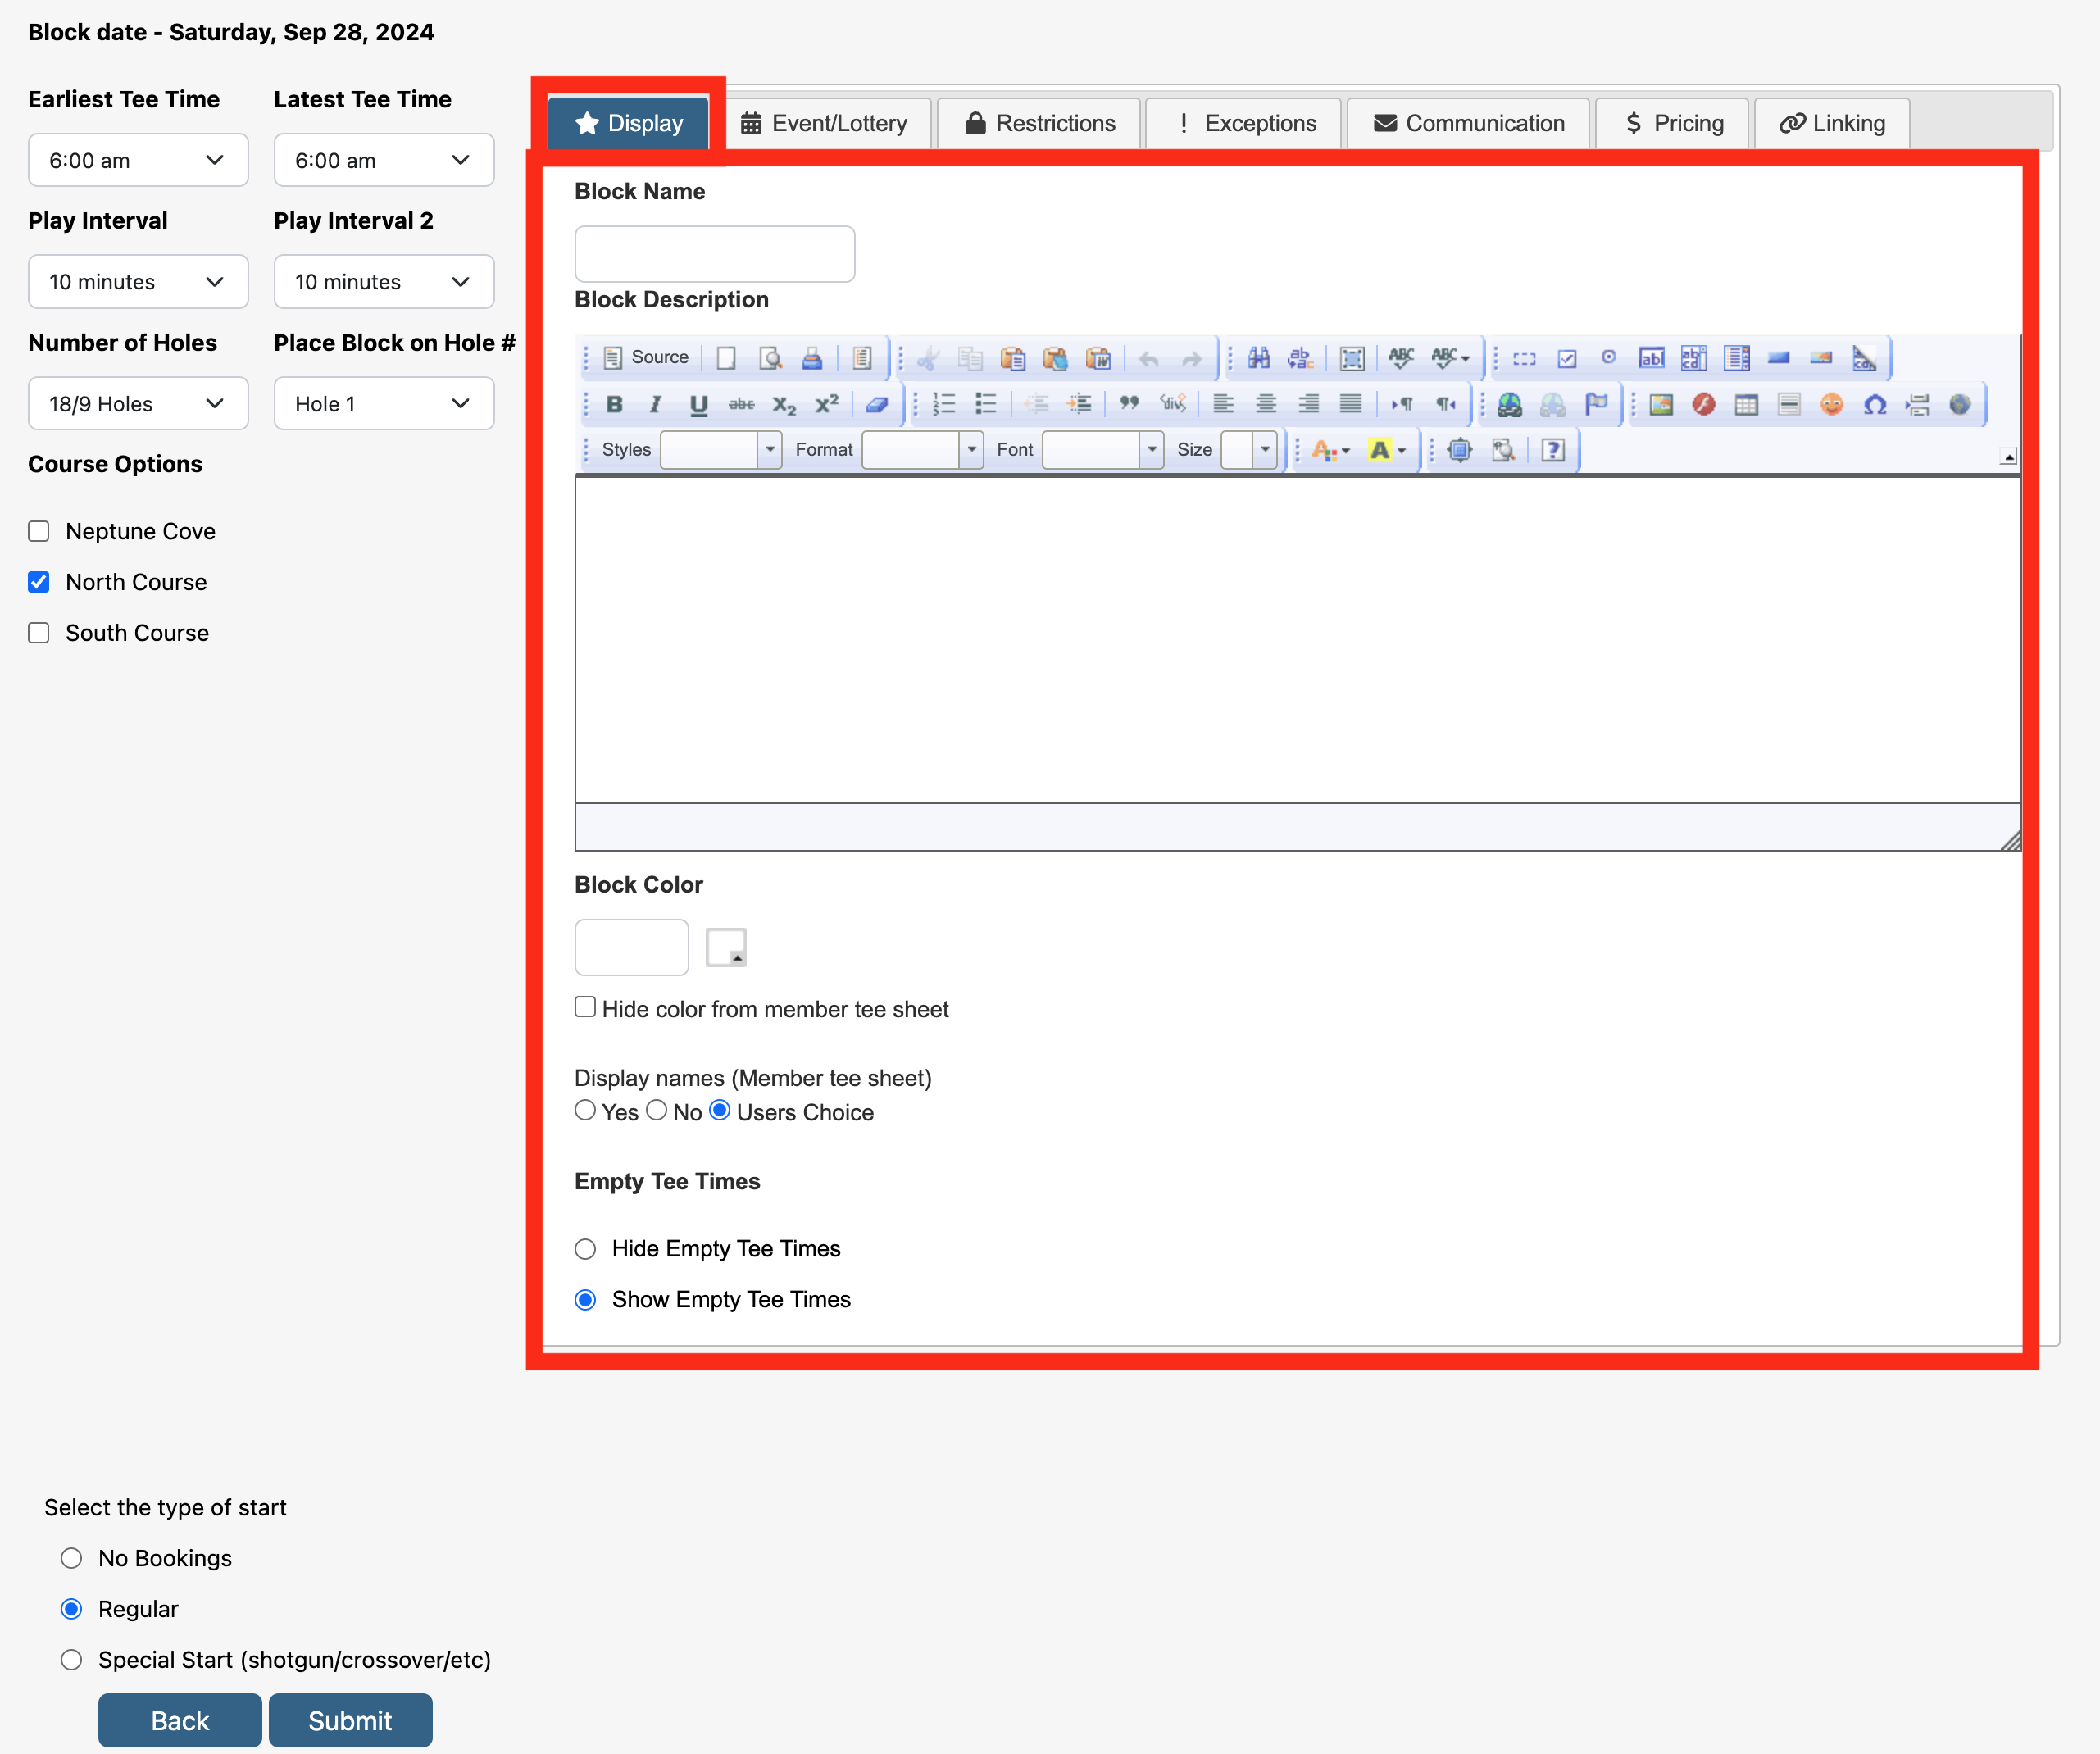 |
| Event/Lottery tab allows for further setup of block criteria. If the block is being used for a tournament, check off This block is a tournament. Check off the appropriate tournament categories, if applicable, within Tournament Categories. If the block is going to be run as an Event/Lottery, check off Run Block as Event/Lottery. If the event requires players to fill out a registration form, select the appropriate form from the drop down menu. | 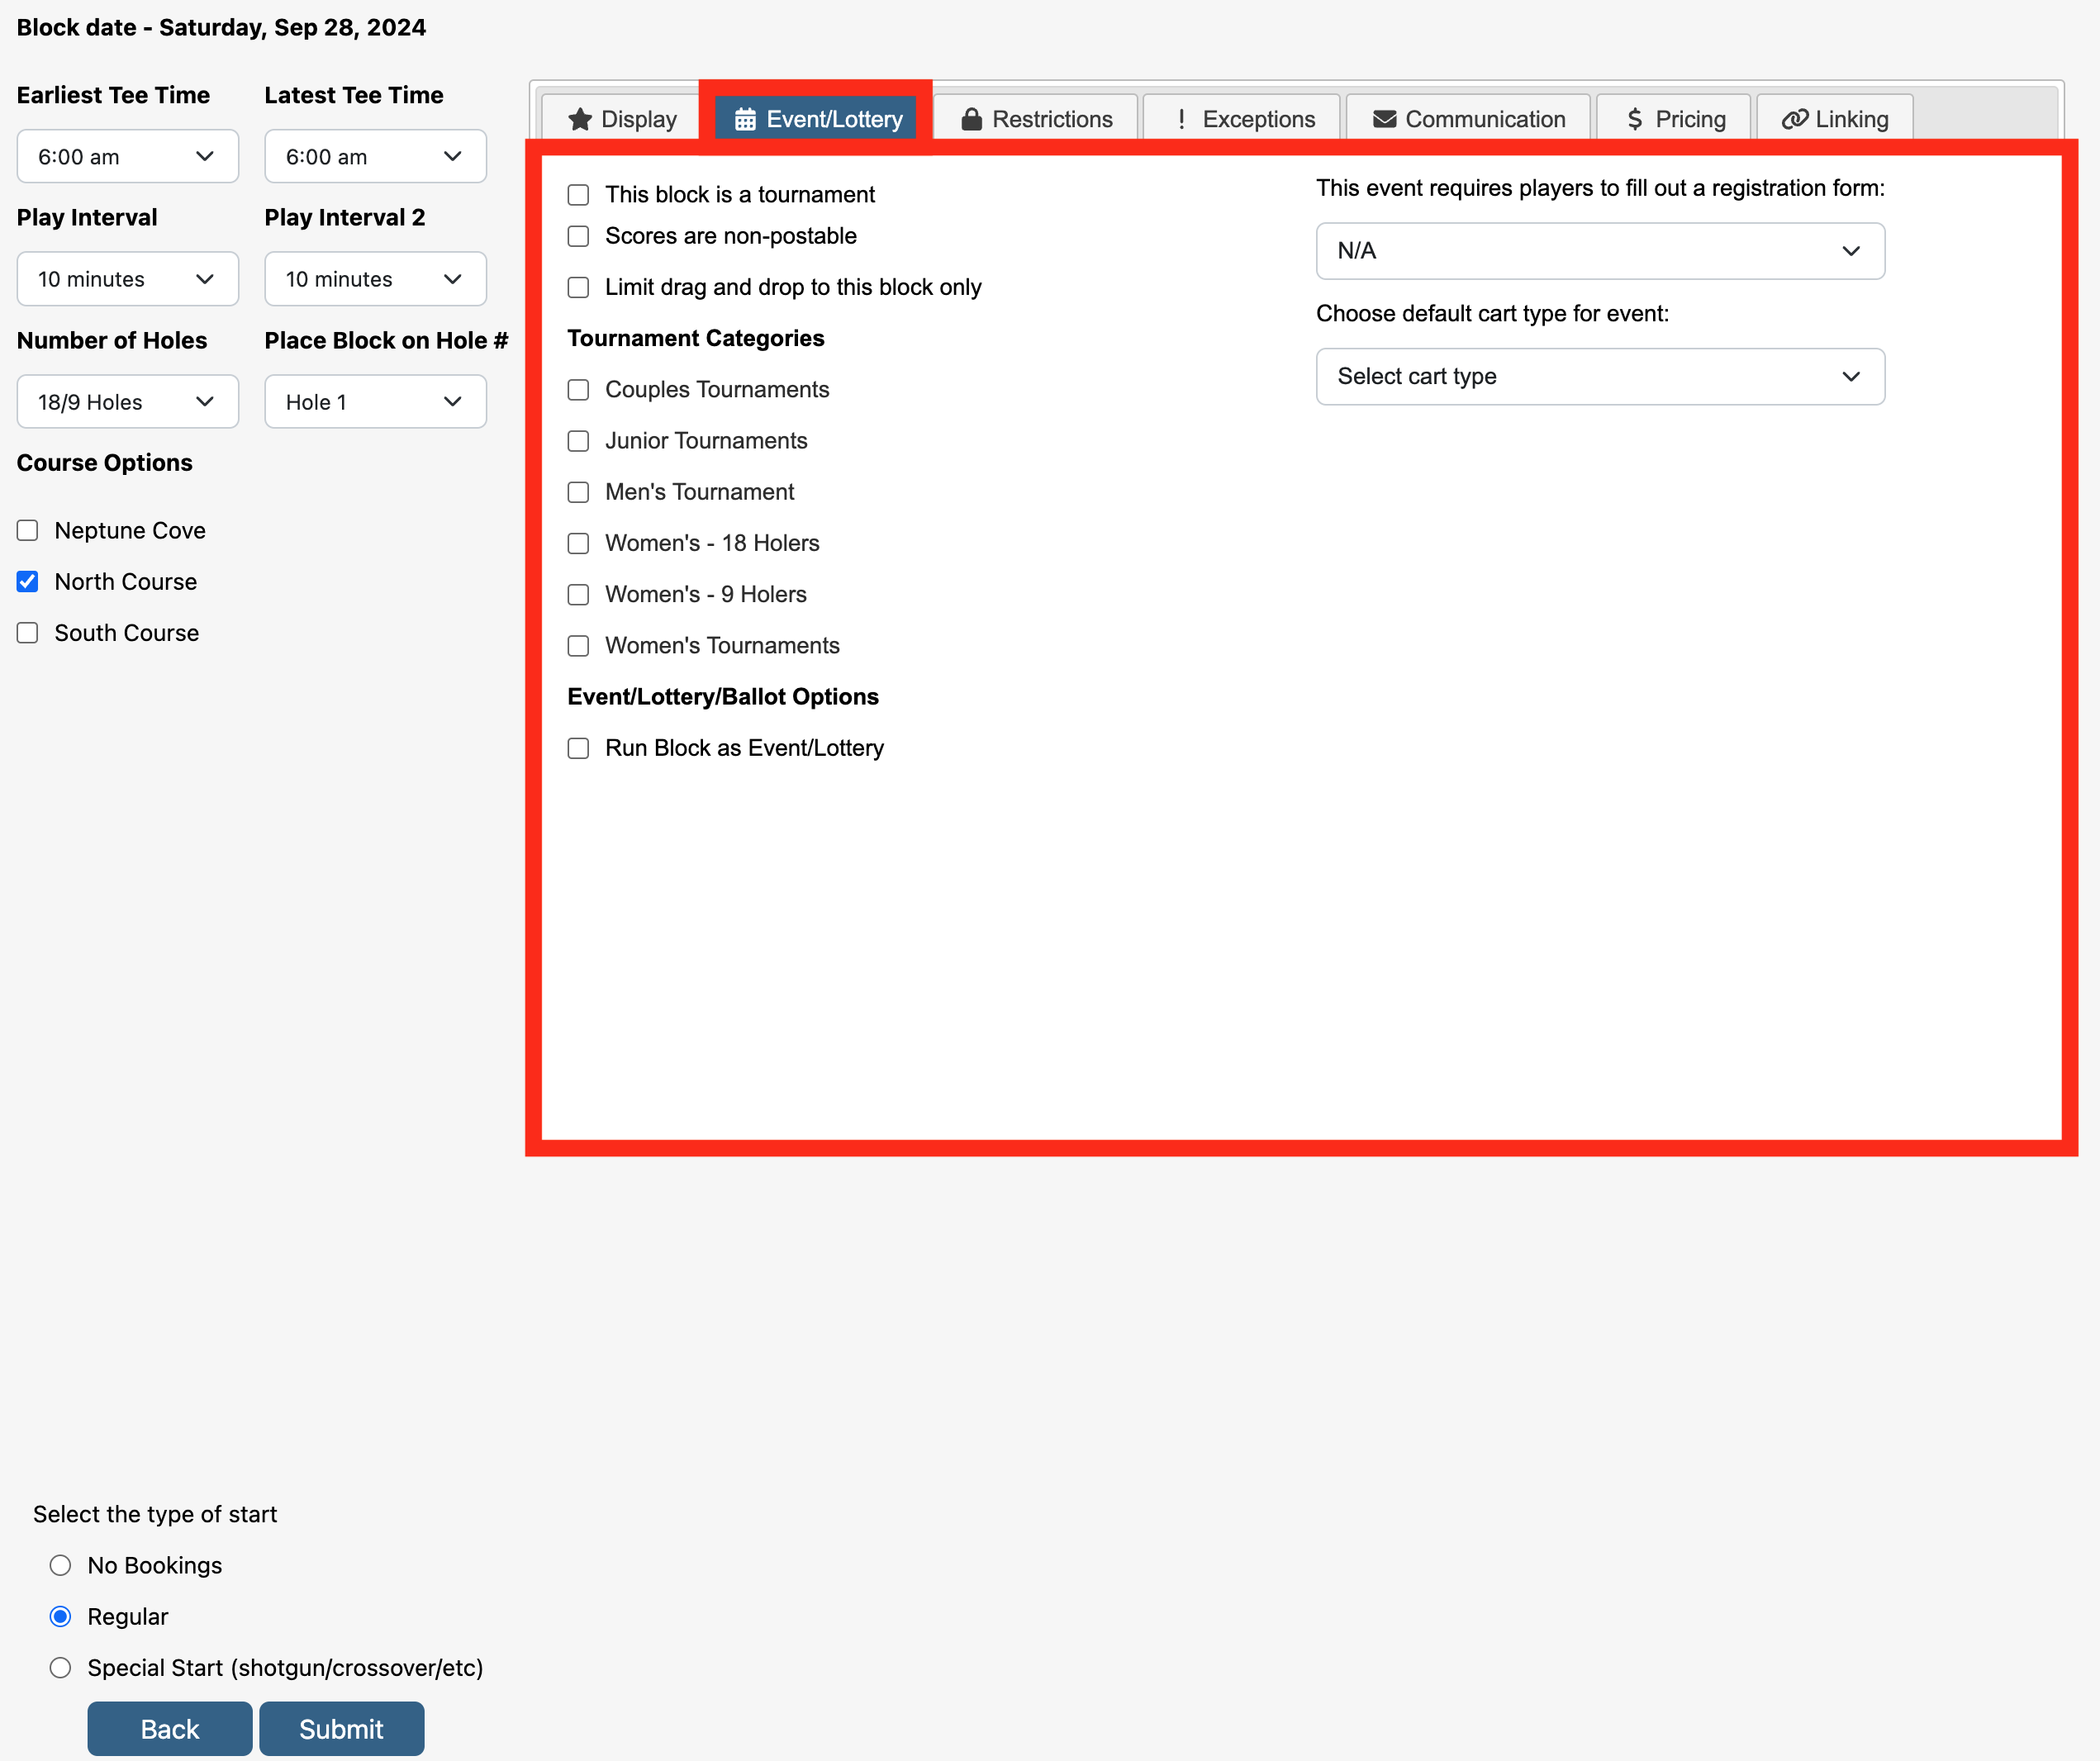 |
| Restrictions tab allows you to set up a multitude of restrictions that can be applied to the block. More explanation on what each restriction is will be reviewed in the Learning Center article Block Restrictions. |  |
| Exceptions tab allows you to set up a exceptions for both Member and Admins. You also have the ability to Display Member Side as Read Only. | 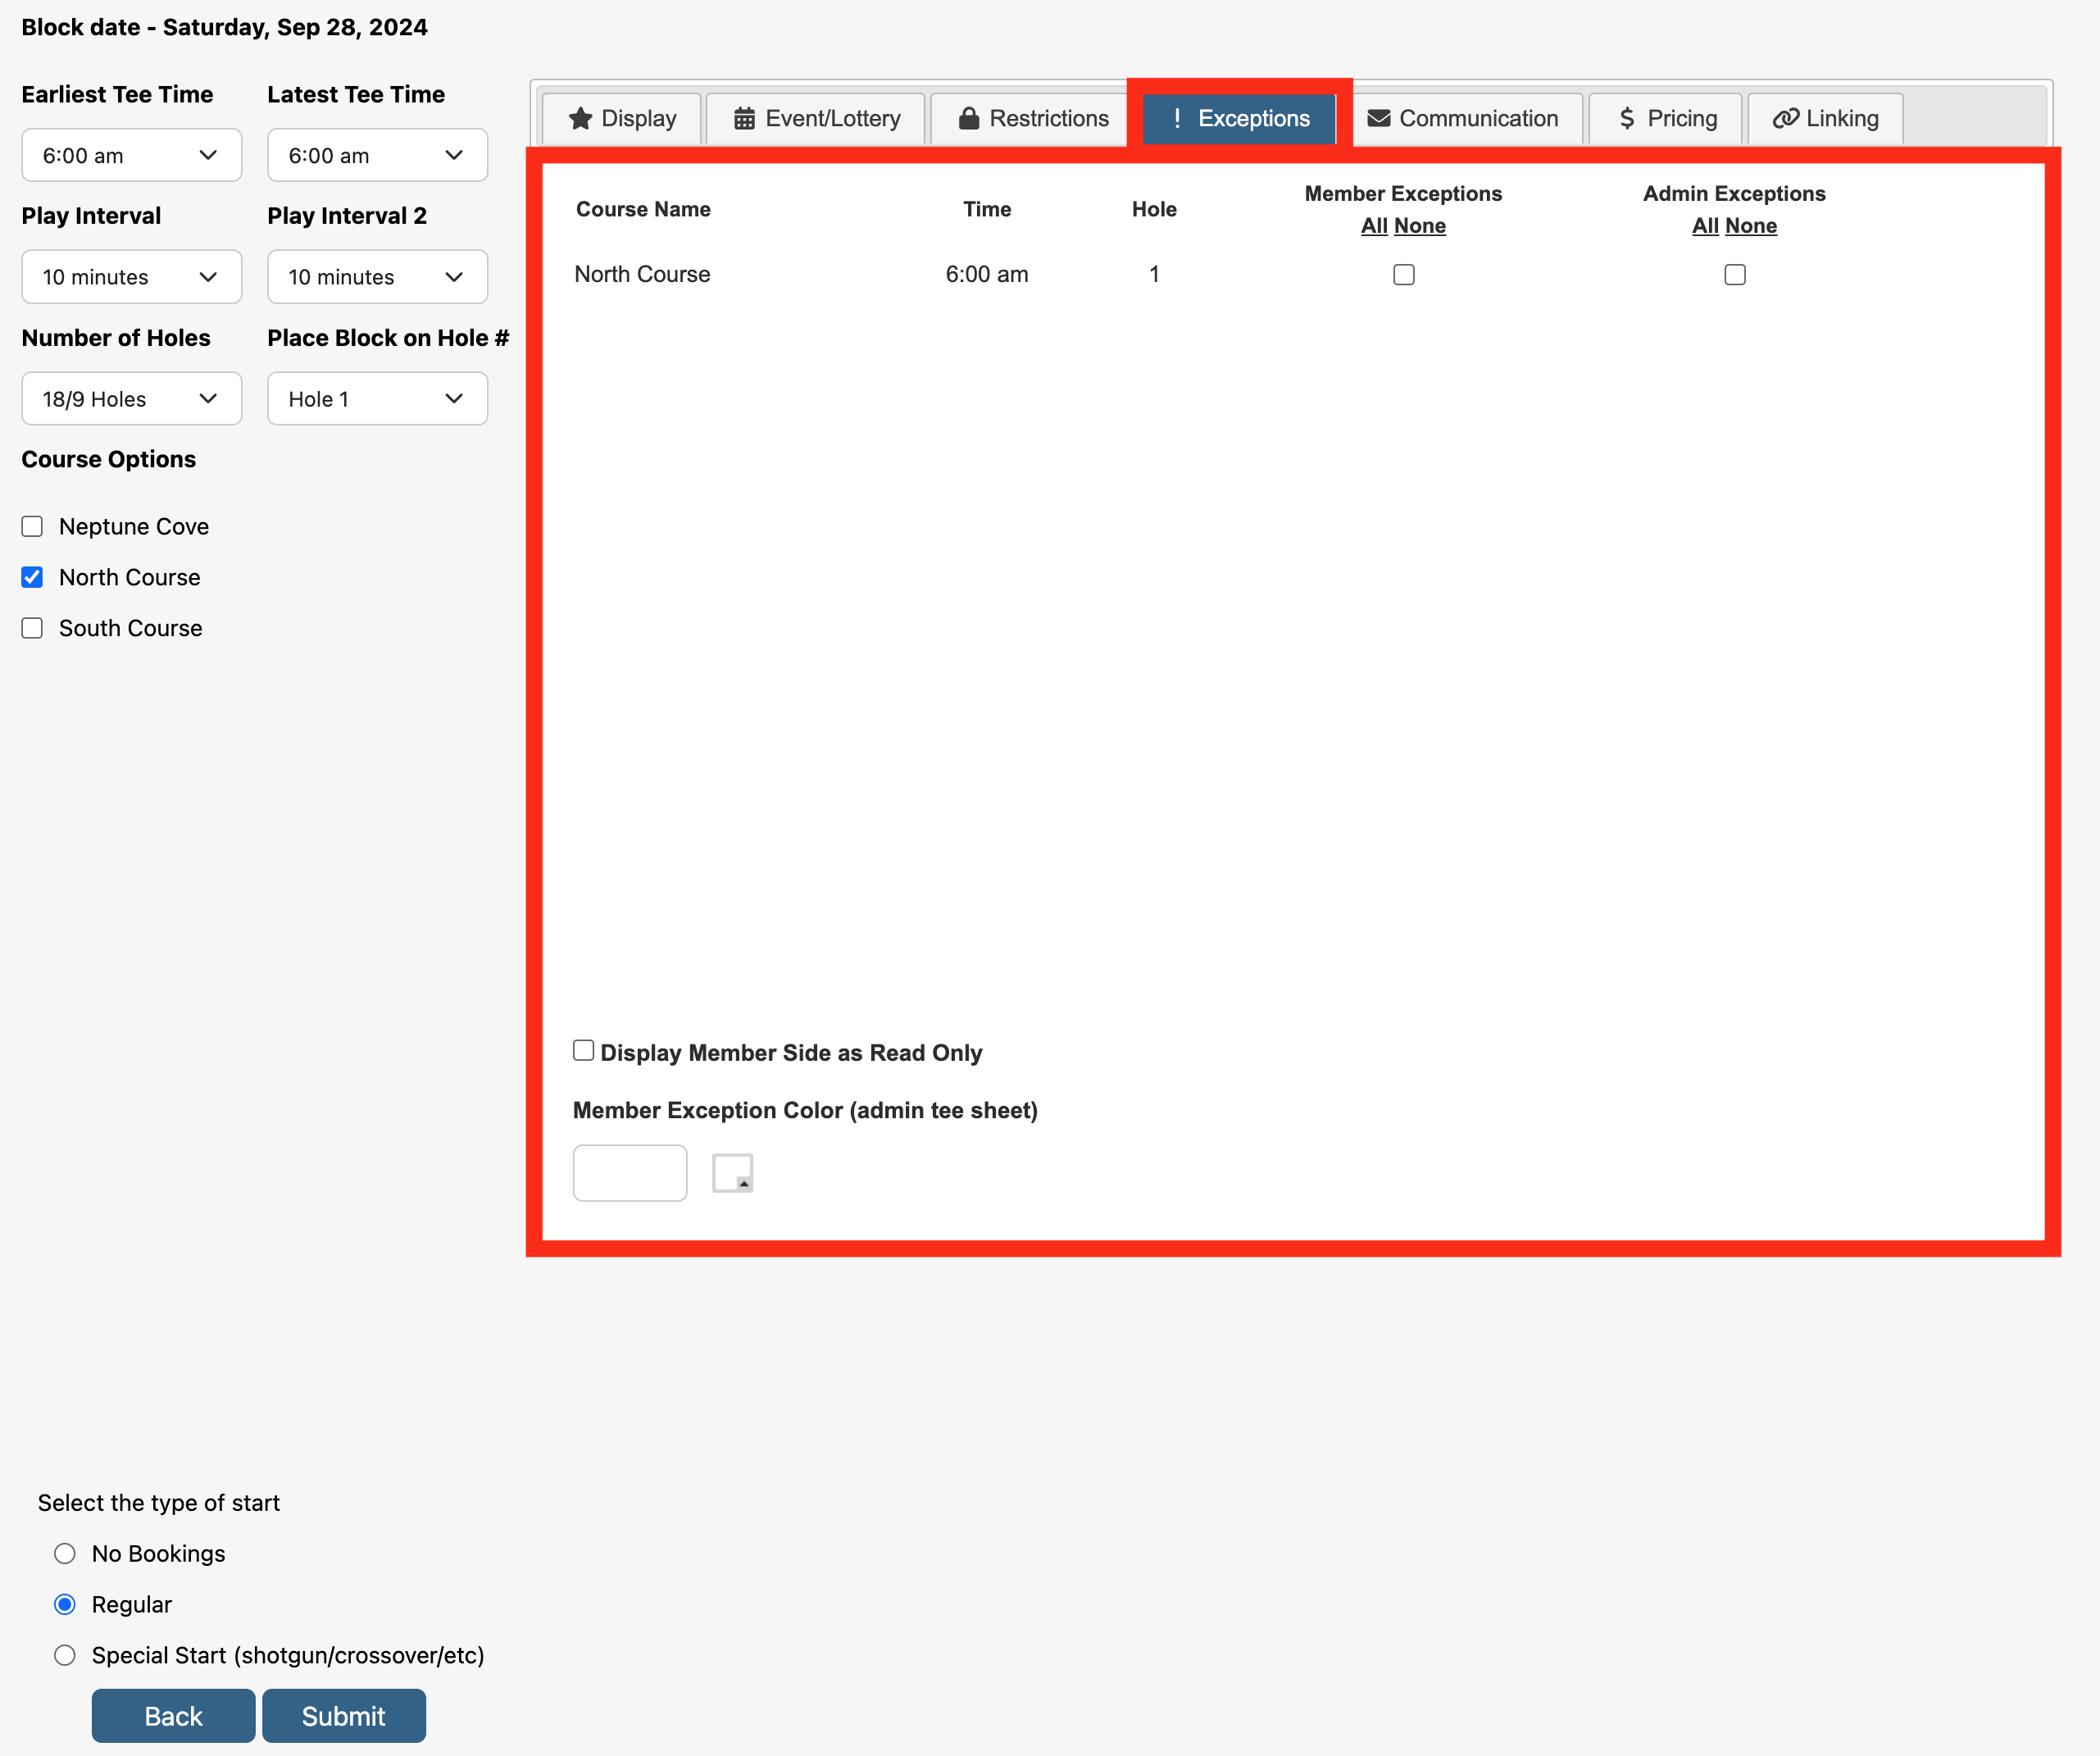 |
| Communication tab allows you to set up what type of communications will be used with the block when certain actions are taken by the member and/or admin.In the Copy all tee time reservation, changes and cancellations to this email address: field, add one or multiple staff emails separated by a comma or semi-colon that you wish to receive all communications. If you want to redirect a member to another website upon submitting their registration for a tournament or event, add the URL to the Redirect to this URL after booking field. Lastly, in the Custom Email Notifications section, if you created a custom email notification for the tournament or event, select the custom notification from the drop-down menu next to each type email notification. Custom email notifications are created within the Tools primary navigation section. All notifications are set to default. | 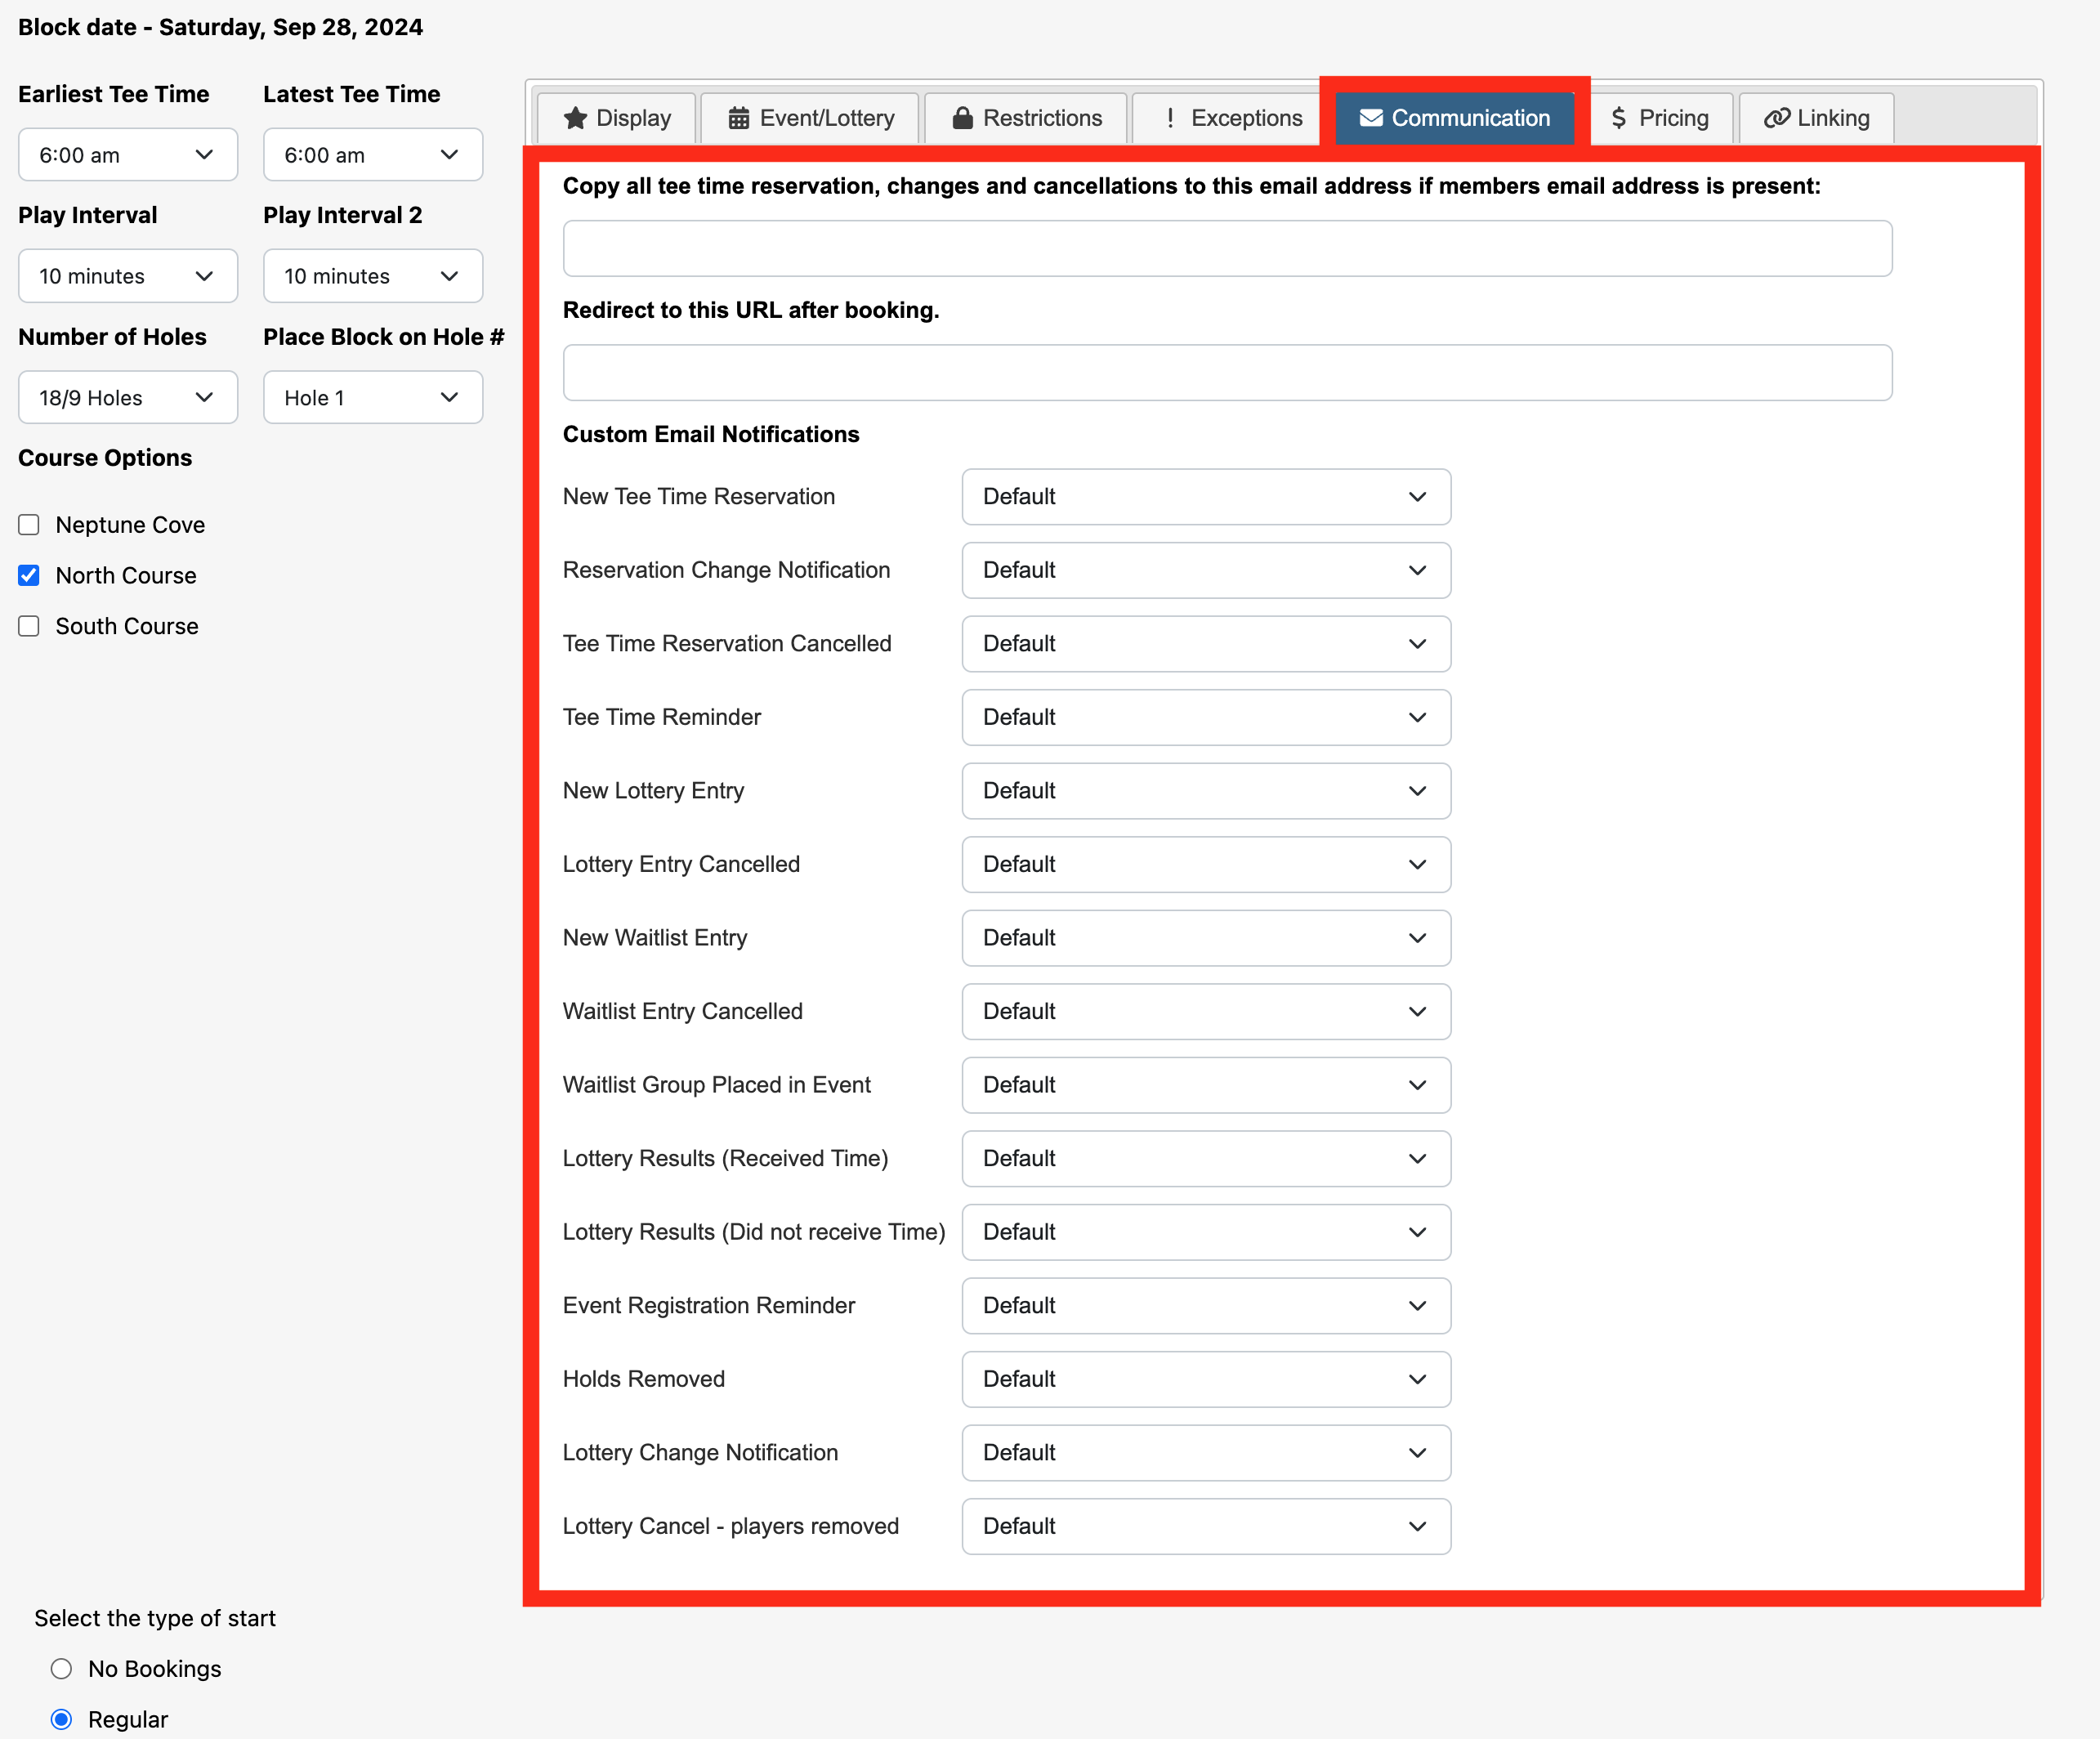 |
| Pricing tab allows you to override the default pricing for different cart types for the specific event the block is being created for. To override, first check of Overwrite Default Pricing. Then, next to each cart type, select the desired pricing code to use instead for that cart type. | 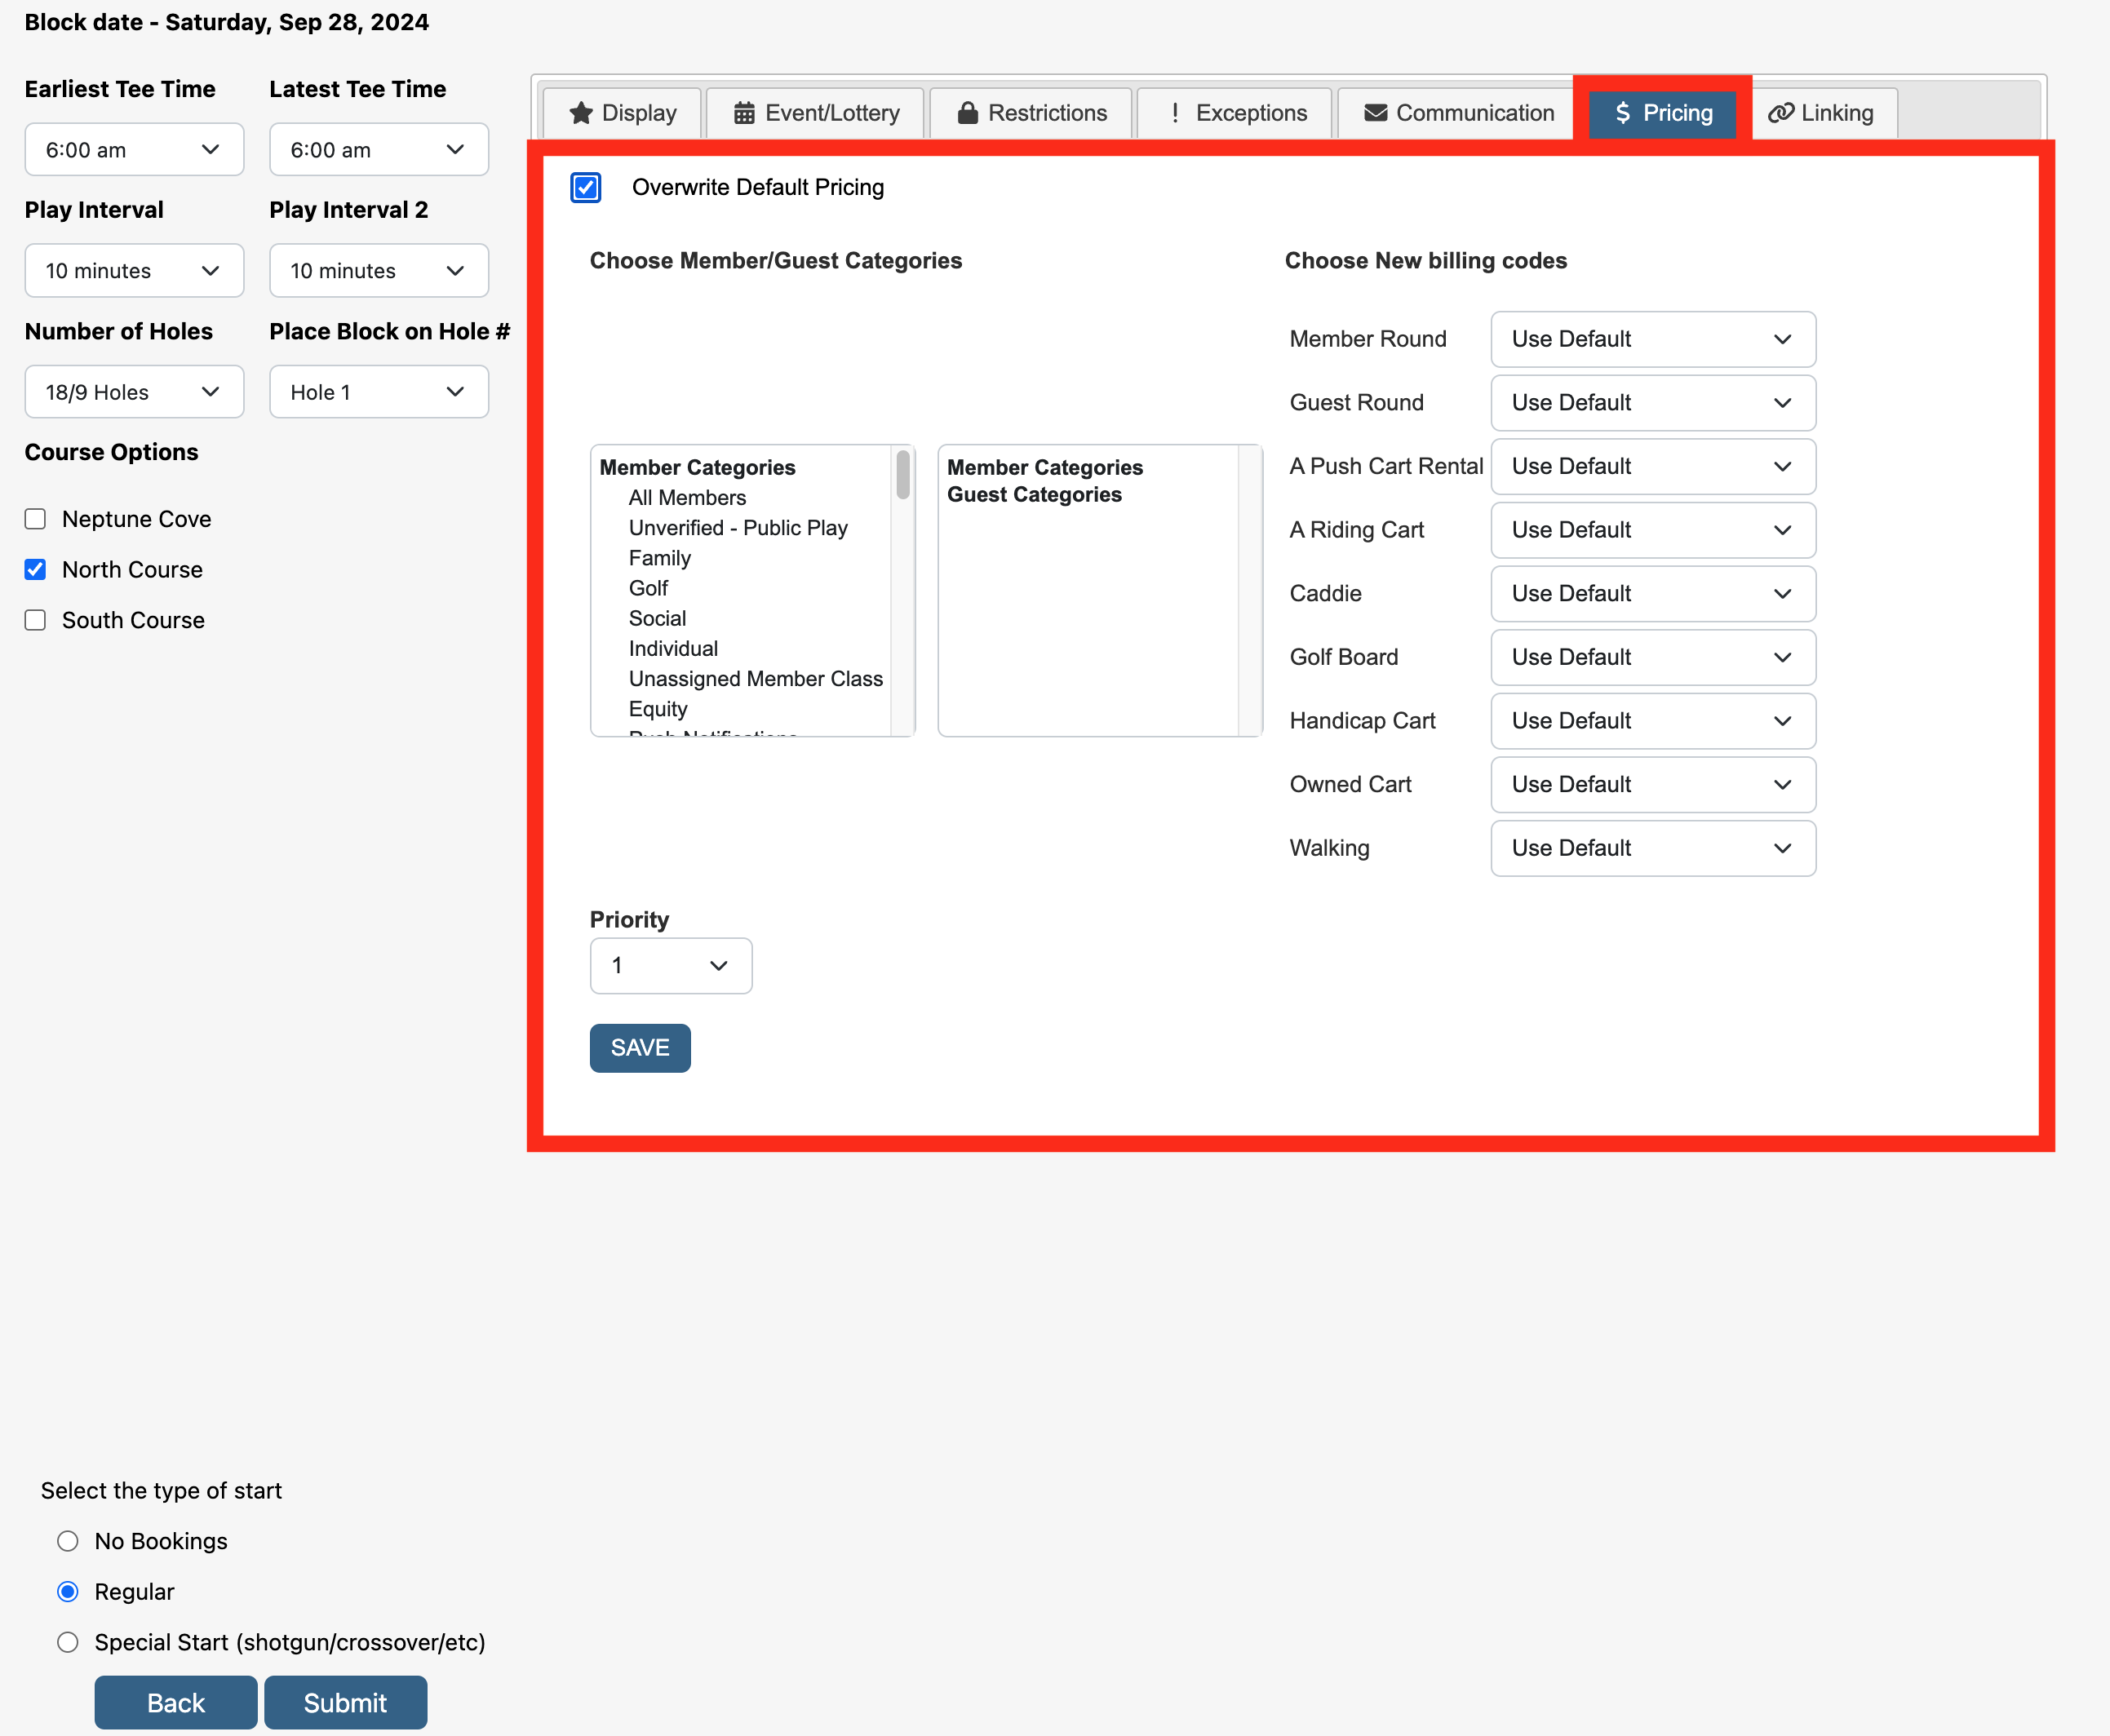 |
| Linking tab allows you to link the event on the tee sheet to the MRM Calendar. To link, copy the MRM Link URL and paste into the Alternate Link URL field found on the Advanced tab within the calendar event in MRM Club Calendar of Events. Click on the Open in MRM Calendar button for quick access to MRM Club Calendar of Events. | 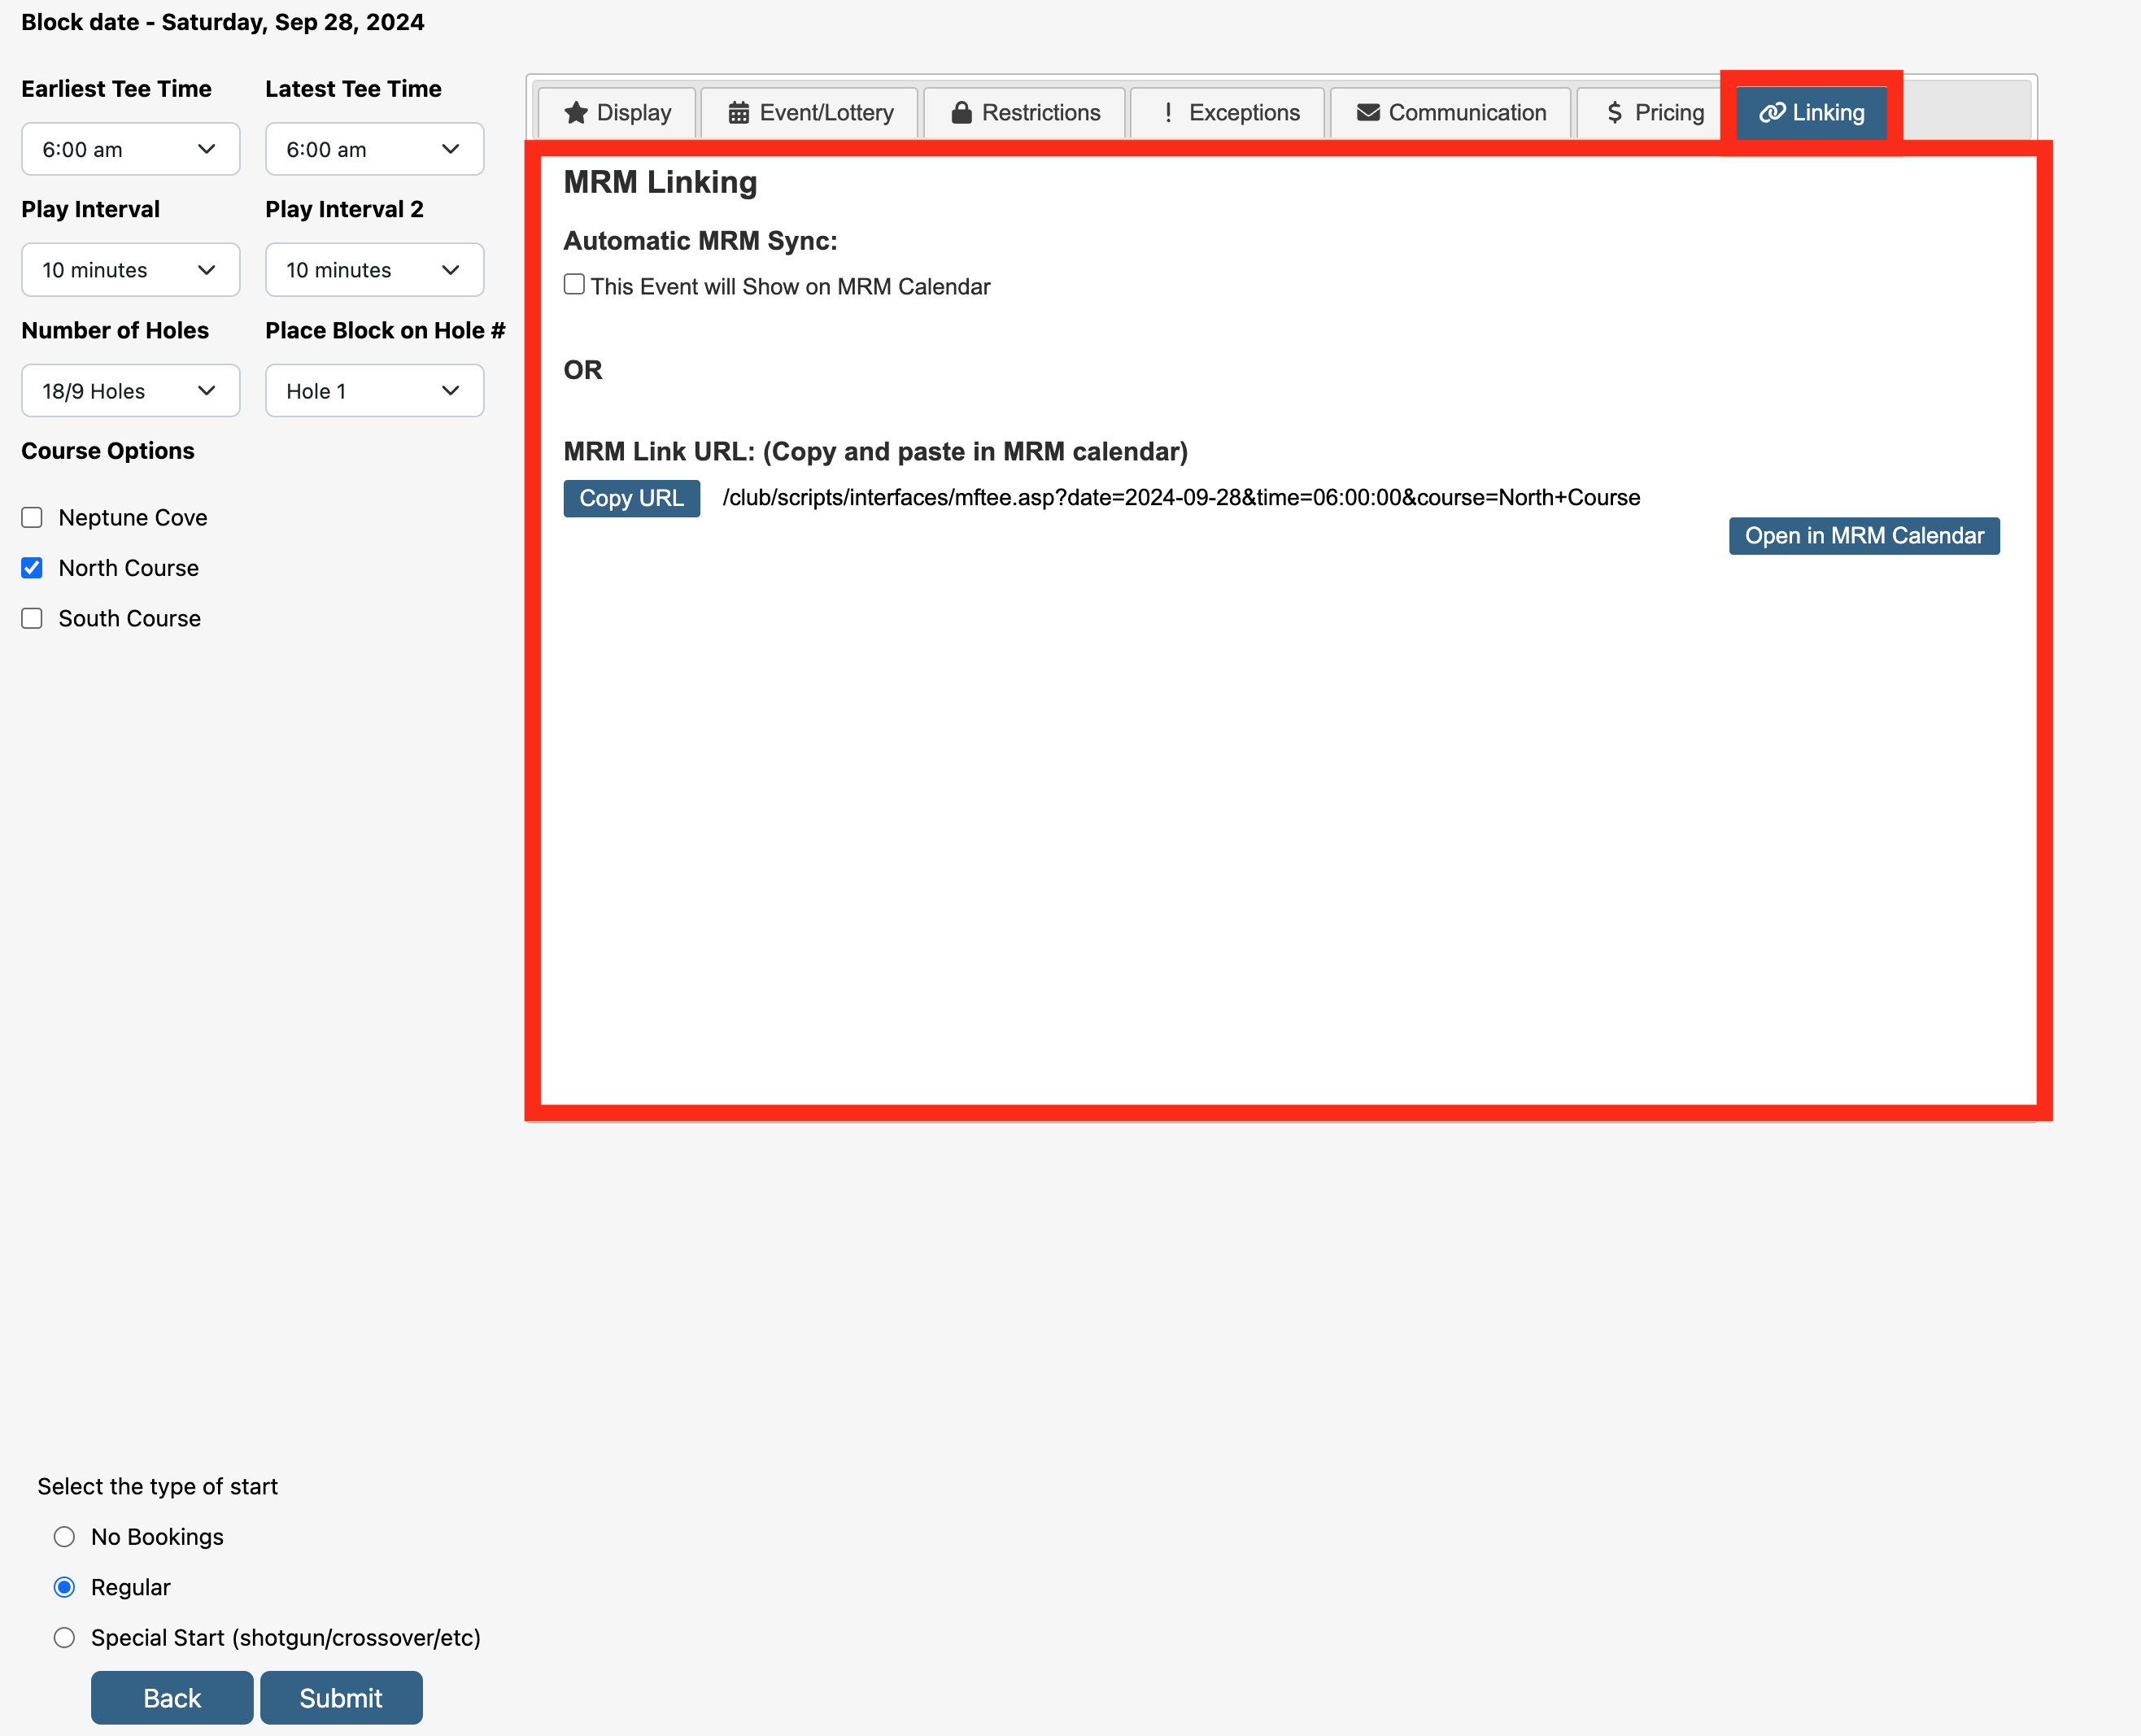 |