Creating a Custom Event Thank You Page & Confirmation Email
Calendar Events can be configured to show registrants a custom post-registration "Thank You" page, as well as send a custom confirmation email. To enable this feature, the event must be configured for Enhanced registrations. If the options pictured below are not available to you, contact your Client Service Manager to enable them.
These instructions assume you know how to create a calendar event and configure registrations. See How to Create a Basic Club Calendar Event and How to Configure & Manage Event Registrations if you are unsure how to do this.
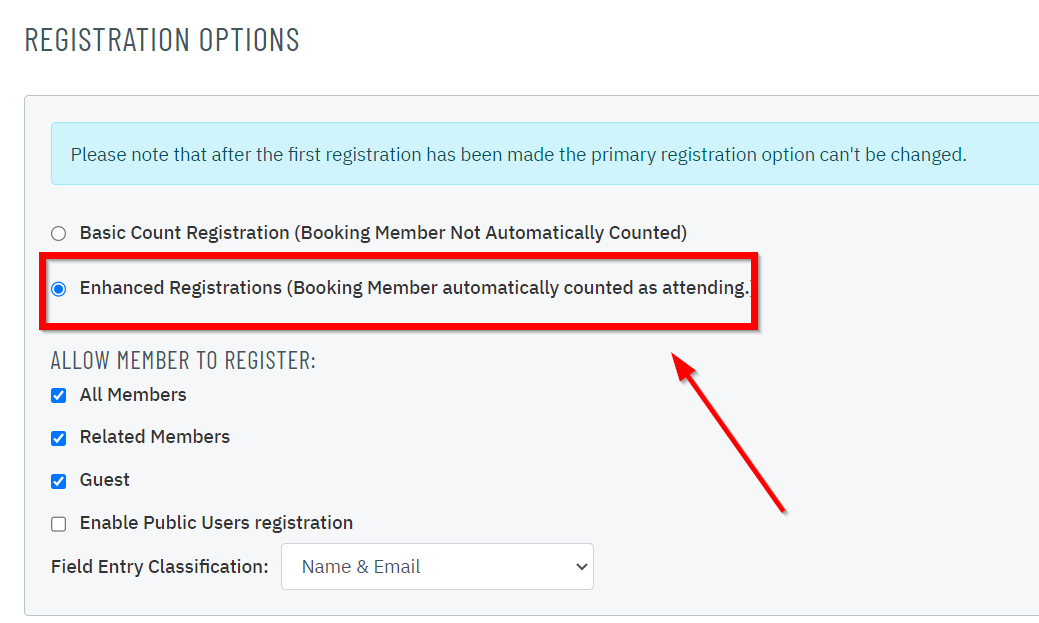
From your calendar event, click on the Registrations tab. Scroll down to Registration Options and make sure that your event is set to accept Enhanced Registrations. Note: After the first registration has been made, you cannot change your registration type from Basic to Enhanced. |
 |
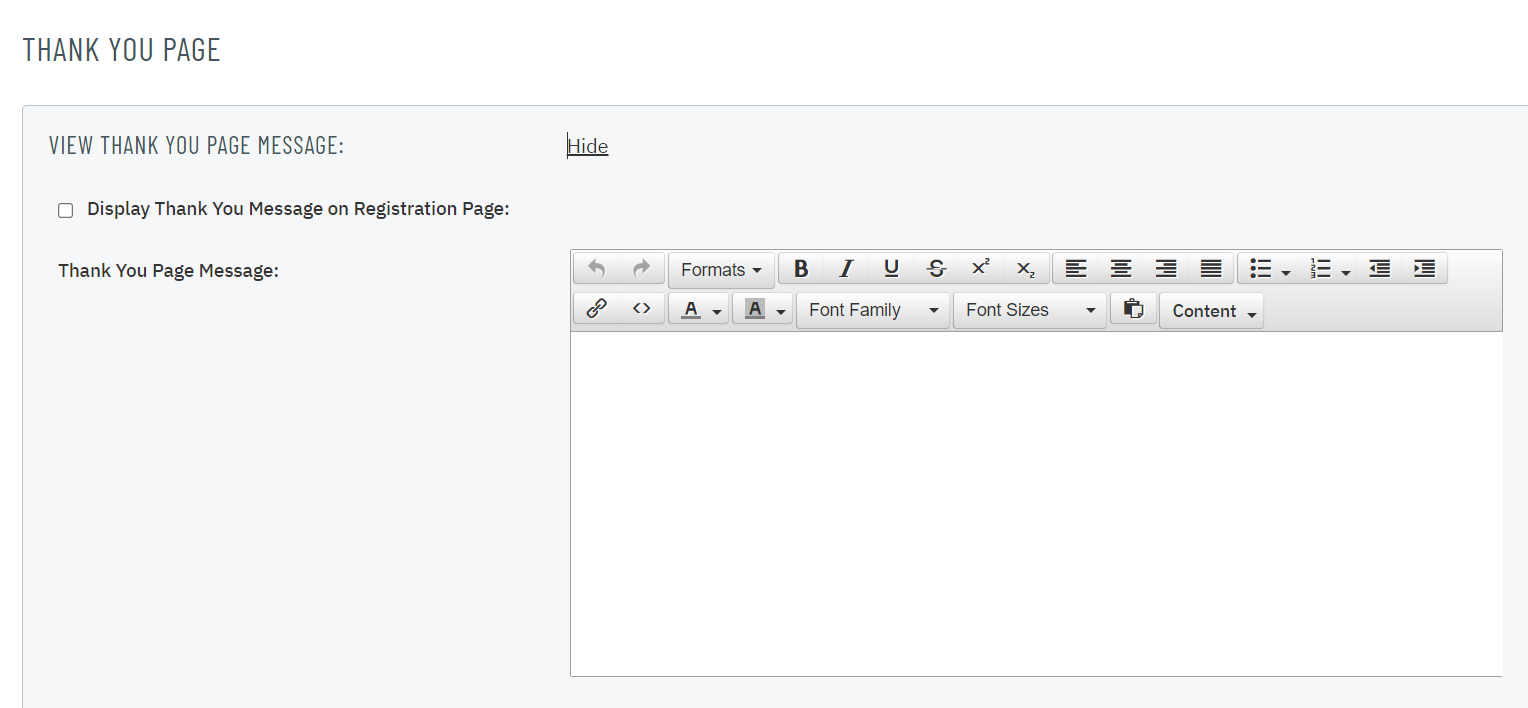
Next, scroll down towards the bottom of the page. Click Show on the right side of the Thank You Page section. Use the editor to write and format your custom text, including hyperlinks if needed. Only check off Display Thank You Message on Registration Page if you'd like members to see it before they're done registering (typically this box is left unchecked). |
 |
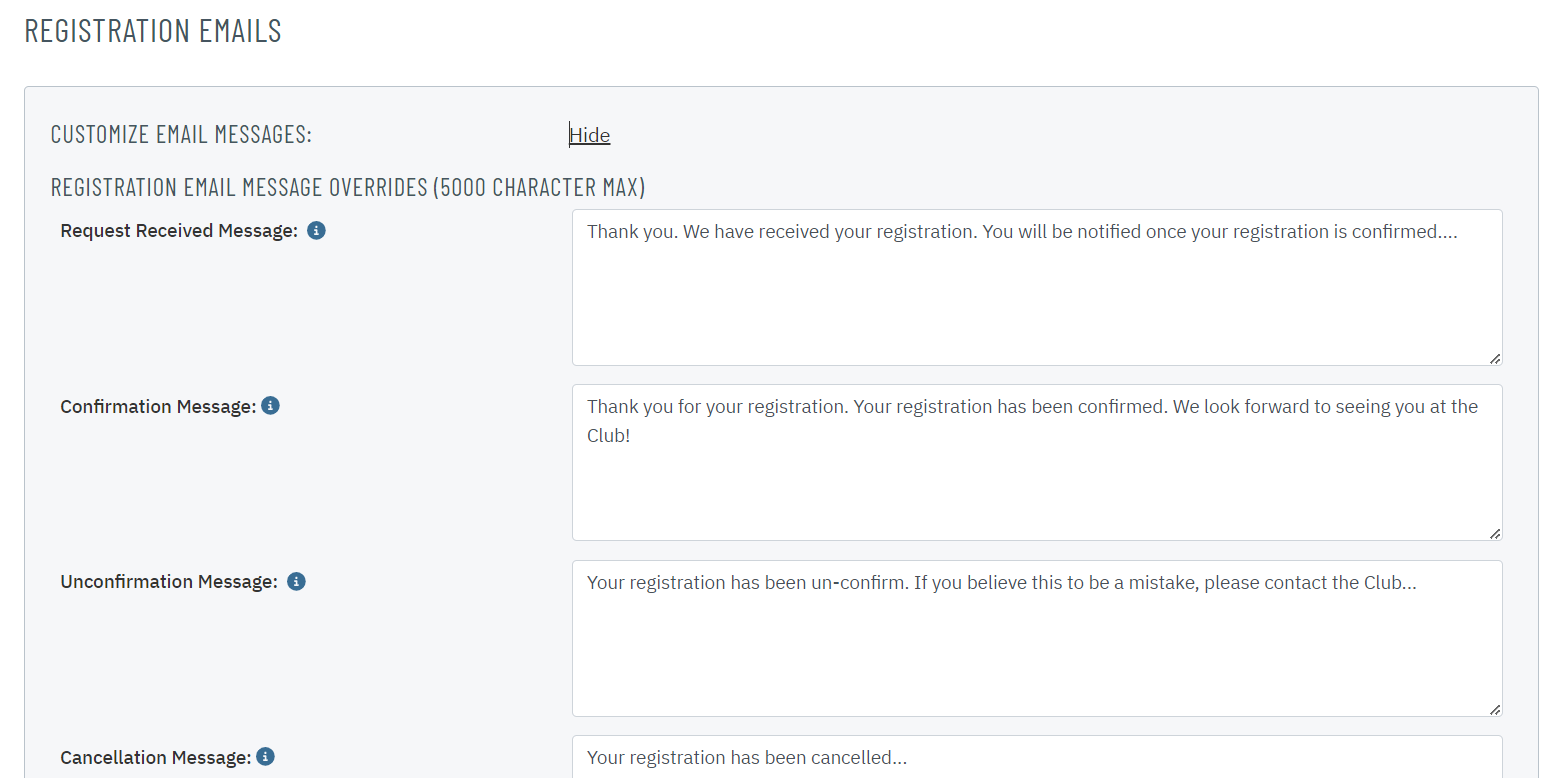
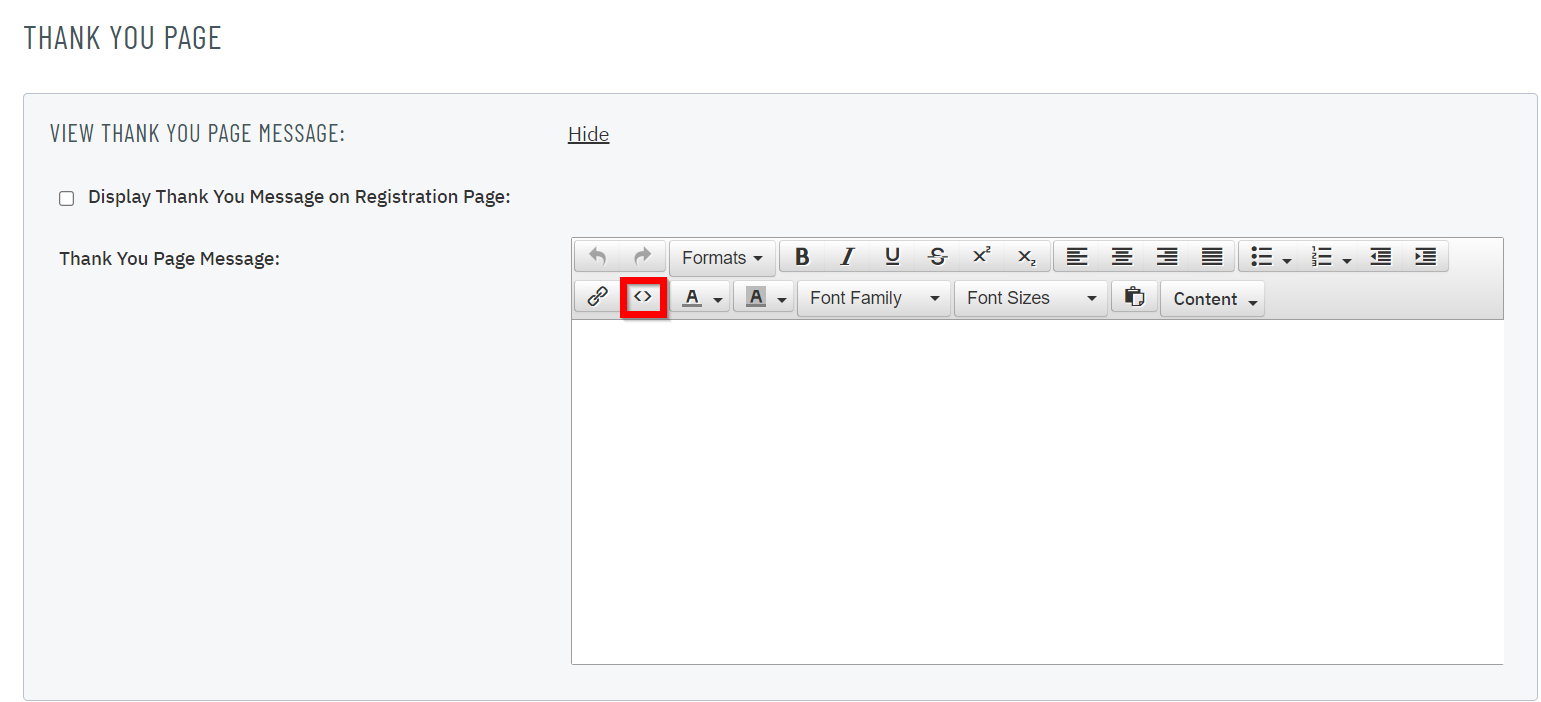
Finally, scroll down and click Show on the right side of the Registration Emails section. Your post registration emails are located in the Request Received Message and the Confirmation Message boxes. Fill out one or both, depending on how you've set up your event confirmation options during the configuration process. Hint: These email boxes can accommodate HTML code (i.e. custom formatting and hyperlinks). If you'd like to match your Confirmation Email text to the Thank You Message you configured in Step 2, scroll up to the Thank You Message and click the < > button. Copy and paste all the text and code from the pop-up box into your email fields. If you'd like to create and format a message from scratch, you can create a blank Library Document, use the editor to format your text, and then click the < > button at the bottom of the editor. Copy and paste all the code you see into the email fields, then delete the Library Document as you no longer need it. |
  |
| Scroll back up to the top of the page and click Save & Close. |  |