How to Setup a Proofing Process Distribution Group
| Log in to your admin homepage and expand "Communications" application group. Then click on "Distribution Groups". | 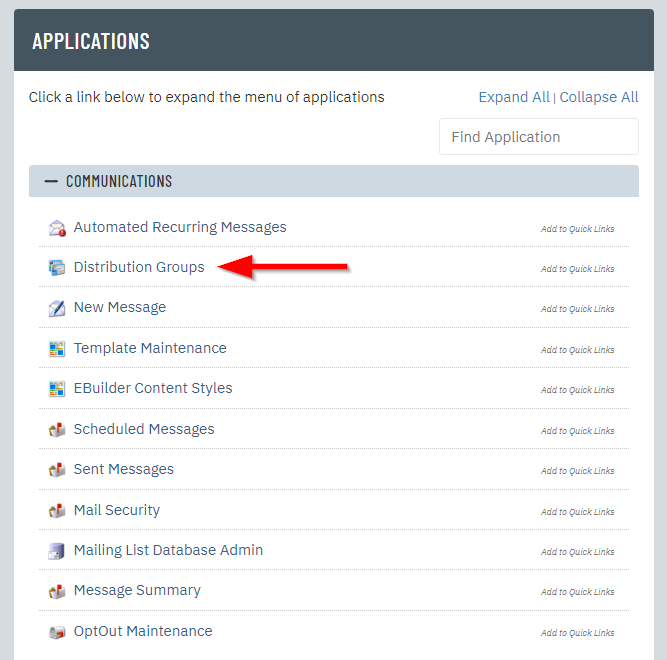 |
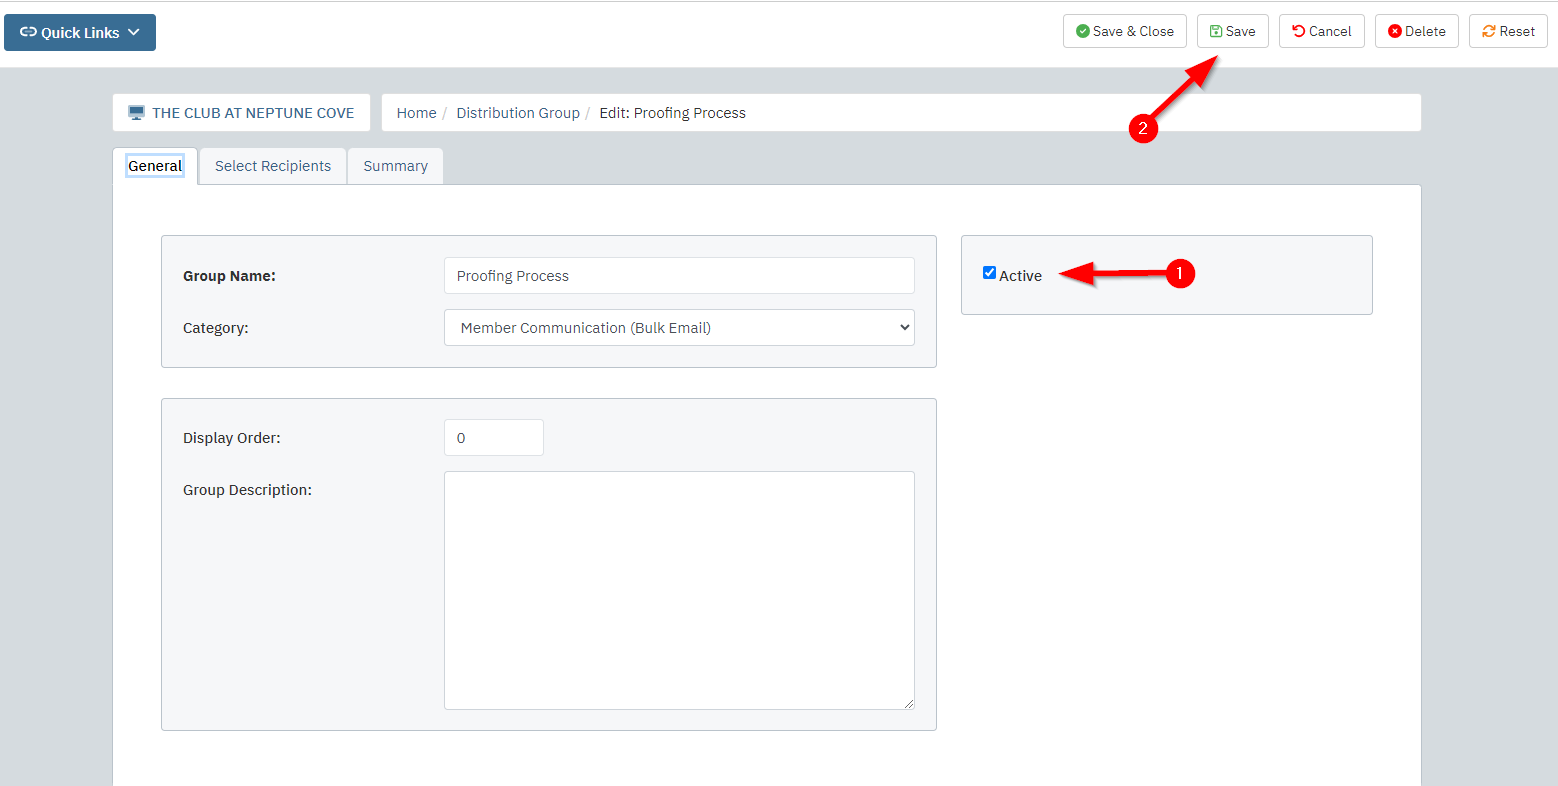
| Click "New" at the top to start a new distribution group. | 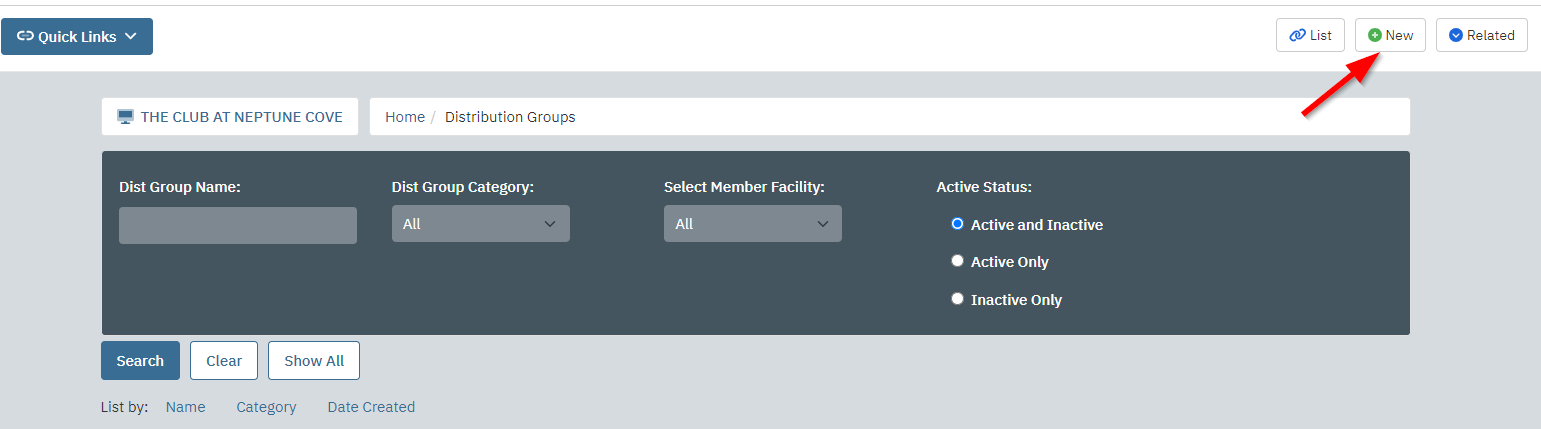 |
| 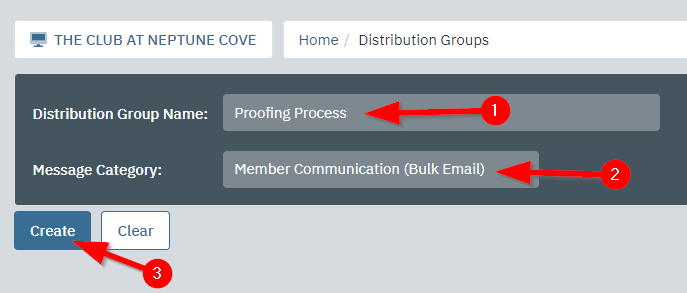 |
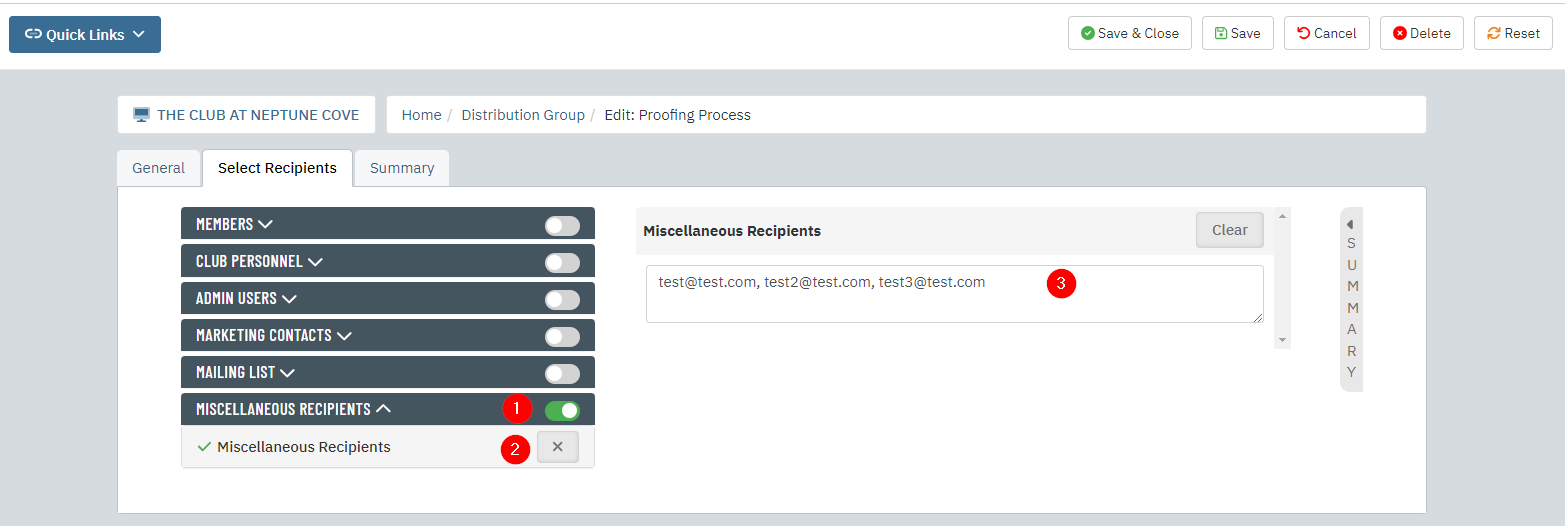
You should land on the "Select Recipients" tab of the distribution group.
|  |
|  |
| Your distribution group is ready for use. The next time you are getting ready to send a proof and you are on the "Select Recipients" tab just click "Use Distribution Group". | 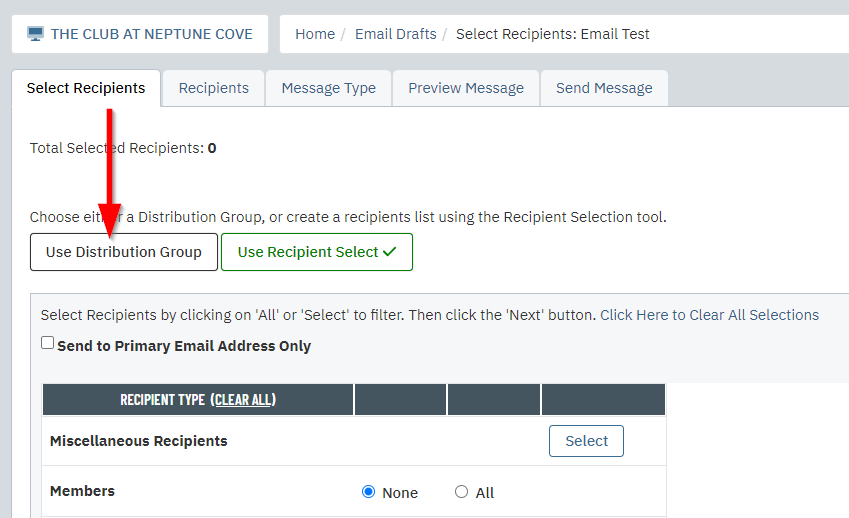 |
| 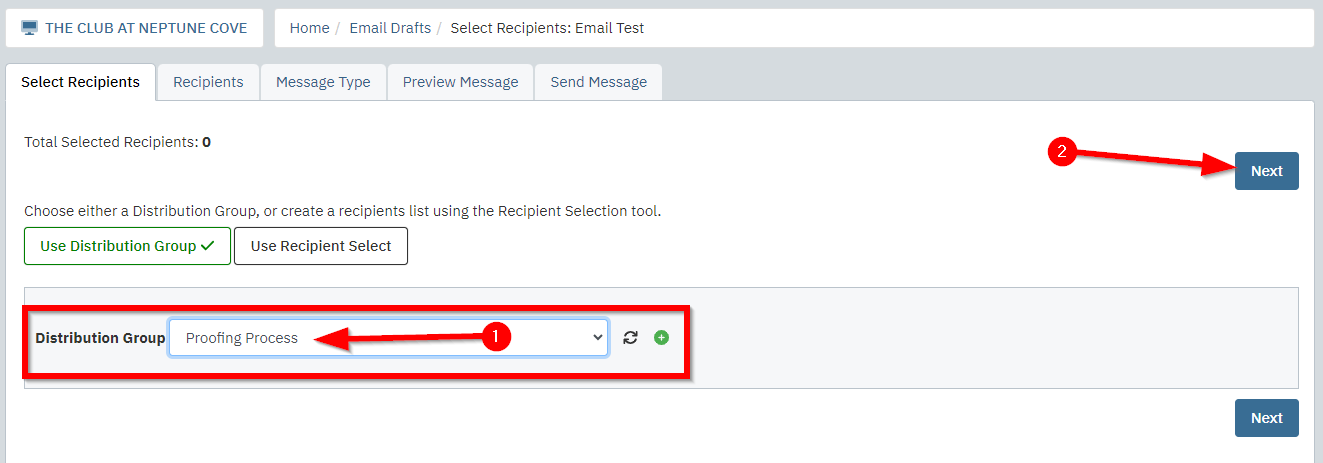 |
You're all set! Now you don't have to manually copy/paste everyone's email address every time you send a proof, just select the distribution group and you're done!