How to Create RSVP Calendar Events
Occasionally, you may wish to use your website's calendar to track planned attendance to important meetings such as committee meetings, board meetings, and annual meetings. Combined with content security, you can setup these calendar events as private events that only members of a selected organization may see. The setup involves enhanced registration, which keeps track of the member's name, and non-counted breakout headcount which keeps track of the member's response (e.g. participate, possible, and decline).
This guide walks through the process of adding RSVP options to your event. It assumes you have already created the event - without registration - by following the instructions in the How to Create a Basic Club Calendar Event guide.
| Locate your event and click on the Registrations tab. | 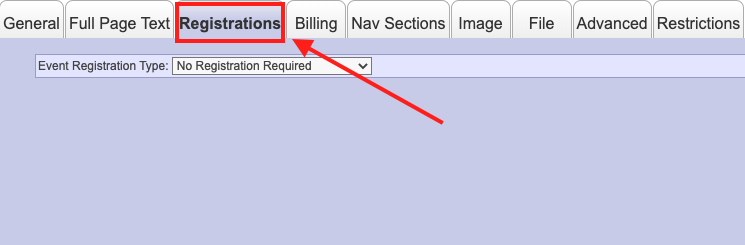 |
| Select Registration Required from the Event Registration Type field. |  |
| Set your Registration Start and End Date/Time under Registration Configuration. |  |
| Set Maximum Headcount for Single Registration to 1. |  |
| Select Enhanced Registrations in the Registration Options field. Do not check any of the boxes that appear. | 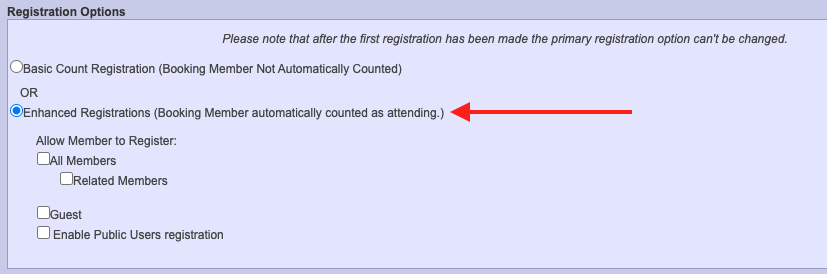 |
| Flag the Breakout Headcount check box. |  |
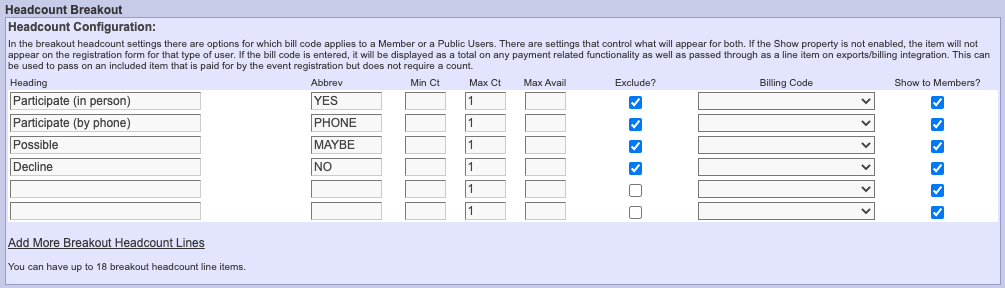
Use Headcount Configuration to create your RSVP options. For each option, set Max Ct of 1 and flag the Exclude check box. We recommend creating 4 options as shown in the screenshot:
|
 |
| If you wish to restrict the event to a particular member organization, click on the Restrictions tab. | 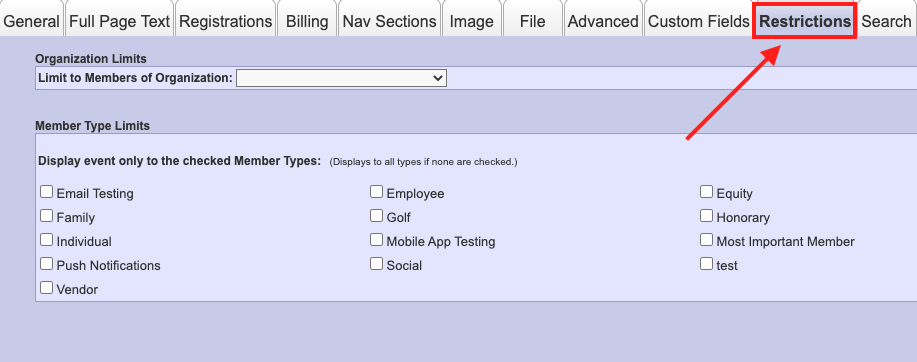 |
| Then, select the member organization from the Limit to Members of Organization drop down menu. Only members of this organization will be able to see and access the event. |  |
| If you wish to add content your event, such as dial-in information, meeting minutes, and agenda, click on the Full Page Text tab and enter your content into the Editor. | 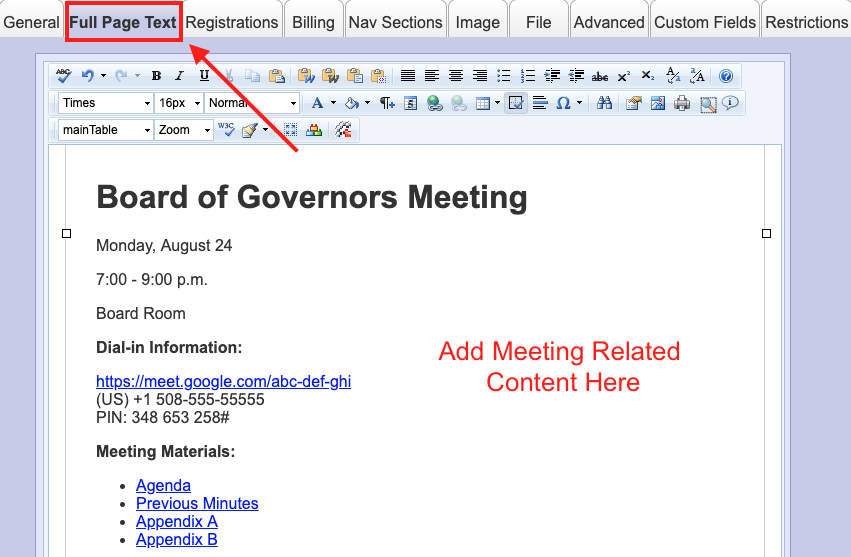 |
| Click Save & Close to complete your changes. |  |