�How to Manage the Secondary (Left) Navigation
Thank you for creating a website with MembersFirst. In order to help your club's team stay up-to-date on how to manage your sub-navigation, we've included this guide to show you how easily you can now add/edit/remove pages from your navigation.
Re-Ordering the Pages
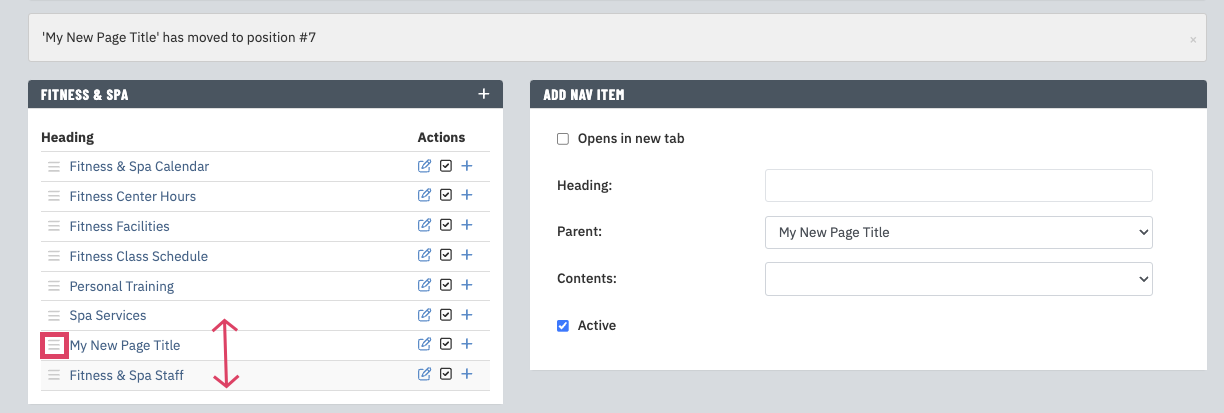
If you want to change the order of the pages in the sub-navigation, click the 3 vertical line icon to the left of the page title you want to move. While keeping the mouse button depressed, drag the page to it's new location and release the mouse button when the page is in it's new desired location.
The new order will then be displayed in the Edit Navigation module.
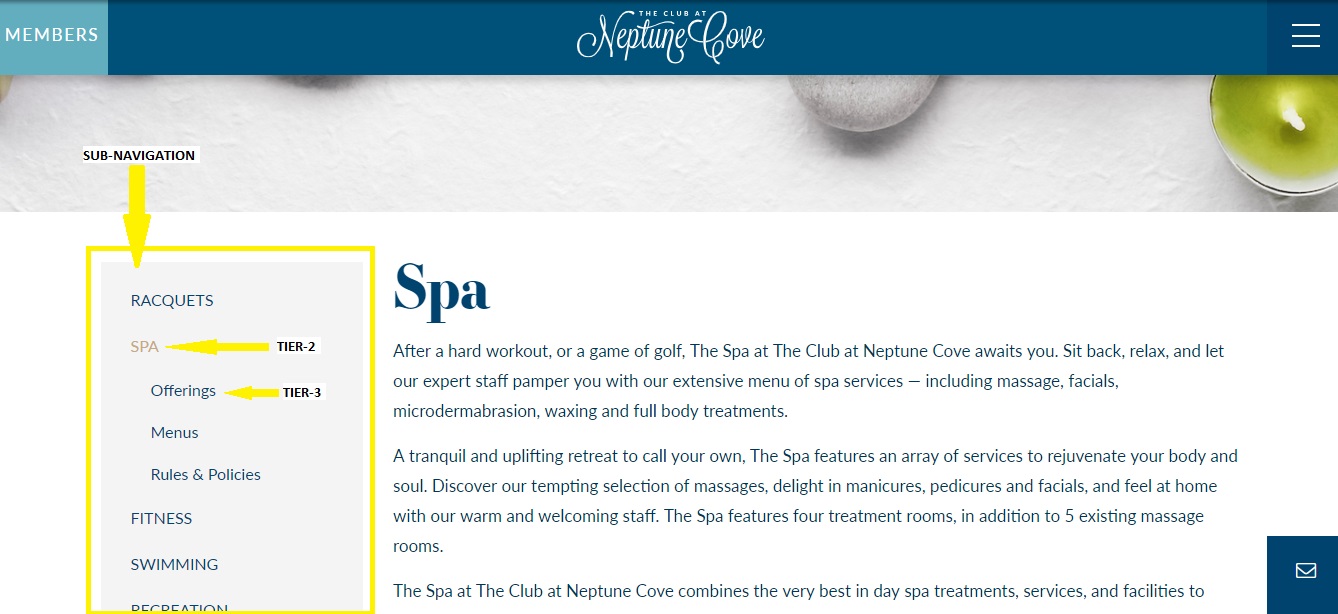
What is Sub-Navigation? Traditionally, sub-navigation items are found in the left column of the website. They contain Tier-2 and Tier-3 navigation items. |
 |
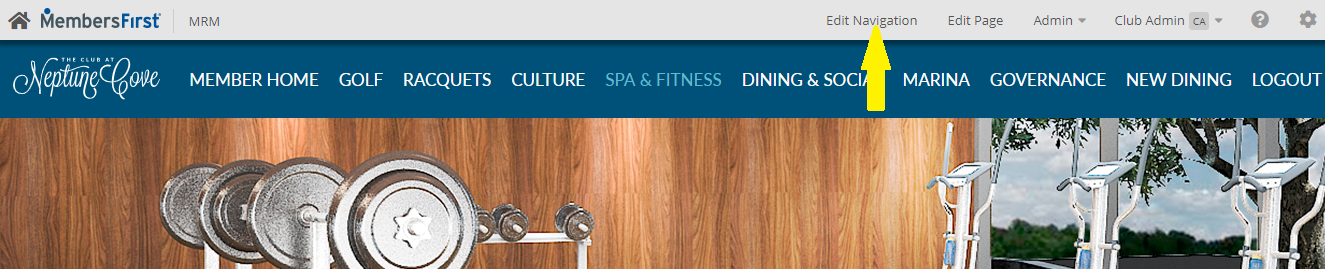
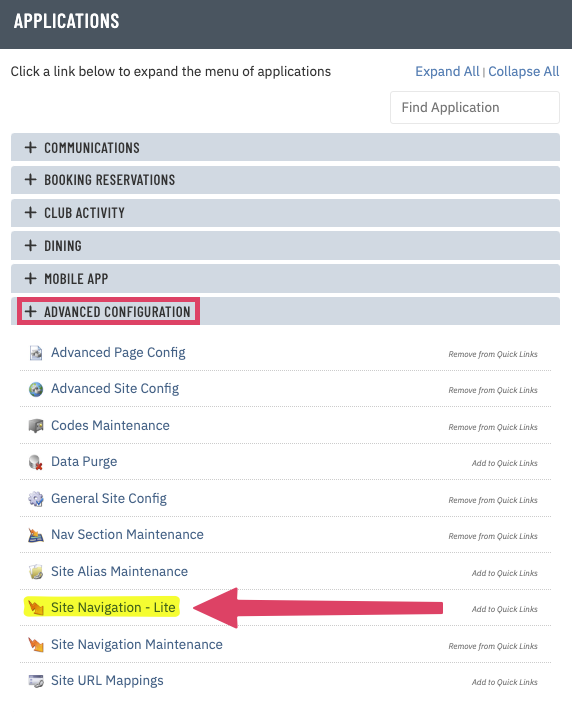
Opening the Edit Navigation ModuleFrom the Website Front-End Admin Toolbar: |
 |
From the Website Back-End Admin Home Screen: |
|
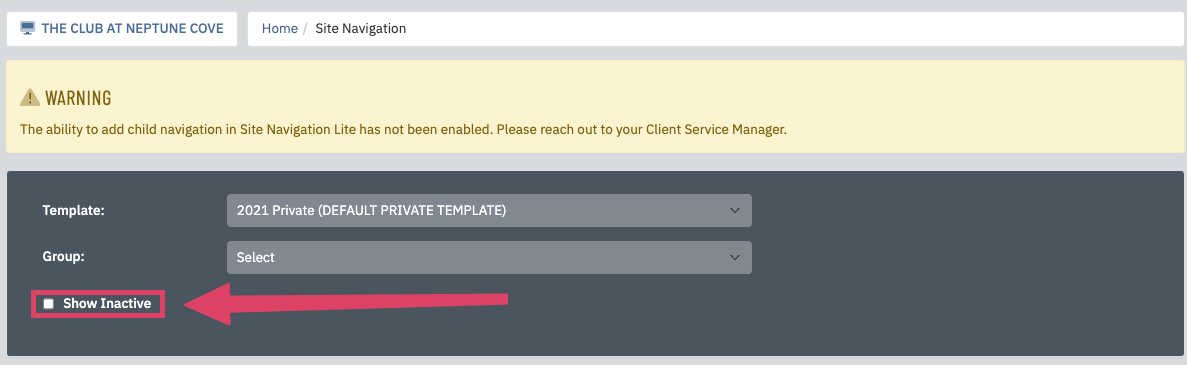
Here's what you'll see when you choose that module: Please note: by default, the Show Inactive? will be unchecked. Check this if you want to include all inactive navigation items. They will be marked with an (I). |
 |
From the Website Front-End Admin Toolbar
|
 |
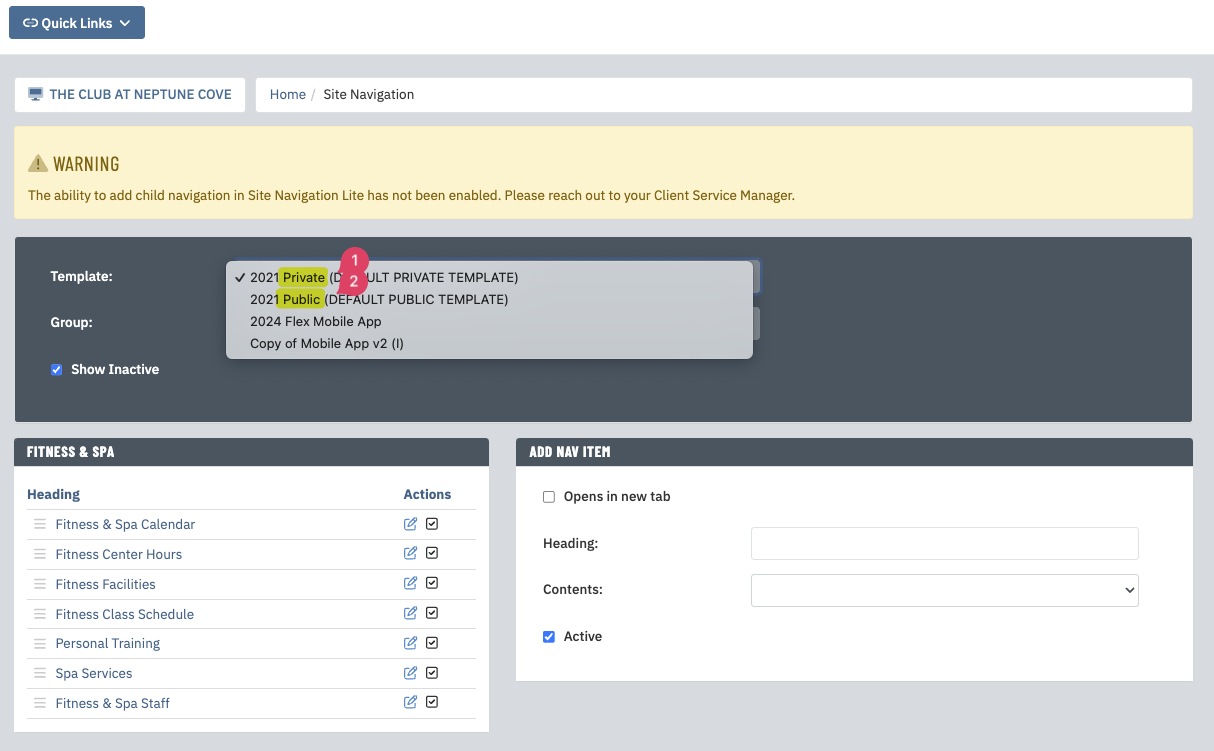
From the Website Back-End Edit Navigation ModuleChoose the appropriate private (1) or public (2) template, depending on whether you want to edit the navigation on the private facing or public facing side of the site respectively. You may have multiple templates to choose from. Make sure to select the one that is active on your site by selecting the one that has (DEFAULT PRIVATE TEMPLATE) or (DEFAULT PUBLIC TEMPLATE) in the name. |
 |
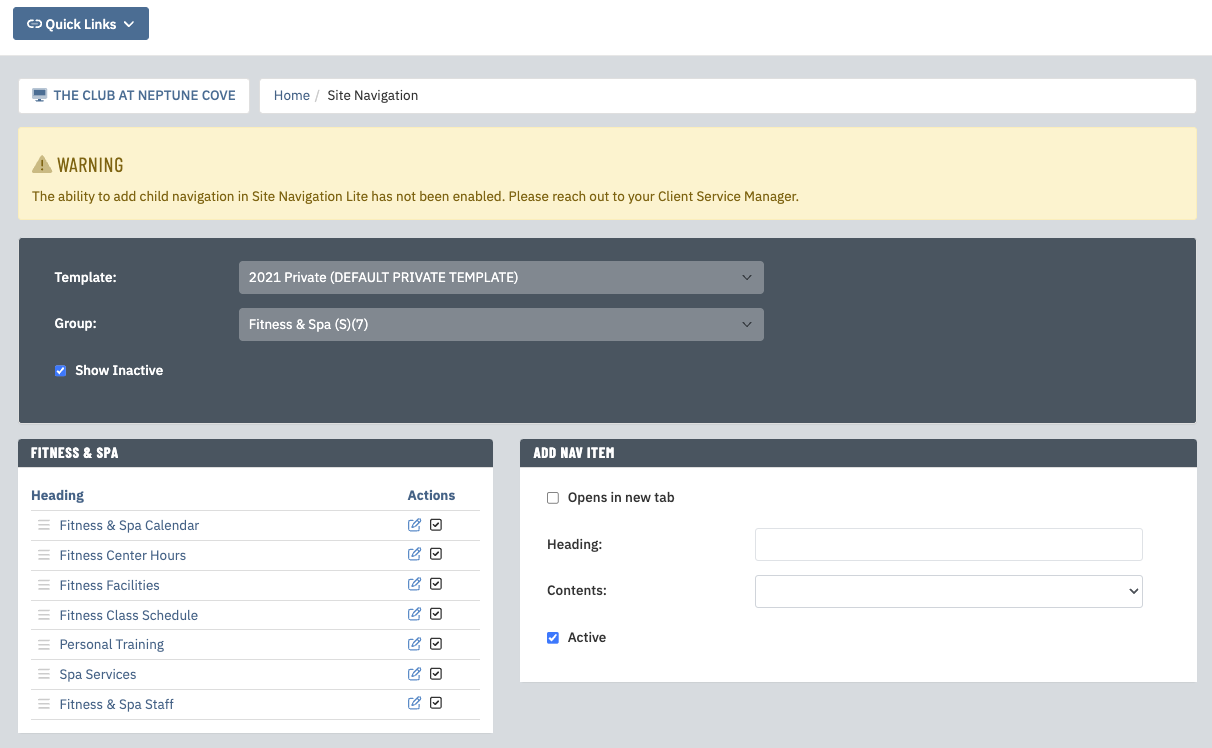
| Choose the appropriate section of the site from the Group dropdown. This will take you to the screen where you can add/edit the navigation. | 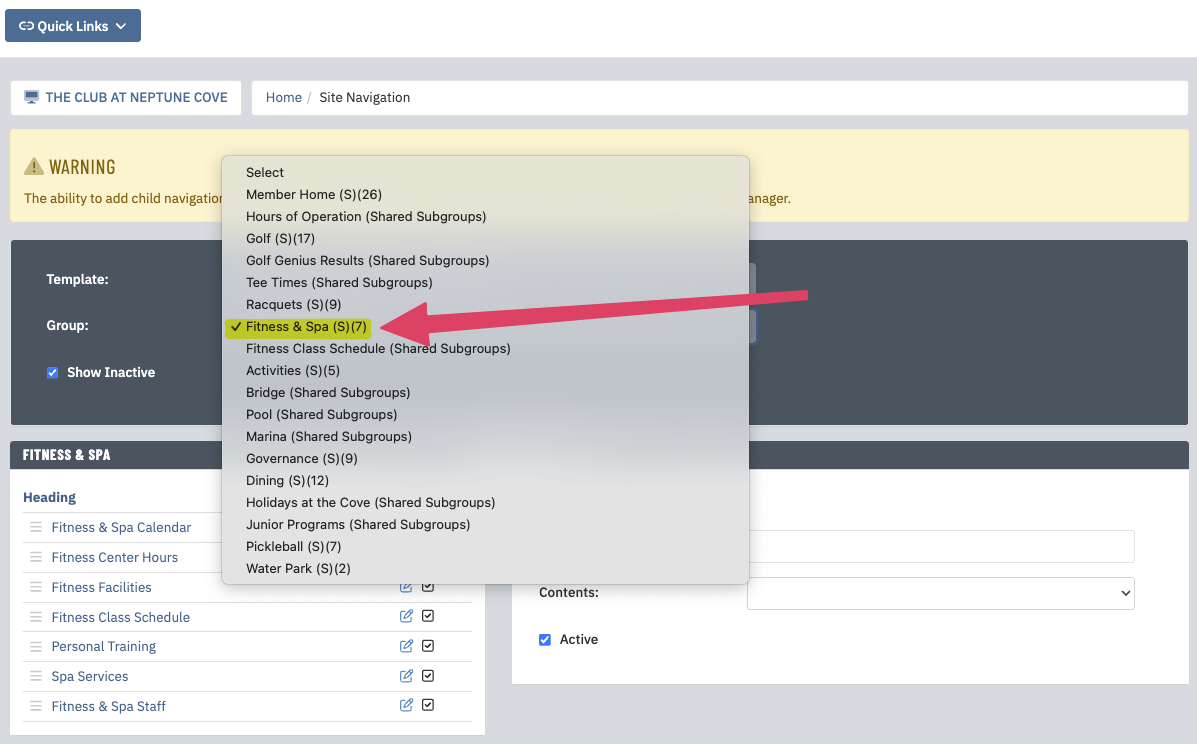 |
Adding a Page (Tier-2)
|
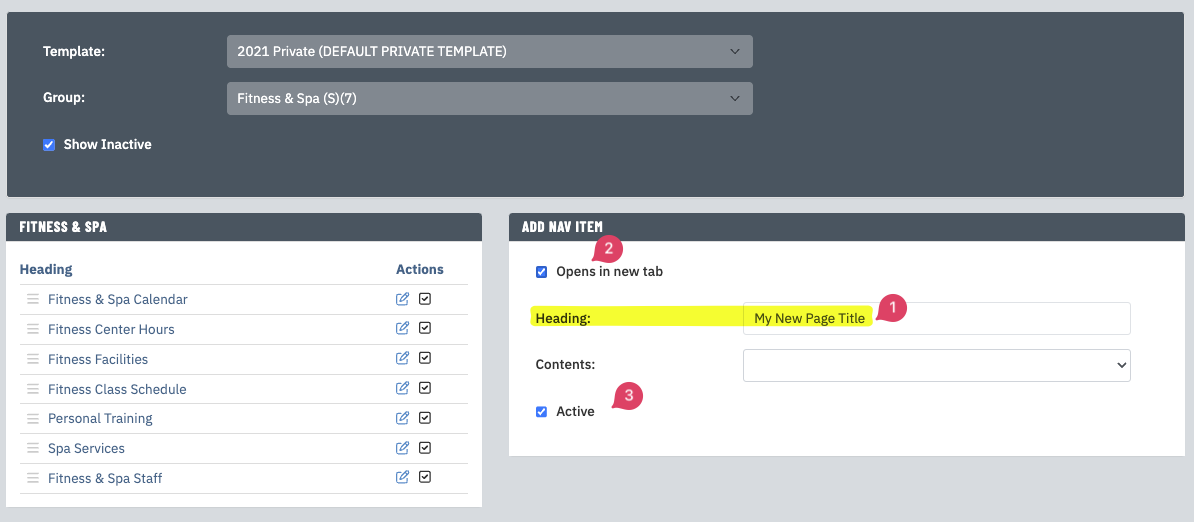 |
Choose the type of page from the Contents dropdown. Here are the available types:
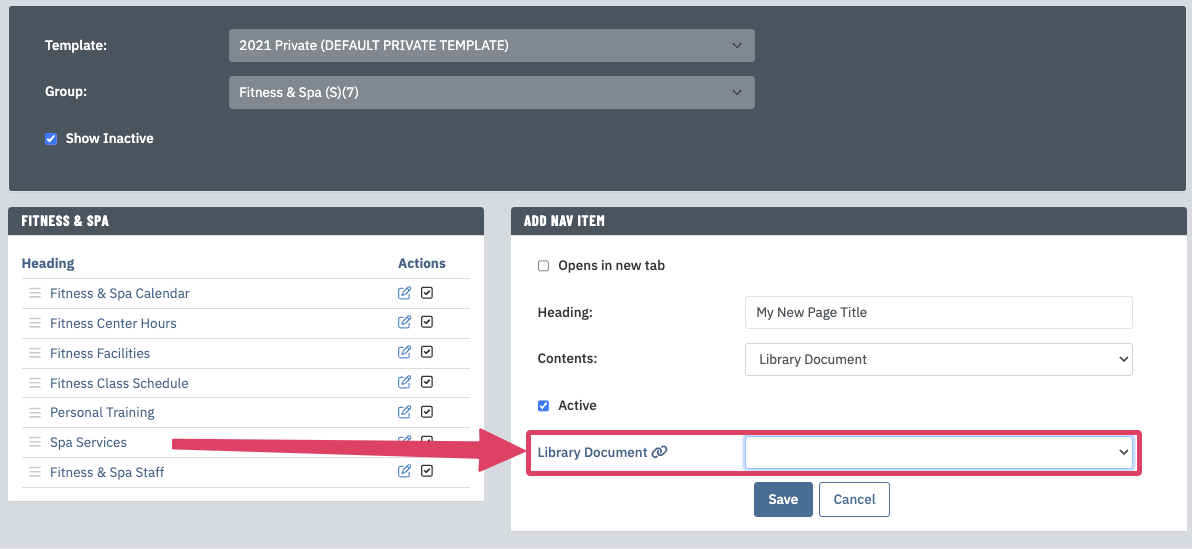
In our example, we are using the Library Document content type. Please note: the page must be created before you can add it to the navigation. If you need to create the new page, please refer to this article for step-by-step instructions. Once Library Document is selected an addtional dropdown menu will appear with a list of the Documents for your site. Select one from the list. They will be grouped by Document Type. |
 |
| Once the item is selected and appears in that field, make sure it's Active and click Save. | 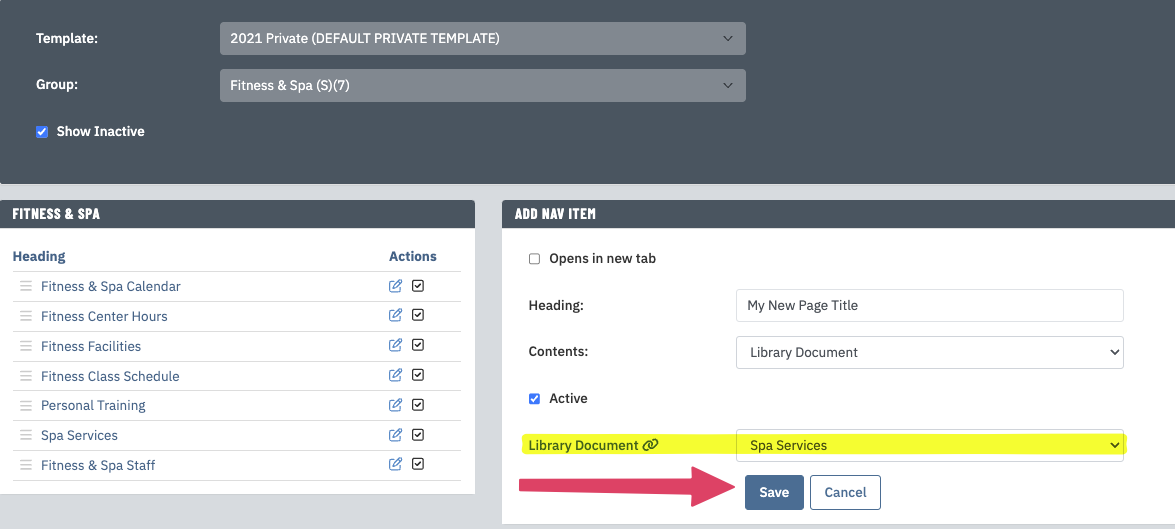 |
| The item will how show in the list of navigation items for that page. | 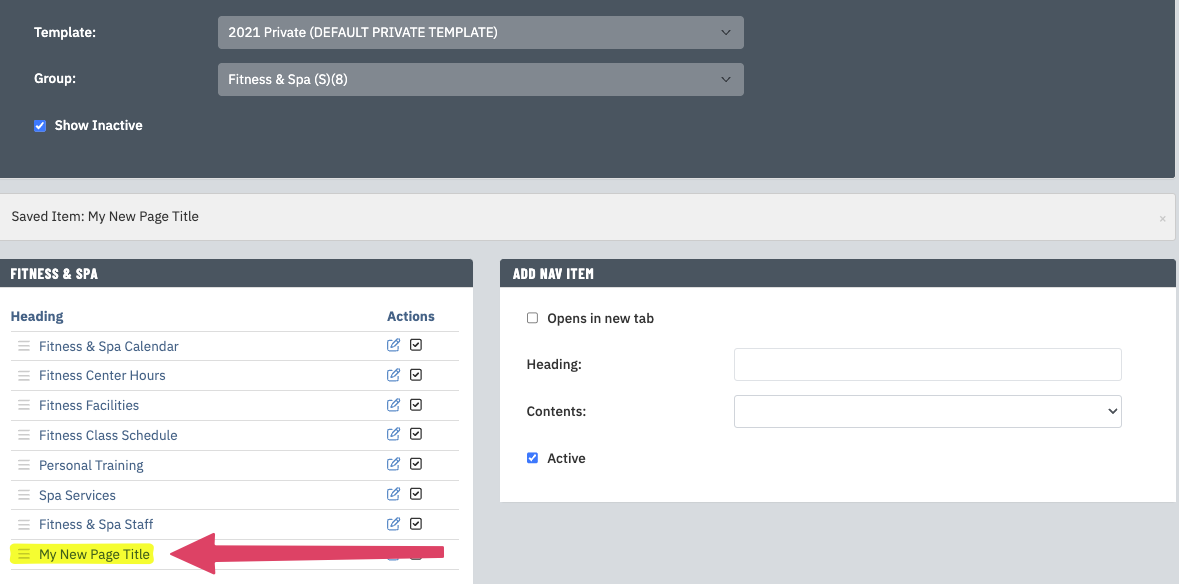 |
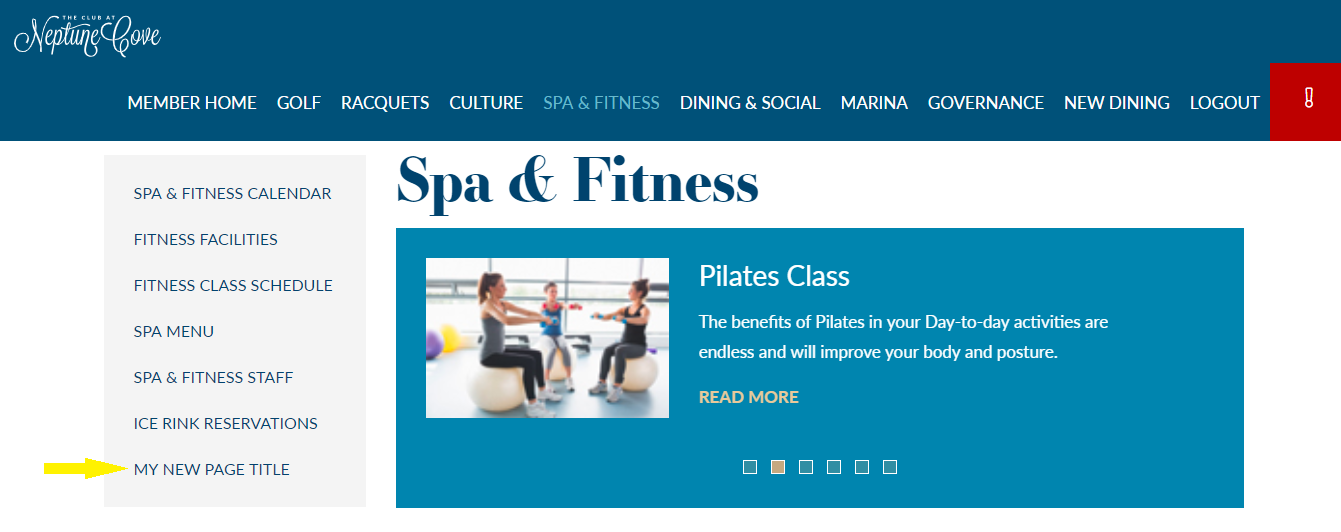
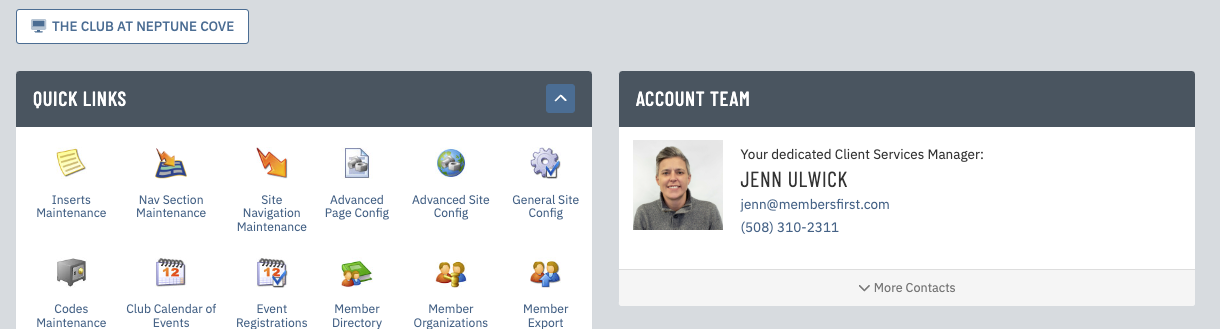
| It will also appear on the members' side of the site. If you have any specific questions regarding the different types of content you can link, please contact your Client Services Manager. They'd be happy to assist! |
|
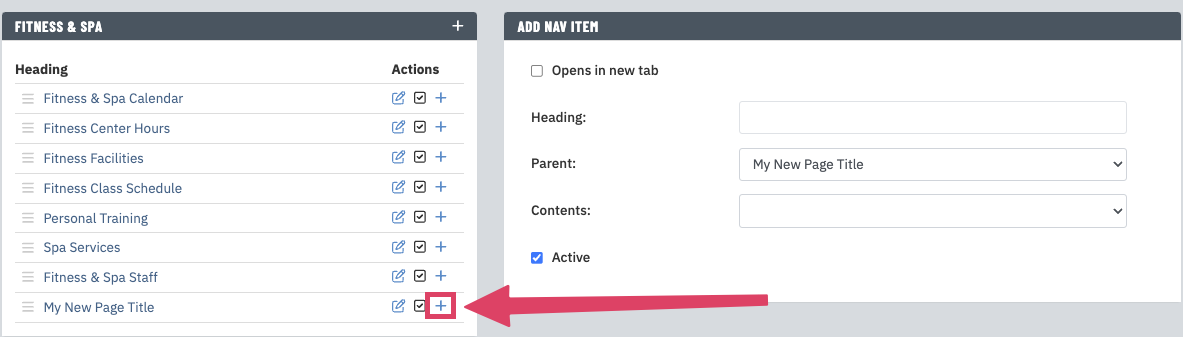
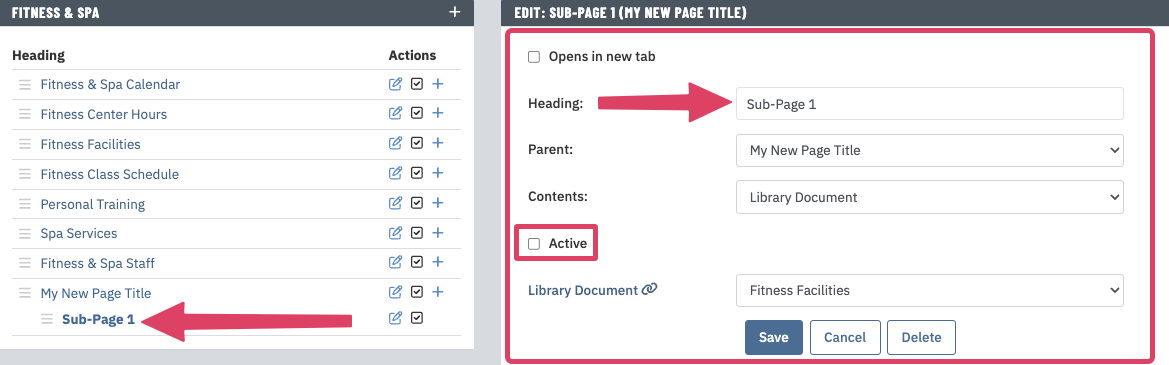
Adding a Child Page (Tier 3)If you want to add a third level navigation under an existing sub-navigation page, click the + icon next to the page title:
|
 |
Adding a Child Page (Tier 3)If you want to add a third level navigation under an existing sub-navigation page, click the + icon next to the page title: |
 |
Adding a Child Page (Tier 3)If you want to add a third level navigation under an existing sub-navigation page, click the + icon next to the page title: |
|
See steps under Adding a Page (Tier-2) for details on completing the rest of the fields to add this page. Once you click save on the type of page you are adding, it will be listed as a child on the edit navigation screen. Please note: You can edit or activate/inactivate tier-3 navigation items. You are not able to add children to tier-3 navigation items, this is why there is no + sign next to this page. |
 |
Re-Ordering the PagesIf you want to change the order of the pages in the sub-navigation, click the 3 vertical line icon to the left of the page title you want to move. While keeping the mouse button depressed, drag the page to it's new location and release the mouse button when the page is in it's new desired location. The new order will then be displayed in the Edit Navigation module. |
 |
Editing an Existing PageIf you want to change an existing page/link in the sub-navigation, click on the Edit icon next to the page title. It will open the Edit box on the right. From here, you can make any changes needed. See steps under Adding a Page (Tier-2) for further details of these fields. |
 |
Deactivating a PageIf you want to remove a page from the sub-navigation on the front-end of the website, deactivate it by checking the Active box next to the page title, You will be asked if you're sure you want to deactivate this page. Click yes. |
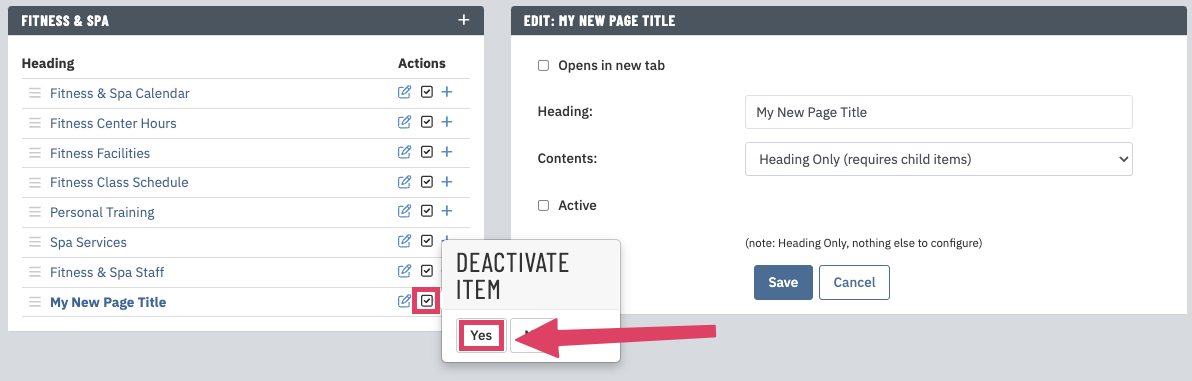 |
| The edit navigation page will refresh and indicate the page is now inactive by having the active box un-checked as well as the (I) next to the page title. |  |
| The page no longer shows on the front-end of the website. | 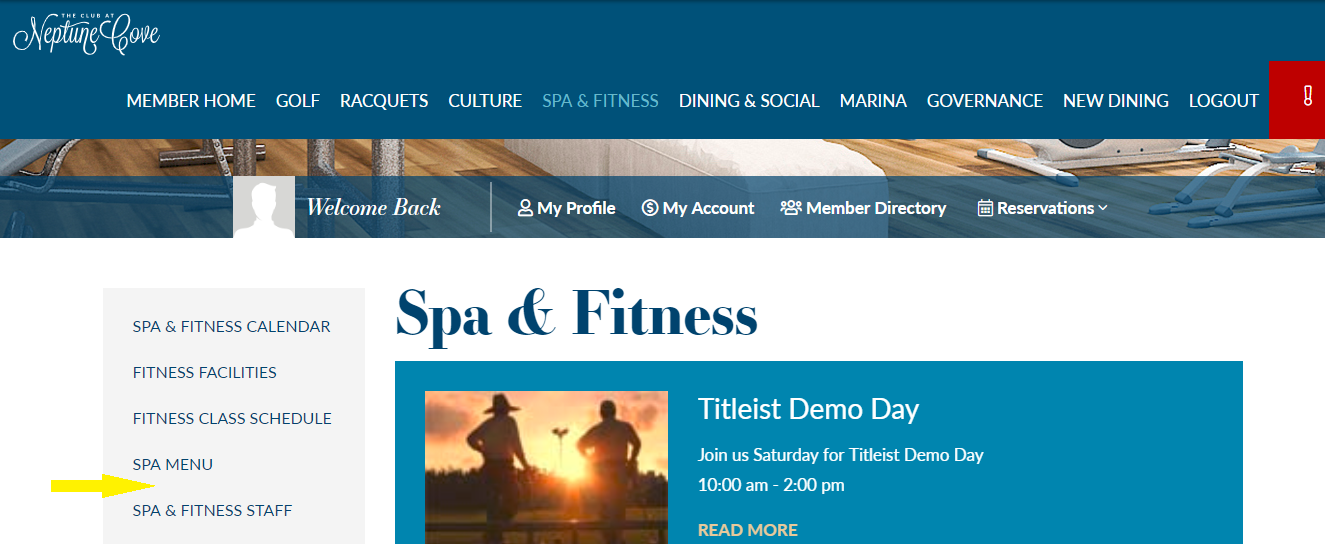 |
Frequently Asked Questions
I cannot find the type of page I want to add in the contents list. How come?
Not all content modules are currently available in the site navigation system at this time. Please contact your Client Services Manager, they are happy to help you add these links to your navigation.
How come some items are missing the action icons?
You can drag and drop the items in the list to change the order, but no action buttons exist. Because not all modules are available in the site navigation system at this time, some navigation items are restricted. This means the page is not eligible to be edited by club administrators and can only be edited by your Client Services Manager. Please contact your Client Services Manager, they are happy to help you with these links.
I checked the "Opens in a new tab?" box but my link is not opening in a new window. How come?
We custom build each client's website. This option may have been created since the time your site was initially built. Please contact your Client Services Manager, they are happy to help with a solution.
Child Items are showing immediately on the page instead of having to click the parent to expand and see the child items. Why is this different from how other pages on my site function?
We custom build each client's website and your site's navigation may have a unique structure. Please contact your Client Services Manager, they are happy to help you with the initial configuration of the navigation so you can then edit the navigation moving forward.
Can I create a new section page?
No. Whether this new page lives in the primary (top) navigation or as a link in the sub-navigation, there is more to the creation of these pages than simply adding navigation items. Please contact your Client Services Manager, they are happy to help you with these pages.
I don't have the icon to add child items. Why is that?
The ability to add child navigation items has not been enabled on your website. Please contact your Client Services Manager, they are happy to help enable this feature.
The sub navigation on my website's dropdown menu isn't changing, even though my sub navigation on the page does. Why is that?
Drop-down navigation is generally done in a separate file that lives outside of the Site Navigation Lite module in MRM. Please contact your Client Services Manager, they are happy to help you make these changes.